|
Note
|
This document is under active development!
If you find errors or missing information in this document, please don’t hesitate to submit an issue or open a pull request with a fix. We encourage you to submit questions and discuss any aspects of the project on github. We are happy to welcome new contributors! |
Introduction to Cerberus
Cerberus is a user-friendly automated testing framework. The development of this web application has started in 2010 and became open source in 2013.
Cerberus provides :
-
a user friendly and intuitive interface
-
a complete set of solutions to organize your test library
-
the possibility to run your tests, grouped in campaigns, easily and at a specific frequence
-
a reporting tool to visualize quickly and efficiently the result of a campaign
-
much more…
1. What is Cerberus?
Getting started
In this section, you will find information on how is organized the Cerberus application.
We assume that you already configured your application, as described in the Application configuration section.
2. Welcome to Cerberus application
2.1. Login
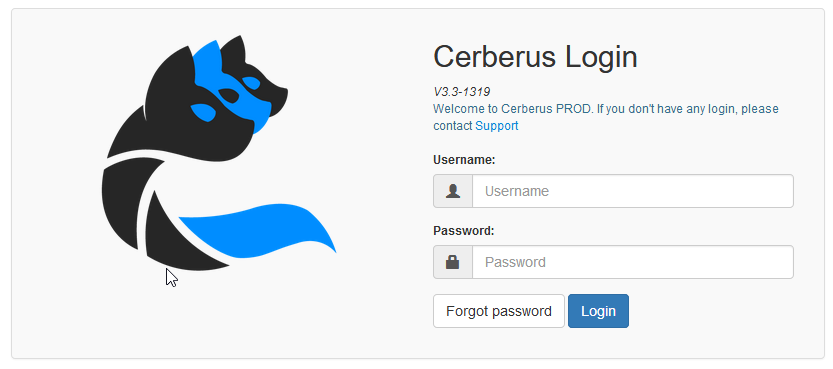
Opening Cerberus, you will be invited to login with the information you should have received from your Cerberus administrator.
|
Note
|
If you did not receive any credential, please contact your Cerberus administrator. |
|
Note
|
If you forgot your password, you can retrieve it following the forgot password wizard. |
Once you’re logged in, you will access to the homepage.
2.2. Homepage
- The homepage is showing information on
-
-
testcases set by application grouped by status (See the [workflow] section for more information);
-
testcase executions by tag (the last ones by default, or customizable as described in the Customization section);
-
the application versions deployed on environment;
-

2.2.1. Customization
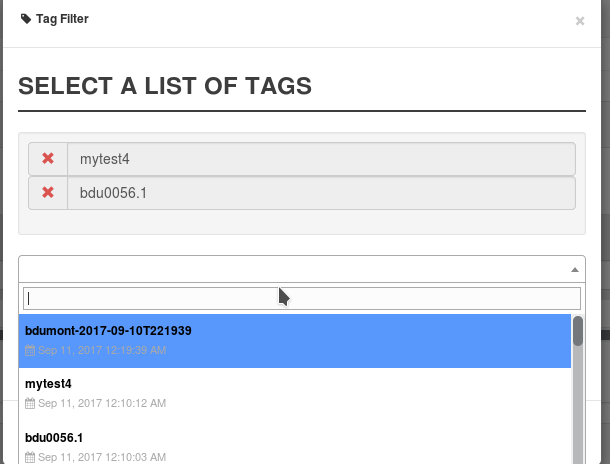
You can customize the list of tag in a static way by selecting the tags from the combo.
But you can also define a search text that will be used to dynamicaly retreive the list of tag.
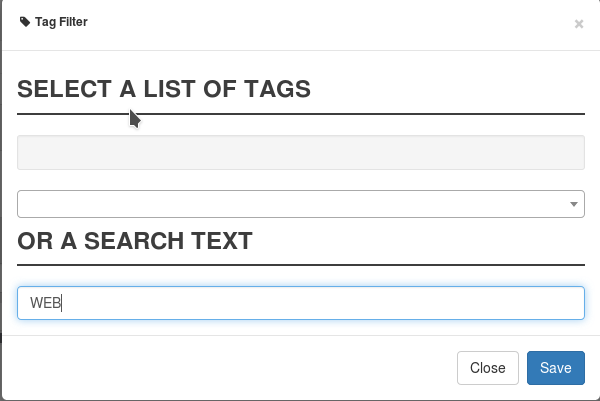
NB : If the list of tag is defined, the search Text will be ignored.
2.3. First steps
2.3.1. Glossary
You will find below definitions of Cerberus common terms.
-
System : Business Application or CI (Configuration Item). It correspond to a group of application that needs to be tested. User access are defined at that level.
-
Application : Technical component. every Application is linked to a 'System'.
-
Test Folder : Group of TestCases, This is flexible way to group and classify the test cases.
-
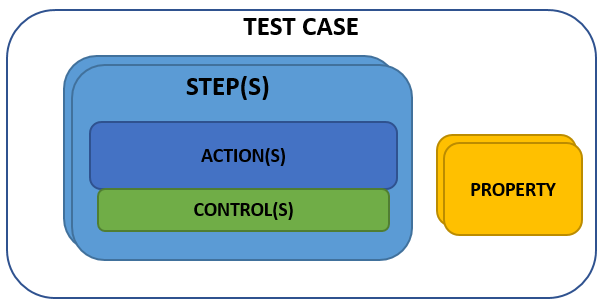
TestCase : Test scenario made of steps, actions and controls. (User story implementation in Cerberus)
-
Label : Mark to describe TestCases, so you can group and filter easily.
-
Campaign : Group of testcases (selected using labels) all linked to execution parameters (country - environment - browser - robot (optional)).
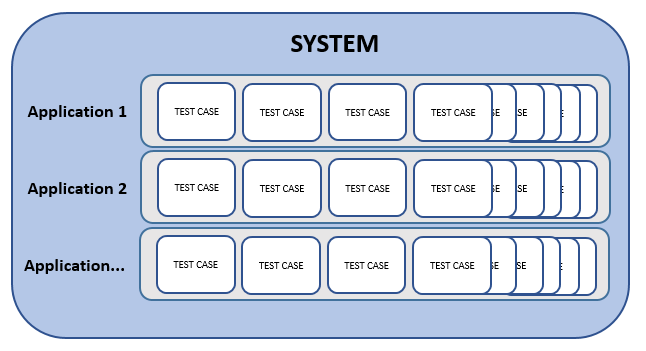
2.3.2. Representation
You will find in this section a graphical representation of the main Cerberus elements.
Below the system :
Below the test case :
2.3.3. Tutorials
First steps as an administrator
|
Note
|
For non-admin users, please go to the next section : "First steps" |
You will find below setting steps for an application to test.
-
Create a system. More information here Invariants
|
Note
|
Check you are on the system you have just created (dropdown menu at top right) 
|
-
Create an environment. Example : PROD FR (see Environment)
-
Create an application. Example : Google (see Application)
-
Edit once again your application, you can now set new parameters. In tab environment, create PROD FR environment and fill http://www.google.fr in host section.
Technical settings are now finished. Please refer to the following section to implement a TestCase.
First steps
|
Note
|
Please verify with your administrator if system and application are already created. |
You will find below step to create and execute a TestCase.
-
Optionally you can created one or several Test Folder in order to host your test cases. Example : « Search Engine » (see [Create test])
-
Access to TestCase list and create a TestCase (cf [Create TestCase]). Mandatory fields : Test / Application / TestCase ID (Should already be filled with a reference).
|
Note
|
Activation criteria tab : Activate for PROD your TestCase. (default setting not active for PROD) For the example, We will run our TestCase on PROD environment |
-
Your TestCase is now created, find it in the list using filters.
-
Edit it (cf [Implement TestCase])
-
Create your first step « Open Google »
-
Add your first action : OpenURL value = www.google.com or OpenURLWithBase value = / (if URL is already defined in application settings)
-
You can add a control : VerifyTitle Title = Google
-
Save the script and click on Run button.
-
You are now on execution page. Select country / environment
-
Fill robot information. Mandatory fields : IP / port / browser.
|
Note
|
You must first run your selenium server (see [Selenium]) |
-
Click on the execution button.

Congratulations, you’ve just executed your first Cerberus TestCase !
3. Overview
Test Management
4. Test Folder
4.1. Test
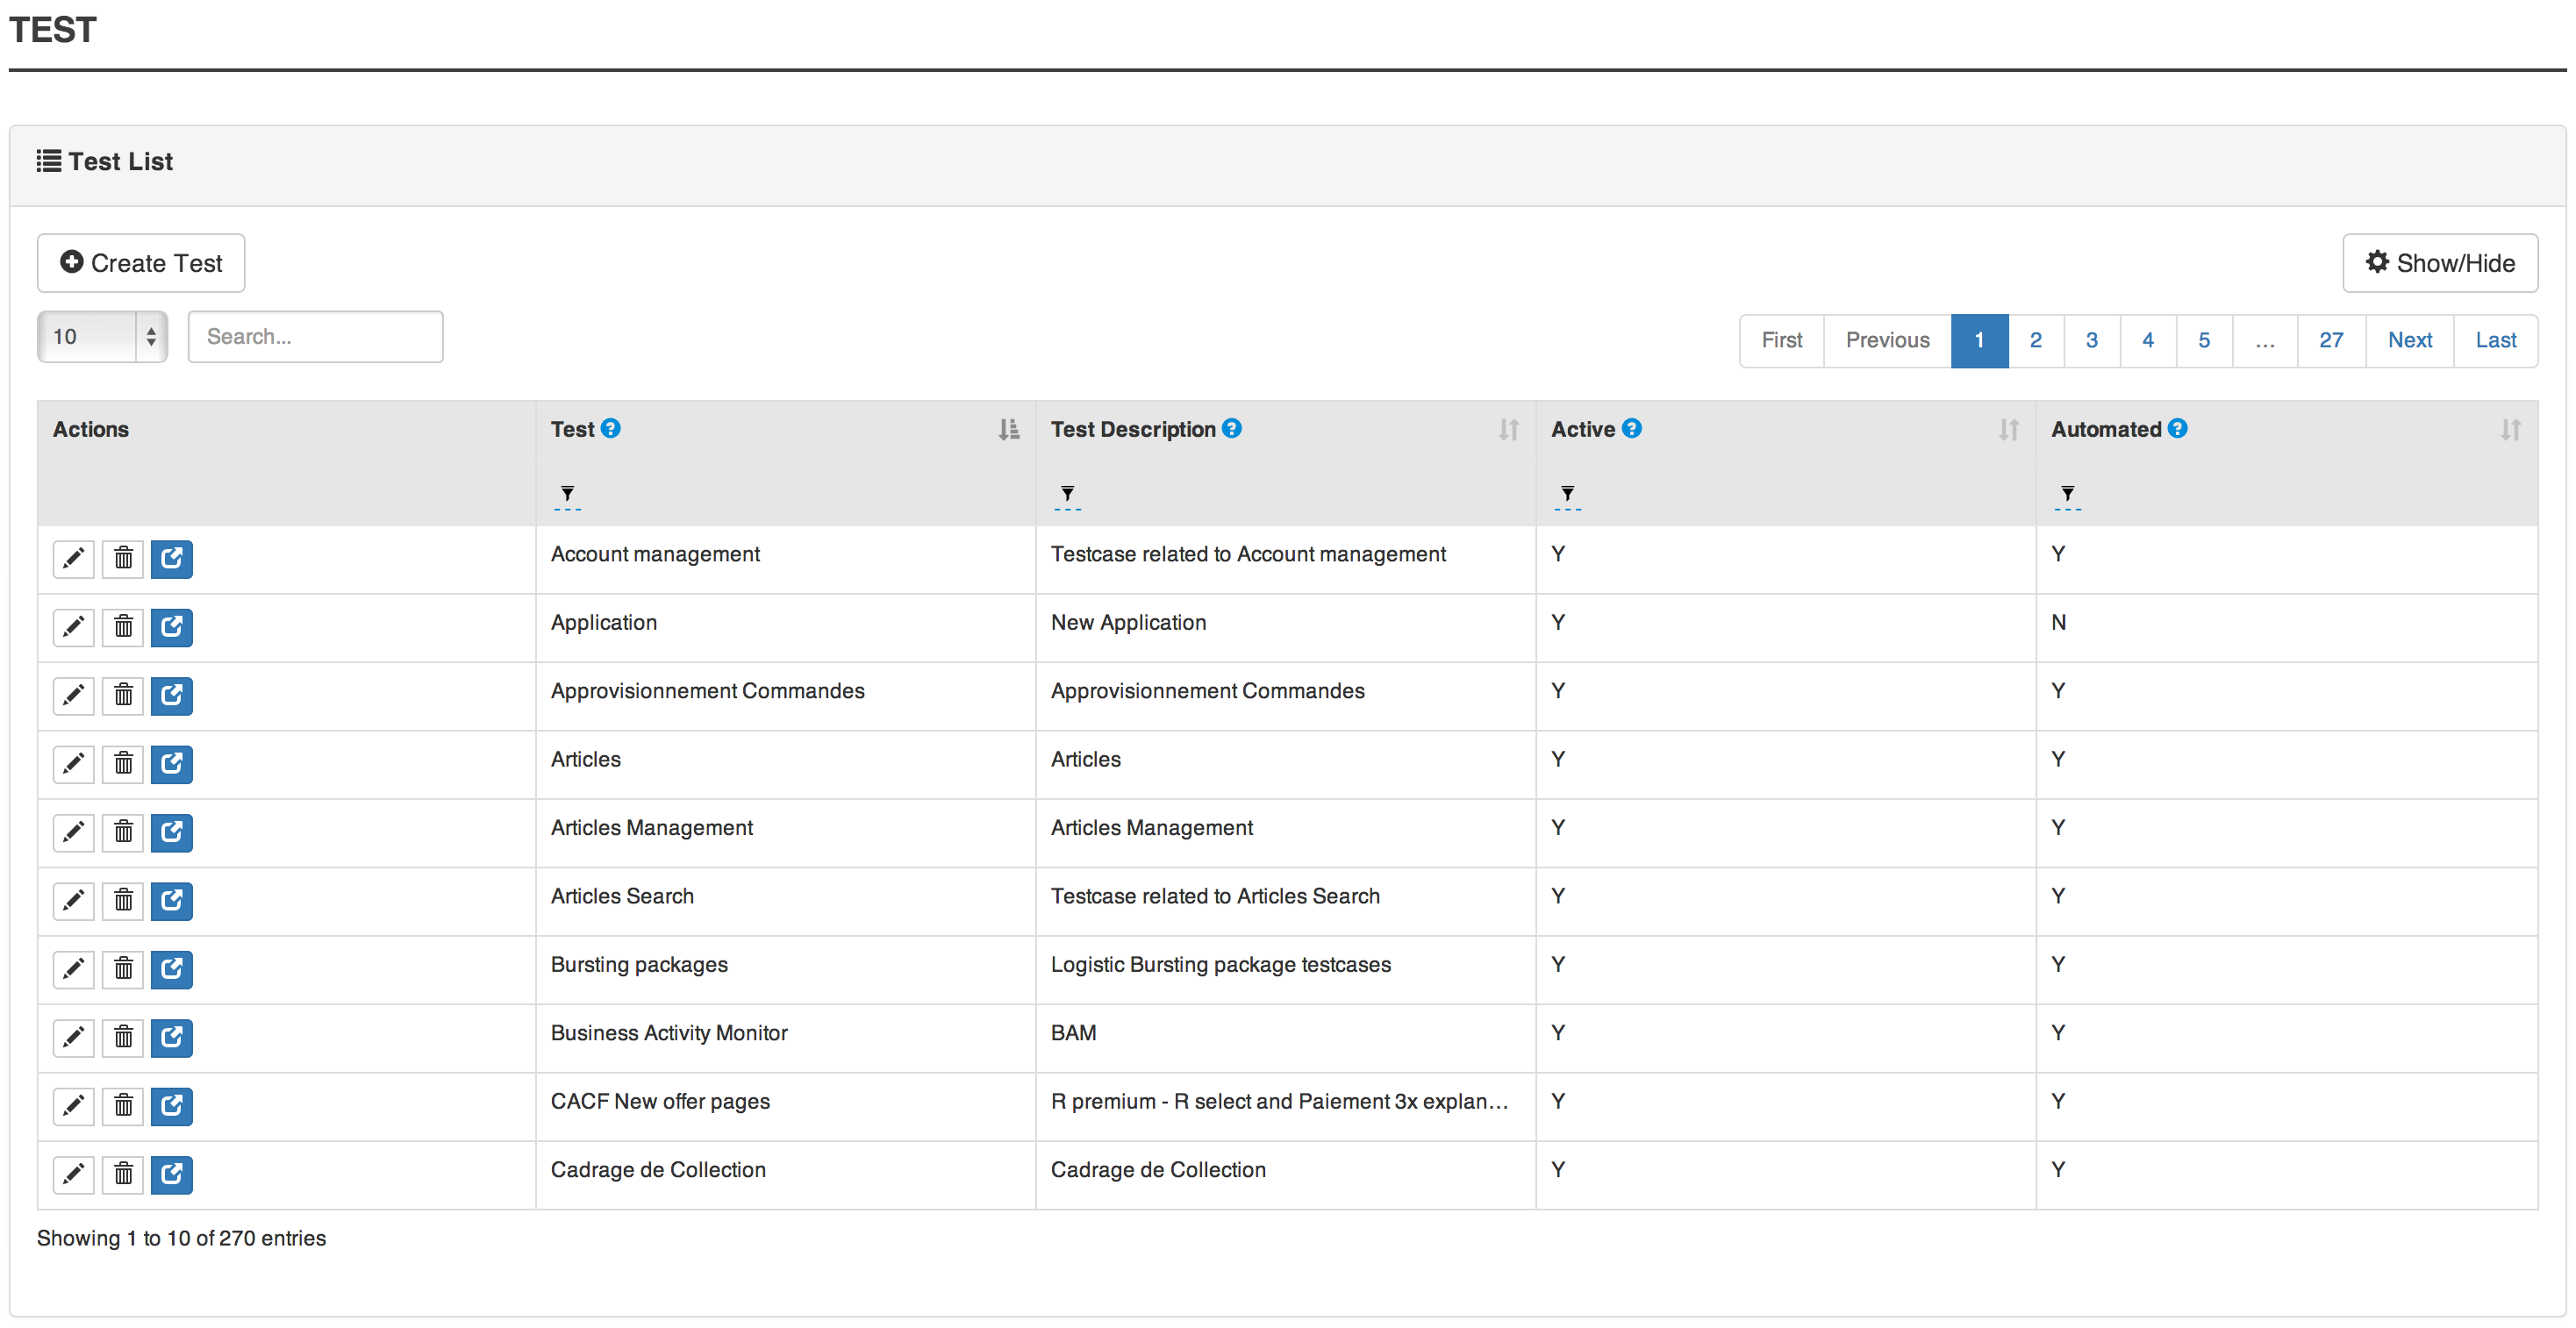
In this section, you will find information on Test Folder in Cerberus. A Test Folder is just a way to group and classify your test case. Every test case must be attached to a unique Test Folder. Inside the same Test Folder, every test case must have a different id. 2 test cases can have the same id if they belong to 2 different Test Folder.
|
Note
|
There are 2 Test Folder that have a specific behavior and allow to automatically add before and after any steps execution. Those 2 tests are Pre Testing and Post Testing. They are identifying all test cases that will respectively be added at the beginning and at the end of the test cases. For a given test case running on an application app1, the following rules will apply : . Only test cases inside Pre Testing and Post Testing will be added if they belong to the same application app1. . Only active test cases will be added. . Only test cases that are within the From Major / From Minor and To Major / To Minor . The test cases will be executed sorted by test case id. |
4.2. Test attributes
Field |
Description |
Test |
Test name. |
Description |
Description of the test. |
Active |
Define if the test is active. When Inactive, all associated test cases will be desactivated and will be allowed to be executed. |
5. Test Case
5.1. Test Case
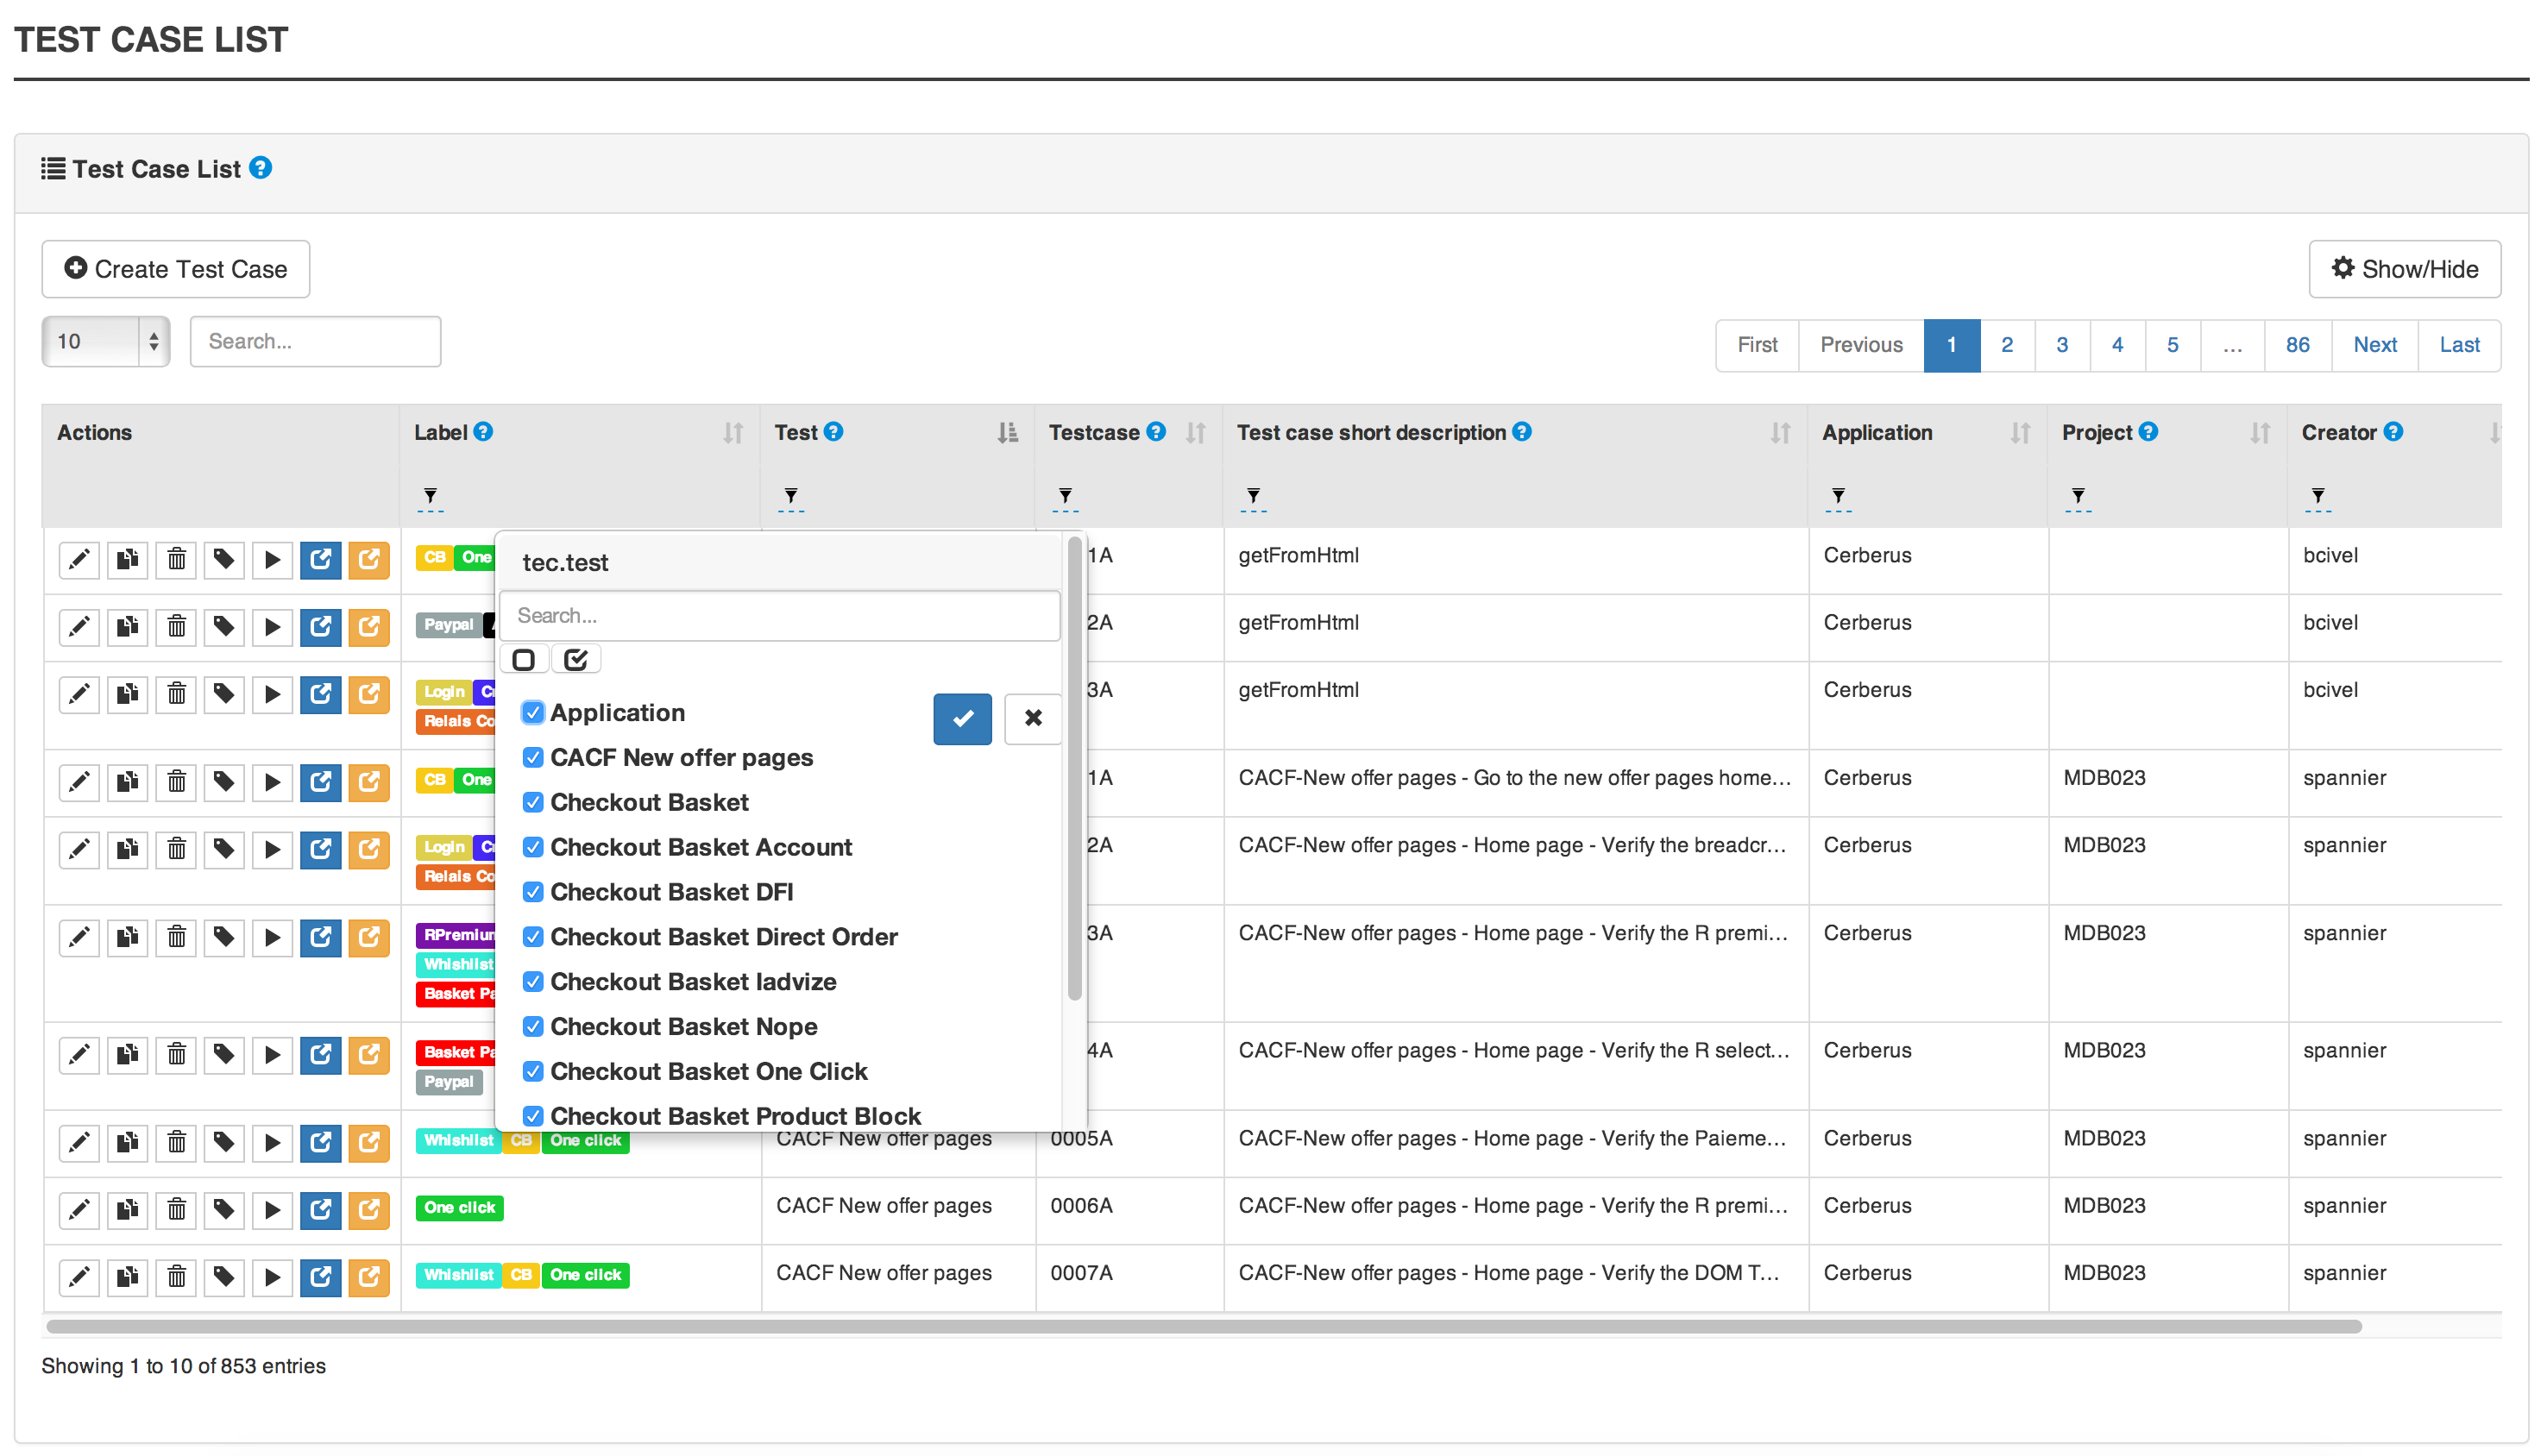
5.1.1. Test Case List
5.1.2. Test Case attributes
Field |
Description |
Test Folder |
Test Folder name on which test case belong. |
Test case |
An ID (alphanumeric character) that identify the Test Case inside the Test Folder. |
Short Description |
Provide a brief description of the Test Case. |
Application |
The application for which the test case is defined. |
Status |
Used to implement a workflow and gives way to filter Test Case depending on its implementation status. |
Active |
Boolean that defines if the Test Case can be launched. |
Type |
define if the testcase is targeted for AUTOMATED or only MANUAL. It can also be PRIVATE in case it is not intented to be executed (holds libraries of steps of instance) |
Priority |
Defined the priority of the Test Case. Means importance of the feature covered by the Test Case. |
Detailed Description |
Provide more detailed information about the Test Case. |
The Activation Criterias defines condition to enable/block the Testcase to be launched in specific context (countries, environment…). This level of specification is the most important (override all the others conditions)
A Test case can be linked to multiple Labels depending on their assigned system (see labels section)
You can define Robot constrains at test case level in order to force the execution a specific test case with a specific UserAgent or ScreenSize. This is used to test some specific behavior of a website for a given UserAgent or ScreenSize. You can tune the list of UserAgent and ScreenSize proposed in autocomplete mode (on the GUI) by modifying the respective public invariant USERAGENT and SCREENSIZE.
UserAgent and ScreenSize will be defined at execution level following the rule :
TestCase |
Robot / Execution |
UserAgent Result |
UserAgent1 |
UserAgent1 |
|
UserAgent2 |
UserAgent2 |
|
user Agent unchanged |
||
UserAgent1 |
UserAgent2 |
UserAgent1 |
TestCase |
Robot / Execution |
ScreenSize Result |
1024*768 |
1024*768 |
|
640*360 |
640*360 |
|
Fullscreen |
||
1024*768 |
640*360 |
1024*768 |
5.2. Test Case Step
5.2.1. Step
-
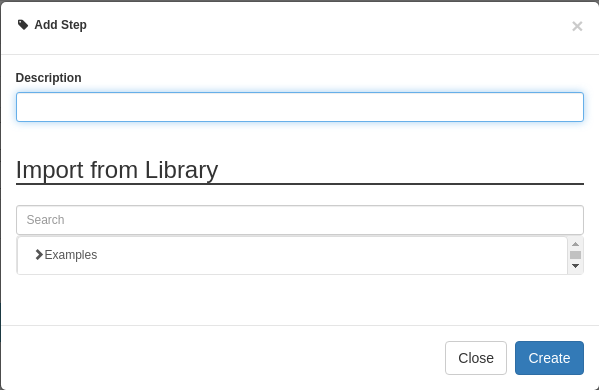
Click on Add step to display the following window.
-
Feed a Description and click on Add for a new step.
-
Or search for a step in library then click on Add.
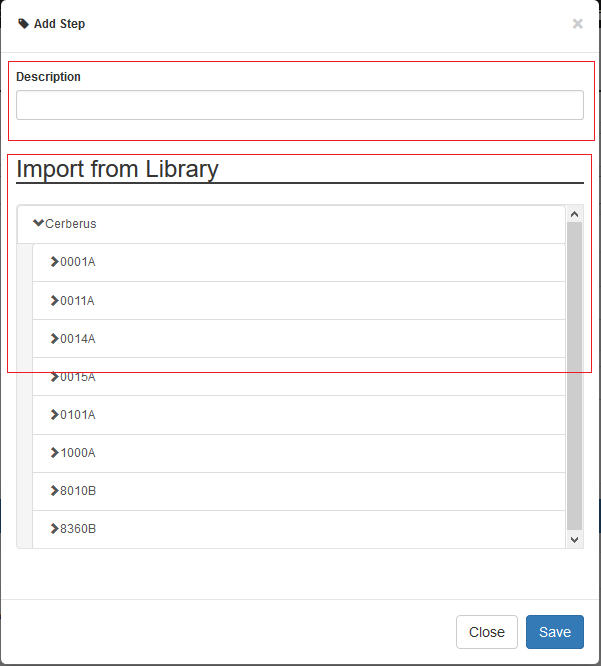
Your step is created. if you want to put it in library, just click on the book on the right side. A step in library will be available to add it in all test cases of your current system.

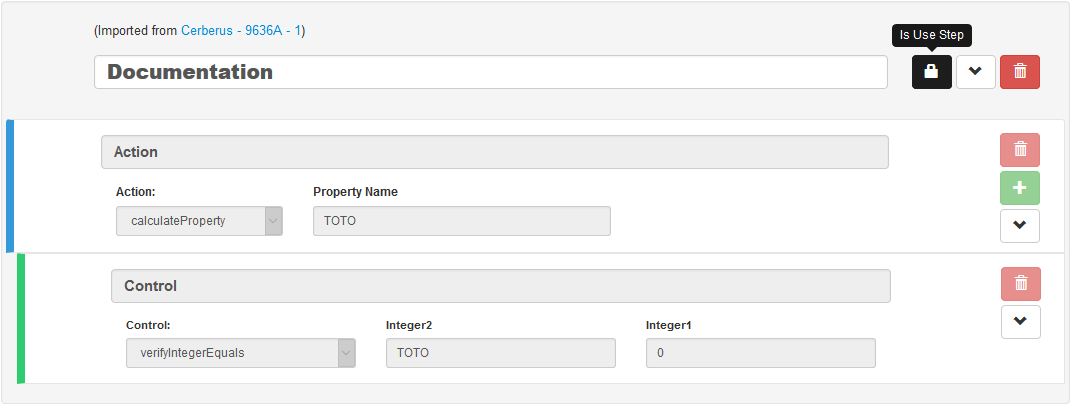
In the following screenshot you can see a use step. This step is imported from the previous library step. You are not able to modify it (all fields are grey). But you can find a link at the top to open the library if you want to modify your step. All use steps from this library will be impacted by your modification.
To modify only this use step, you have to click on the padlock icon but it will not be a use step anymore. (modification on library step will not affect it)
|
Tip
|
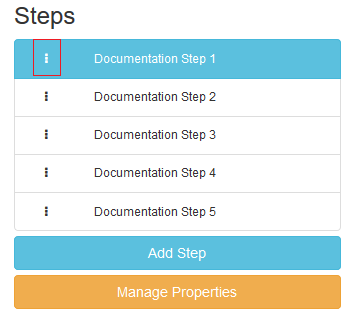
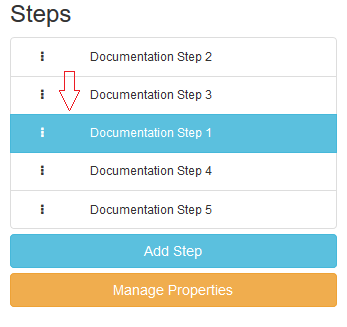
You have the possibility to switch the position of your steps by drag and drop the 3 dots.
|
|
Tip
|
It is possible to loop over a step using the following configuration. %system.CURRENTSTEP_INDEX% will contain the current index position. Condition will become false after the 4th iteration.
|
5.3. Test Case Action
5.3.1. Unknown
Unknown action. Should be used when the action is not yet known. Warning: make the execution fail.
5.3.2. click
GUI |
SRV |
APK |
IPA |
FAT |
BAT |
Click on the left mouse button on an element inside the current page.
Value1 Identifier and name of the element to click in the form of : identifier=html_reference.
5.3.3. longPress
GUI |
SRV |
APK |
IPA |
FAT |
BAT |
Click during a specific duration on the left mouse button on an element inside the current page.
Value1 Identifier and name of the element to click in the form of : identifier=html_reference.
Value2 Duration of the click in milliseconds.
5.3.4. mouseLeftButtonPress
GUI |
SRV |
APK |
IPA |
FAT |
BAT |
Press and keep the left mouse button pressed on an element until the action 'mouseLeftButtonRelease' is executed. If element not defined, Sikuli engine will be used and mouse button will be pressed on the current pocsition of the mouse pointer.
Value1 Identifier and name of the element to click in the form of : identifier=html_reference.
5.3.5. mouseLeftButtonRelease
GUI |
SRV |
APK |
IPA |
FAT |
BAT |
Release the mouse button on an element. Usefull with ButtonPress to perform drag & drop but also to draw picture using Sikuli engine.
Value1 Identifier and name of the element where release will be done in the form of : identifier=html_reference.
5.3.6. doubleClick
GUI |
SRV |
APK |
IPA |
FAT |
BAT |
Double click on an element inside the current page.
Value1 Identifier and name of the element to click in the form of : identifier=html_reference.
5.3.7. rightClick
GUI |
SRV |
APK |
IPA |
FAT |
BAT |
Right click on an element inside the current page.
Value1 Identifier and name of the element to double click in the form of : identifier=html_reference.
5.3.8. mouseOver
GUI |
SRV |
APK |
IPA |
FAT |
BAT |
Mouse cursor over an element inside the current page.
Value1 Identifier and name of the element to over in the form of : identifier=html_reference.
5.3.9. mouseMove
GUI (hybrid) |
SRV |
APK |
IPA |
FAT |
BAT |
Allow to move the mouse.
Value1 List of x and y relative position to move the mouse pointer. Several move positions can be specified separated by semi comma. Top Left position of the screen correspond to 0,0 coords. You can specify absolute coords by using keywork absolute before the coords. center keyword can be used to move pointer to center of the screen.
50,0 ; 0,50 ; -50,0 ; 0,-50
0,50
absolute 0,0 ; center
5.3.10. focustoIframe
GUI |
SRV |
APK |
IPA |
FAT |
BAT |
Set the focus to a specific frame on the current page.
Value1 Identifier and name of the frame to focus in the form of : identifier=html_reference.
5.3.11. focustoDefaultIframe
GUI |
SRV |
APK |
IPA |
FAT |
BAT |
Set back the focus to the previous frame on the current page.
5.3.12. switchToWindow
GUI |
SRV |
APK |
IPA |
FAT |
BAT |
Switch the focus to another window (like popup dialog).
Value1 Title or URL of the other window to switch to. identifier=html_reference identifier can be title, url, regexUrl or regexTitle
title=titleOfThisNewWindow
regexTitle=.*ThisNewWindow.*
url=http://url_of_this_new_window
regexUrl=.*_this_new.*
5.3.13. switchToContext
GUI |
SRV |
APK |
IPA |
FAT |
BAT |
Switch the current application context to another.
Value1 Name of the context you want to switch to. If the value is empty, this will switch to the default context "NATIVE_APP". For example, you can set this action with defined value to switch on the context you want, then do your actions in this context, and finally set again this action with no value to get back to the default context.
5.3.14. manageDialog
GUI |
SRV |
APK |
IPA |
FAT |
BAT |
Close the browser popup alert windows either by accepting it with ok either by cancelling it with cancel
Value1 ok or cancel
5.3.15. manageDialogKeypress
GUI |
SRV |
APK |
IPA |
FAT |
BAT |
Keypress inside the browser popup alert windows.
Value1 List of characters to type. You can use several special keys into the same action
texttoenter[ENTER]
user[TAB]password[ENTER]
|
Note
|
Supported keys are : [BACK_SPACE], [TAB], [RETURN], [ENTER], [SHIFT], [LEFT_SHIFT], [CONTROL], [LEFT_CONTROL], [ALT], [LEFT_ALT], [ESCAPE], [SPACE], [PAGE_UP], [PAGE_DOWN], [LEFT], [ARROW_LEFT], [UP], [ARROW_UP], [RIGHT], [ARROW_RIGHT], [DOWN], [ARROW_DOWN], [DELETE], [SEMICOLON], [EQUALS], [NUMPAD0], [NUMPAD1], [NUMPAD2], [NUMPAD3], [NUMPAD4], [NUMPAD5], [NUMPAD6], [NUMPAD7], [NUMPAD8], [NUMPAD9], [MULTIPLY], [ADD], [SEPARATOR], [SUBTRACT], [DECIMAL], [DIVIDE], [F1], [F2], [F3], [F4], [F5], [F6], [F7], [F8], [F9], [F10], [F11], [F12] |
5.3.16. OpenUrlWithBase
GUI |
SRV |
APK |
IPA |
FAT |
BAT |
OpenUrl action using the base defined in the application / environment section.
Value1 Relative URL to open.
/cerberustesting/page.html
5.3.17. OpenUrlLogin
GUI |
SRV |
APK |
IPA |
FAT |
BAT |
OpenUrl action using the login page defined at application / environment level.
5.3.18. OpenUrl
GUI |
SRV |
APK |
IPA |
FAT |
BAT |
Open a specified full url.
Value1 Complete URL to open.
5.3.19. refreshCurrentPage
GUI |
SRV |
APK |
IPA |
FAT |
BAT |
Reload the current page.
5.3.20. executeJS
GUI |
SRV |
APK |
IPA |
FAT |
BAT |
Execute a JS script (no output can be retrieved).
Value1 Javascript to execute.
var newOption = new Option('%property.ApplicationName%', '%property.ApplicationName%', true, true);
$('#application').append(newOption).trigger('change');
5.3.21. executeCommand
GUI |
SRV |
APK |
IPA |
FAT |
BAT |
Execute a Command on the robot side. You can follow the Appium instructions here.
Value1 Command to execute. Ex : mobile:deepLink
Value2 Arguments of the command. Ex : {url: "https://www.site.com/", package: "com.site.SomeAndroidPackage"}
5.3.22. executeCerberusCommand
GUI |
SRV |
APK |
IPA |
FAT |
BAT |
Execute a Command from the Cerberus Server side. The command will be executed using the user defined in the parameter cerberus_executeCerberusCommand_user, password defined in cerberus_executeCerberusCommand_password and script from the path cerberus_executeCerberusCommand_path
Value1 Command to execute.
5.3.23. openApp
GUI (hybrid) |
SRV |
APK |
IPA |
FAT |
BAT |
Open an Application. For GUI and FAT, this action require the Cerberus Sikuli extention.
Value1 Application to Open. BundleId for IPA (activateApp() method is used), if empty, launchApp() method is used). App Package for APK ('am start' command is used).
Value2 App Activity for APK.
5.3.24. closeApp
GUI |
SRV |
APK |
IPA |
FAT |
BAT |
Close an application.
Value1 Application to Open.
5.3.25. dragAndDrop
GUI |
SRV |
APK |
IPA |
FAT |
BAT |
Will Drag from an Element to another Element.
Value1 Identifier and name of the element to drag in the form of : identifier=html_reference.
Value2 Identifier and name of the element where to drop in the form of : identifier=html_reference..
5.3.26. select
GUI |
SRV |
APK |
IPA |
FAT |
BAT |
Select an option in a <select> Element. this 'text' must be defined : <option value="text">. For APK and IPA, action only works in a web mode.
Value1 Identifier and name of the element of the select in the form of : identifier=html_reference.
Value2 Element to select.
<option value="text">
5.3.27. keypress
GUI |
SRV |
APK |
IPA |
FAT |
BAT |
will allow you to press any key in the current page. Value3 contains the modifier that can be used.
Value1 : Identifier and name of the element where the key is pressed in the form of : identifier=html_reference.
Value2 : Keycode of the key to press.
ENTER
Key.ENTER
12345Key.ENTER
Value3 : Keycode of the modifier key to press at the same time of the Value2 key pressed.
Key.CTRL
|
Note
|
You can force the keypress to be performed with sikuli backend when specifying Value1 with value : picture=. |
|
Note
|
Speed of typing can be configured inside the TypeDelay options of the action. |
The keycodes (see. keypress action) also changes depending on the application type (GUI, IPA, APK or FAT). The syntaxes are:
-
for GUI :
KEYNAME
Following Selenium KEYNAME can be used : NULL, CANCEL, HELP, BACK_SPACE, TAB, CLEAR, RETURN, ENTER, SHIFT, LEFT_SHIFT, CONTROL, LEFT_CONTROL, ALT, LEFT_ALT, PAUSE, ESCAPE, SPACE, PAGE_UP, PAGE_DOWN, END, HOME, LEFT, ARROW_LEFT, UP, ARROW_UP, RIGHT, ARROW_RIGHT, DOWN, ARROW_DOWN, INSERT, DELETE, SEMICOLON, EQUALS, NUMPAD0, NUMPAD1, NUMPAD2, NUMPAD3, NUMPAD4, NUMPAD5, NUMPAD6, NUMPAD7, NUMPAD8, NUMPAD9, MULTIPLY, ADD, SEPARATOR, SUBTRACT, DECIMAL, DIVIDE, F1, F2, F3, F4, F5, F6, F7, F8, F9, F10, F11, F12, META, COMMAND, ZENKAKU_HANKAKU
-
for APK :
KEYNAME
Following Appium Android KEYNAME can be used : UNKNOWN, SOFT_LEFT, SOFT_RIGHT, HOME, BACK, CALL, ENDCALL, DIGIT_0, DIGIT_1, DIGIT_2, DIGIT_3, DIGIT_4, DIGIT_5, DIGIT_6, DIGIT_7, DIGIT_8, DIGIT_9, STAR, POUND, DPAD_UP, DPAD_DOWN, DPAD_LEFT, DPAD_RIGHT, DPAD_CENTER, VOLUME_UP, VOLUME_DOWN, POWER, CAMERA, CLEAR, A, B, C, D, E, F, G, H, I, J, K, L, M, N, O, P, Q, R, S, T, U, V, W, X, Y, Z, COMMA, PERIOD, ALT_LEFT, ALT_RIGHT, SHIFT_LEFT, SHIFT_RIGHT, TAB, SPACE, SYM, EXPLORER, ENVELOPE, ENTER, DEL, GRAVE, MINUS, EQUALS, LEFT_BRACKET, RIGHT_BRACKET, BACKSLASH, SEMICOLON, APOSTROPHE, SLASH, AT, NUM, HEADSETHOOK, FOCUS, PLUS, MENU, NOTIFICATION, SEARCH, MEDIA_PLAY_PAUSE, MEDIA_STOP, MEDIA_NEXT, MEDIA_PREVIOUS, MEDIA_REWIND, MEDIA_FAST_FORWARD, MUTE, PAGE_UP, PAGE_DOWN, PICTSYMBOLS, SWITCH_CHARSET, BUTTON_A, BUTTON_B, BUTTON_C, BUTTON_X, BUTTON_Y, BUTTON_Z, BUTTON_L1, BUTTON_R1, BUTTON_L2, BUTTON_R2, BUTTON_THUMBL, BUTTON_THUMBR, BUTTON_START, BUTTON_SELECT, BUTTON_MODE, ESCAPE, FORWARD_DEL, CTRL_LEFT, CTRL_RIGHT, CAPS_LOCK, SCROLL_LOCK, META_LEFT, META_RIGHT, FUNCTION, SYSRQ, BREAK, MOVE_HOME, MOVE_END, INSERT, FORWARD, MEDIA_PLAY, MEDIA_PAUSE, MEDIA_CLOSE, MEDIA_EJECT, MEDIA_RECORD, F1, F2, F3, F4, F5, F6, F7, F8, F9, F10, F11, F12, NUM_LOCK, NUMPAD_0, NUMPAD_1, NUMPAD_2, NUMPAD_3, NUMPAD_4, NUMPAD_5, NUMPAD_6, NUMPAD_7, NUMPAD_8, NUMPAD_9, NUMPAD_DIVIDE, NUMPAD_MULTIPLY, NUMPAD_SUBTRACT, NUMPAD_ADD, NUMPAD_DOT, NUMPAD_COMMA, NUMPAD_ENTER, NUMPAD_EQUALS, NUMPAD_LEFT_PAREN, NUMPAD_RIGHT_PAREN, VOLUME_MUTE, INFO, CHANNEL_UP, CHANNEL_DOWN, KEYCODE_ZOOM_IN, KEYCODE_ZOOM_OUT, TV, WINDOW, GUIDE, DVR, BOOKMARK, CAPTIONS, SETTINGS, TV_POWER, TV_INPUT, STB_POWER, STB_INPUT, AVR_POWER, AVR_INPUT, PROG_RED, PROG_GREEN, PROG_YELLOW, PROG_BLUE, APP_SWITCH, BUTTON_1, BUTTON_2, BUTTON_3, BUTTON_4, BUTTON_5, BUTTON_6, BUTTON_7, BUTTON_8, BUTTON_9, BUTTON_10, BUTTON_11, BUTTON_12, BUTTON_13, BUTTON_14, BUTTON_15, BUTTON_16, LANGUAGE_SWITCH, MANNER_MODE, MODE_3D, CONTACTS, CALENDAR, MUSIC, CALCULATOR, ZENKAKU_HANKAKU, EISU, MUHENKAN, HENKAN, KATAKANA_HIRAGANA, YEN, RO, KANA, ASSIST, BRIGHTNESS_DOWN, BRIGHTNESS_UP, MEDIA_AUDIO_TRACK, SLEEP, WAKEUP, PAIRING, _MEDIA_TOP_MENU, KEY_11, KEY_12, LAST_CHANNEL, TV_DATA_SERVICE, VOICE_ASSIST, TV_RADIO_SERVICE, TV_TELETEXT, TV_NUMBER_ENTRY, TV_TERRESTRIAL_ANALOG, TV_TERRESTRIAL_DIGITAL, TV_SATELLITE, TV_SATELLITE_BS, TV_SATELLITE_CS, TV_SATELLITE_SERVICE, TV_NETWORK, TV_ANTENNA_CABLE, TV_INPUT_HDMI_1, TV_INPUT_HDMI_2, TV_INPUT_HDMI_3, TV_INPUT_HDMI_4, TV_INPUT_COMPOSITE_1, TV_INPUT_COMPOSITE_2, TV_INPUT_COMPONENT_1, TV_INPUT_COMPONENT_2, TV_INPUT_VGA_1, TV_AUDIO_DESCRIPTION, TV_AUDIO_DESCRIPTION_MIX_UP, TV_AUDIO_DESCRIPTION_MIX_DOWN, TV_ZOOM_MODE, TV_CONTENTS_MENU, _TV_MEDIA_CONTEXT_MENU, TV_TIMER_PROGRAMMING, HELP, NAVIGATE_PREVIOUS, NAVIGATE_NEXT, NAVIGATE_IN, NAVIGATE_OUT, STEM_PRIMARY, STEM_1, STEM_2, STEM_3, DPAD_UP_LEFT, DPAD_DOWN_LEFT, DPAD_UP_RIGHT, DPAD_DOWN_RIGHT, MEDIA_SKIP_FORWARD, MEDIA_SKIP_BACKWARD, MEDIA_STEP_FORWARD, MEDIA_STEP_BACKWARD, SOFT_SLEEP, CUT, COPY, PASTE
-
for IPA :
KEYNAME
Following Appium IOS KEYNAME can be used : RETURN, ENTER, SEARCH, BACKSPACE
-
for FAT :
Key.KEYNAME
Following KEYNAME values can be used : ENTER, TAB, ESC, BACKSPACE, DELETE, INSERT, SPACE, F1, F2, F3, F4, F5, F6, F7, F8, F9, F10, F11, F12, F13, F14, F15, HOME, END, LEFT, RIGHT, DOWN, UP, PAGE_DOWN, PAGE_UP, PRINTSCREEN, PAUSE, CAPS_LOCK, SCROLL_LOCK, NUM_LOCK, NUM0, NUM1, NUM2, NUM3, NUM4, NUM5, NUM6, NUM7, NUM8, NUM9, SEPARATOR, ADD, MINUS, MULTIPLY, DIVIDE, ALT, CMD, CTRL, META, SHIFT, WIN
5.3.28. type
GUI |
SRV |
APK |
IPA |
FAT |
BAT |
Type a data in an Element.
Value1 : Identifier and name of the element where the data is entered in the form of : identifier=html_reference.
Value2 : data to enter in the field.
5.3.29. clearField
GUI |
SRV |
APK |
IPA |
FAT |
BAT |
Clear (Empty) an Element.
Value1 : Identifier and name of the element to be cleared in the form of : identifier=html_reference.
5.3.30. hidekeyboard
GUI |
SRV |
APK |
IPA |
FAT |
BAT |
Hide the currently visible keyboard
5.3.31. swipe
GUI |
SRV |
APK |
IPA |
FAT |
BAT |
The action simulates a user pressing down on the screen, sliding to another position, and removing their finger from the screen. Swipe action can be used neither with unique parameter UP, DOWN, LEFT or RIGHT or with combination of parameter CUSTOM and x1;y1;x2;y2, which are coordinates of origin point (x1;y1) and relatives coordinates of destination point (x2;y2)
Value1 : UP, DOWN, LEFT, RIGHT or CUSTOM.
Value2 : x1;y1;x2;y2 (only used if Value1 is CUSTOM)
Value1 UP
Value2
will swipe from the 2/3 to the 1/3 of the screen.
Value1 CUSTOM
Value2 100;100;0;100
Will swipe from the point (100;100) to the point (100;200)
5.3.32. scrollTo
GUI |
SRV |
APK |
IPA |
FAT |
BAT |
Scroll to either an element or a text.
For GUI applications, screen will be scrolled until the targeted element is at the top of the screen (shifted according to the defined offset).
For APK and IPA applications, screen will be scrolled until the targeted element is at the middle of the screen (shifted according to the defined offset).
Value1 : Identifier of the element or text where the scroll will move the screen to. Has the form of : identifier=html_reference.
///button[contains(@class,'product-rating-open-language')]//span
My Playlist
Value2 : Maximum number of scroll that will be performed in order to reach the element. This parameter is used only for APK and IPA applications. It default to 8 if empty or invalid.
Value3 : Scroll offset that will be perform after scrolling to the element. This parameter is used only for GUI applications. Format is 2 integer values seperated by a comma. When empty, the global parameters cerberus_selenium_autoscroll_horizontal_offset and cerberus_selenium_autoscroll_vertical_offset are used to offset to the given values.
0,-100
0,0
|
Note
|
A temporisation of a few seconds will be done between the scrolls in order to secure that the browser has time to reach the element before doing the offset. |
5.3.33. installApp
GUI |
SRV |
APK |
IPA |
FAT |
BAT |
Install an application on the mobile.
Value1 : Path to the application to install.
/root/toto.apk
5.3.34. removeApp
GUI |
SRV |
APK |
IPA |
FAT |
BAT |
Remove an application from the mobile.
Value1 : Application package name to remove.
com.cerberus.appmobile
5.3.35. wait
GUI |
SRV |
APK |
IPA |
FAT |
BAT |
Wait for a certain amount of time or for an element to be present on a page.
Value1 : Either an integer that represent a duration in ms, either an Element that we will wait to exist in the form of : identifier=html_reference.
10000
Will wait 10 seconds
id=userName
Will wait that element with id equal to userName is loaded on the current screen.
5.3.36. waitVanish
GUI |
SRV |
APK |
IPA |
FAT |
BAT |
Wait that an element is removed from the page.
Value1 : Element that we will wait to be removed from the screen in the form of : identifier=html_reference.
id=userName
Will wait that Element with id equal to userName is removed from the current screen.
5.3.37. waitNetworkTrafficIdle
GUI |
SRV |
APK |
IPA |
FAT |
BAT |
Wait that network traffic idle. Cerberus will wait until requests are no longer performed. That can be used in order to secure that all page components are fully loaded and does not miss some important resource hits. In order to do so, Cerberus will check periodically the number of hits generated from the application since the beginning of the test case. When the number of hits stops to grow during that period, Cerberus stop waiting and continue the test case.
Parameter 'cerberus_networkstatsave_idleperiod_ms' can be used to change the period in millisecond and 'cerberus_networkstatsave_idlemaxloop_nb' can be used in order to limit those checks after a maximum of iteration.
|
Note
|
This action is only possible when Robot has the Cerberus executor activated and fully working. It also require at least version 1.1 of the executor. |
5.3.38. callService
GUI |
SRV |
APK |
IPA |
FAT |
BAT |
Call a service (REST, FTP, KAFKA,…) defined on the Service Library and provide the output within the execution.
Value1 : Name of the service to call.
Value2 : Nb of Event until the action finish. It is only used if the Service is a KAFKA service with a SEARCH method. It correspond to the nb of event the action will wait until it resume to the following controls or actions.
Value3 : Time in second until the action finish.It is only used if the Service is a KAFKA service with a SEARCH method. It correspond to maximum time in second the action will wait until it resume to the following controls or actions.
5.3.39. executeSqlUpdate
GUI |
SRV |
APK |
IPA |
FAT |
BAT |
Will allow you to execute SQL update (insert,delete,update).
Value1 : Name of the database where the SQL will be executed. Database needs to be created into the invariant PROPERTYDATABASE and configured on the corresponding environment.
Value2 : SQL to be executed.
5.3.40. executeSqlStoredProcedure
GUI |
SRV |
APK |
IPA |
FAT |
BAT |
Will allow you to execute SQL stored procedure.
Value1 : Name of the database where the SQL will be executed. Database needs to be created into the invariant PROPERTYDATABASE and configured on the corresponding environment.
Value2 : SQL to be executed.
5.3.41. cleanRobotFile
GUI |
SRV |
APK |
IPA |
FAT |
BAT |
Will clean and remove files based on a given pattern on the robot side. That allow to prepare that a file do not exist before downloading it, preventing that it name is changed when downloaded.
Value1 : Folder and pattern to be deleted
Value1 /home/seluser/Downloads/
Value1 /home/seluser/Downloads/*.json
5.3.42. uploadRobotFile
GUI |
SRV |
APK |
IPA |
FAT |
BAT |
Will upload a file to a folder located on the robot side. That allow to implement use case where a file needs to be uploaded from the robot side to the tested application.
Value1 : Full name of the target file on the robot side.
Value2 : Content of the file to upload. (in plain text or base64 format)
Value3 : Option in order to trigger a specific behavior. EMPTYFOLDER will empty the folder where the file is located in order to secure that its selection is to be performed in the exact same way (more and more files appearing on the folder may make its selection quite complex).
Value1 /home/seluser/Downloads/test.json
Value2 {"content" : "test"}
Value3
Will dynamicaly create the file /home/seluser/Downloads/test.json on the robot side with content '{"content" : "test"}'
Value1 /home/seluser/Downloads/test.json
Value2 eyJjb250ZW50IiA6ICJ0ZXN0In0K
Value3 EMPTYFOLDER
Will dynamicaly purge the content of /home/seluser/Downloads/ and then create the file /home/seluser/Downloads/test.json on the robot side with content FILE1
|
Tip
|
In order to encode the content of a file to Base64, you can use a tools such as https://base64.guru/converter |
5.3.43. getRobotFile
GUI |
SRV |
APK |
IPA |
FAT |
BAT |
Will get a list of files located on the robot side. That allow to implement use case where you want to test the content of a file downloaded on the robot side from the tested application.
Value1 : Filename pattern to download.
Value2 : number of files to download.
Value3 : Option in order to trigger a specific sorting behavior when selecting the files.
-
LASTMODIFIED will sort files by latest modification time,
-
IGNORECASEDESC will sort them in descending order by name ignoring case.
-
IGNORECASEASC will sort them in ascending order by name ignoring case.
-
DESC will sort them in descending order by name.
-
ASC will sort them in ascending order by name. (this is the default value)
The Action will return a json file that follow the below json format:
{
    "totalFilesAvailable": "3",
    "totalFilesDownloaded": "2",
    "files": [
    {
        "path": "/home/seluser/Downloads/pdf_digital_signature_timestamp.pdf",
        "filename": "pdf_digital_signature_timestamp.pdf",
        "size": "46016",
        "lastModified": "2024.03.23:14.23.07",
        "contentType": "PDF",
        "pdfInfo": {
            "pdfCertInfo": {
                "names": [
                {
                    "names": ["Test Signing Certificate-1-1081166692", null],
                    "reasons": ["I approve these details."],
                    "contents": ["0\u0082\u001c)\u0006\t*\u0086H\u0086÷\r"],
                    "dates": ["D:20180901125733-04'00'"],
                    "locations": ["City"]
                }
                ],
                "blankSignatureNames": [""],
                "signatureNames": ["Test Signing Certificate-1-1081166692|"]
            },
            "pdfPageNb": 2,
            "pdfText": {
                "allPages": "PDF Digital Signatures\n \n \ndigitally .\n ",
                "pages": [
                    "PDF Digital Signatures\n \n \n",
                    "digitally .\n "
                ]
            }
            },
        "content": "%PDF-1.4\n%����\n5 0 obj\n<<\/C[0 0 1]/Border"
    },
    {
        "path": "/home/seluser/Downloads/toto/titi/testnew2.json",
        "filename": "testnew2.json",
        "size": "0",
        "content-type": "UNKNOWN",
        "lastModified": "2022.08.12:07.05.57",
        "content": {
            "content": "test"
        }
    }
    ]
}
|
Note
|
Please note that on the above example, the 1st file is a pdf file and the 2nd a json file that contain: {"content": "test"}
|
Value1 /home/seluser/Downloads/*.json
Value2 2
Value3 LASTMODIFIED
Will get the last 2 json files from /home/seluser/Downloads/ on the robot side.
Value1 /home/seluser/Downloads/test.json
Value2
Value3
Will get /home/seluser/Downloads/test.json file on the robot side.
5.3.44. calculateProperty
GUI |
SRV |
APK |
IPA |
FAT |
BAT |
Will allow you to calculate a Property defined in the property section of the test case and optionally update the content using the definition of another property. That action should only be used if you need to force a calculation at a precise timing or if you want to recalculate it with the latest value. A property calculation is automatically triggered when using a property without being forced to use that action.
Value1 : Name of the property to calculate. If the property is already calculated, it will be forced to be calculated again.
Value2 : [Optional] Name of a second property whose definition will be used to affect the property in Value1.
5.3.45. setNetworkTrafficContent
GUI |
SRV |
APK |
IPA |
FAT |
BAT |
Retrieve the network traffic from Cerberus Robot Proxy (when activated at robot level) and calculate a json message that can be used for direct controls on all attached controls. If Robot Executor is not activated, Action will end in NE Status and all attached controls ignored. Once all controls of that action are finished, current content are set back to normal value (could be an html or app page or another service).
Value1 : URL to filter. Network requests will be filtered based on that value. Any url that contain the value1 will be included in the network traffic.
Value2 : [Optional] Flag in order to include the response content of every requests. For speed and performance reason, Cerberus by default will not retrieve the content of every requests. If you want to get them in order to perform some controls on them, you can use that flag.
|
Note
|
This action is only possible when Robot has the Cerberus executor activated and fully working. It also require at least version 1.1 of the executor. |
5.3.46. indexNetworkTrafficContent
GUI |
SRV |
APK |
IPA |
FAT |
BAT |
Allow to index the network traffic content into pieces. This action allows, during a testcase, to define some checkpoint that will isolate the traffic statistics done before and after the index. When the action is triggered, Cerberus save the number of requests performed since the beginning of the testcase in order to index them. When at least an index exist on a testcase, the 'Network' tab displayed inside the testcase execution report allow to filter the various dashboard on a selection of indexes. When that action is performed, the 'setNetworkTrafficContent' action and 'getFromNetworkTraffic' default to the content that occured since that last index created. That action is handy in order to perform a full end user scenario (ex : a customer going through a checkout) and perform control on traffic done only on some isolated part of the scenario. Thanks to that action I can validate that a certain hit has been done on a specific part of the testcase (ex : no hits perfomed during the payment page loading.)
Value1 : Name of the index.
|
Note
|
This action is only possible when Robot has the Cerberus executor activated and fully working. It also require at least version 1.1 of the executor. |
5.3.47. setServiceCallContent
GUI |
SRV |
APK |
IPA |
FAT |
BAT |
Force current content of the test case on the last service call in a JSON format. That JSON will allow controls on the structure of the last call for both Request and Response including information such as http header, http protocol version, or return code. Any control attached to that action will take json path as element syntax for direct controls. If no calls were performed before that action, action will end in NE Status and all attached controls ignored. Once all controls of that action are finished, current content are set back to normal value (could be an html or app page or another service).
5.3.48. setConsoleContent
GUI |
SRV |
APK |
IPA |
FAT |
BAT |
Force current content of the test case to the console logs in a JSON format. That JSON will allow controls on the all the logs collected between each call to that action (logs contents are reset after each call to get them). Once all controls of that action are finished, current content are set back to normal value (could be an html or app page or another service).
5.3.49. setContent
GUI |
SRV |
APK |
IPA |
FAT |
BAT |
Force current content of the test case to the data provided in value1 parameter. It can be any format you need (JSON, XML). All controls attached to that action will point to that data. Once all controls of that action are finished, current content are set back to normal value (could be an html or app page or another service).
5.3.50. lockDevice
APK |
IPA |
Lock the device during the execution
5.3.51. unlockDevice
APK |
IPA |
Unlock the locked device during the execution. For APK, capabilities unlockType et unlockKey can be used to unlock devices protected by a key.
5.3.52. rotateDevice
APK |
IPA |
Rotate the screen 90 degrees.
5.3.53. doNothing
GUI |
SRV |
APK |
IPA |
FAT |
BAT |
Just perform no action. No action will be executed and engine will go to the next action or control
5.3.54. mouseOverAndWait
DEPRECATED Action that should no longuer used.
5.4. Test Case Control
Control |
Description |
Example |
Unknown |
Default control when creating a new control |
|
getPageSource |
Force the page source to be retrieved and stored to be checked for detailed analysis. |
|
takeScreenshot |
Force to take a screenshot. Image can be automatically crop when taking the screenshot allowing to automatize clean application or web site screenshot (without Operating system header or footer elements). |
|
verifyElementClickable |
OK if Element is clickable. |
|
verifyElementChecked |
OK if Checkbox is checked. |
|
verifyElementNotChecked |
OK if Checkbox is not checked. |
|
verifyElementDifferent |
TBD |
|
verifyElementEquals |
TBD |
|
verifyElementinElement |
OK if Sub Element is inside Master Element. That can be used to check if an option is available inside a select box. |
|
verifyElementNotClickable |
OK if Element is not clickable. |
|
verifyElementNotPresent |
OK if Element is not found (from the page source code) on the current page. in case of a Web application, that control will wait for the timeout until it confirm that element is not present on page. |
|
verifyElementNotVisible |
OK if Element is found but not visible (according to rendering) on the current page. |
|
verifyElementNumericDifferent |
OK if Element is found on the current page and its content has a numeric value that is different from Numeric Value indicated. |
|
verifyElementNumericEqual |
OK if Element is found on the current page and its content has a numeric value that is equal to Numeric Value indicated. |
|
verifyElementNumericGreater |
OK if Element is found on the current page and its content has a numeric value that is greater than the Numeric Value indicated. |
|
verifyElementNumericGreaterOrEqual |
OK if Element is found on the current page and its content has a numeric value that is greater or equal to Numeric Value indicated. |
|
verifyElementNumericMinor |
OK if Element is found on the current page and its content has a numeric value that is lower than the Numeric Value indicated. |
|
verifyElementNumericMinorOrEqual |
OK if Element is found on the current page and its content has a numeric value that is lower or equal than Numeric Value indicated. |
|
verifyElementPresent |
OK if Element is found on the current page. |
|
verifyElementTextDifferent |
OK if the text found in Element is not equal to the Text indicated |
Element : //StatusCode Text : KO |
verifyElementTextEqual |
OK if the text found in Element is equal to the Text indicated |
Element : //StatusCode Text : OK |
verifyElementTextContains |
OK if the text found in Element contains the Text indicated. |
|
VerifyElementTextMatchRegex |
OK if a Regex match the content of an Element. |
|
verifyElementVisible |
OK if Element is visible on the current page. |
|
verifyElementTextArrayContains |
OK if Text value is found in the Array (retrieved by JSONPath or Xpath) which contains strings. |
|
verifyElementNumericArrayContains |
OK if Number value is found in Array (retrieved by JSONPath or Xpath) which contains numbers (integers or floats). |
|
verifyNumericDifferent |
OK if the Integer1 is different from the Integer2. |
|
verifyNumericEquals |
OK if the Integer1 is equal to the Integer2. |
|
verifyNumericGreater |
OK if the Integer1 is greater than the Integer2. |
|
verifyNumericGreaterOrEqual |
OK if the Integer1 is greater than the Integer2. |
|
verifyNumericMinor |
OK if the Integer1 is lower than the Integer2. |
|
verifyNumericMinorOrEqual |
OK if the Integer1 is lower than the Integer2. |
|
verifyNumericArrayContains |
OK if Array contains the Number. |
|
verifyStringContains |
OK if String1 contains the String2. |
|
verifyStringDifferent |
OK if String1 is different from String2. |
|
verifyStringEqual |
OK if String1 is equal to String2. |
|
verifyStringGreater |
OK if String1 is greater than String2 (using alphabetical order) |
String1 : ZZZ String2 : AAA |
verifyStringMinor |
OK if the String1 is minor than to the String2 (using alphabetical order) |
String1 : AAA String2 : ZZZ |
verifyStringNotContains |
OK if String1 does not contains the String2. |
|
verifyStringArrayContains |
OK if Array contains the String. |
|
verifyTextInDialog |
OK if Text is inside the browser dialog box |
|
verifyTextInPage |
TBD |
|
verifyTextNotInPage |
TBD |
|
verifyTitle |
TBD |
|
verifyUrl |
OK if the URL of the current page equal to the URL indicated . |
|
verifyXmlTreeStructure |
TBD |
|
Tip
|
In order to define your regex, you can use the following online tester: https://www.regexplanet.com/advanced/java/index.html |
5.5. Test Case Property
When clicking on Tab  , the Property menu will appear.
From there you can manage your TestCase properties or see your Inherited Properties - coming from the step libraries of your use steps.
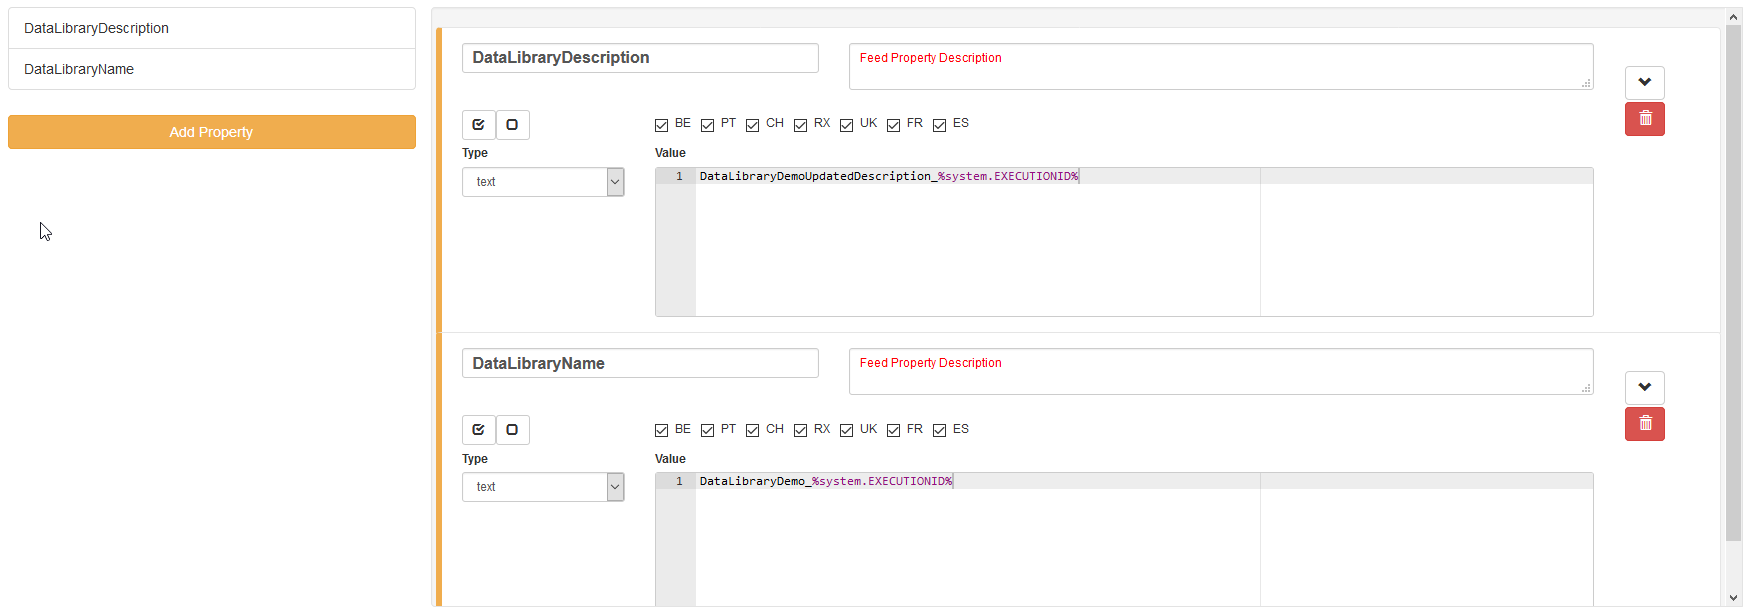
Properties are the key element of your Test Case to manage different variables in the same scenario. A property is identified by its name and the country for which it’s defined (e.g. you cannot have two properties defined for the same country with the same name).
Properties can be called by their name using the following syntaxes:
-
%property.property_name%: the execution will stop if any problem in the property calculation -
%property_name_here%: the execution will not stop if any problem in the property calculation
When handling Datalib, the syntaxes to call the subdata are :
-
%property.property_name.sub_data_name%or%property_name.sub_data_name% -
%property.property_name(sub_data_name)%or%property_name(sub_data_name)%
Properties can be called in action or control values field or in another property.
Field |
Description |
Property |
Name of the property. |
Description |
Description of the property. |
Countries |
Countries for which the property will be calculated (environment parameter). |
Type |
The way the property is going to be calculated. |
Value |
Value of the property. |
DB |
DataBase in which the property will be calculated. Used by "executeSql" Property type. |
Length |
When calculating a list of values, defines the number of rows the property will return. |
Row Limit |
When returning a list of values, limits the number of rows the property will consider for random purposes. |
Nature |
Defines the unique value that will be used in the execution. By default, STATIC has no rules defined : it will take the first result it finds. RANDOM will pick a random value if several rows are available. RANDOMNEW will pick a random value that was never selected before in any older execution. NOTINUSE will pick a value that is not currently used by a running execution. |
Nb of retry |
When the property fail to retrieve any data, it can retry several times to get the data. That data define the nb of retry after which it will stop trying and report a NA status. |
Retry Period |
Defines the period in millisecond between every retry. |
Cache Expire |
Defines the amount of time in second during which the property can be kept in cache. 0 value disable the cache mechanism. |
Rank |
If 1 the property is considered as a primary property and will always be displayed on execution detail. From 2 to higher value, the property will be considered as secondary and will be hidden by default from execution report. |
5.5.1. Property Types
Field |
Description |
Example |
text |
assign the property an alphanumeric value. Can invoke other properties |
|
getFromDataLib |
query the corresponding datalib (identified by its name) |
|
getFromSQL |
run a specific query an get the first, and only the first, result. The DB must be specified |
|
getFromHtml |
||
getFromHtmlVisible |
||
getElementPosition |
||
getFromJS |
Execute the specified JavaScript script without getting any output |
|
getAttributeFromHtml |
||
getFromCookie |
Get a cookie information from a cookie name and a given parameter. |
Cookie name = JSESSIONID / Gookie parameter = (name,value,expiry,domain,path,isHttpOnly,isSecure) |
getFromXml |
Get a certain element from an XML service call from an XPath |
|
getDifferencesFromXml |
||
getRawFromXml |
Get a raw XML element from an XML service call from an XPath |
|
getFromJson |
JSON path to get a certain element from a service call |
|
getRawFromJson |
Get element from a JSON content in a JSON format |
|
getFromCommand |
||
getFromGroovy |
Execute the specified Groovy script and get the last defined variable. Test your scripts easily using the online console By default, there is an internal whitelist for the authorized classes in the Groovy scripts: String, Byte, Short, Integer, Long, Float, Double, BigInteger, BigDecimal, Math, Date, LinkedHashMap, ArrayList, Range, GStringImpl, HashMap, HashSet, Collections, ScriptBytecodeAdapter, Timestamp. If you want to add more classes, you can set the parameter cerberus_groovy_classes_whitelist with the classes you want to add in addition to the default whitelist. You need to put the full package: i.e, for the class SimpleDateFormat, you need to put java.text.SimpleDateFormat. Please note that for security reason, this parameter is not active on the SaaS instance. Some packages and classes stay forbidden for security reasons: java.io, java.nio.file, java.net, java.lang.System, java.lang.reflect. |
|
SQL queries management:
-
queries can be stored inside the test case and launched using getFromSQL. Only one value of the first row can be retrieved.
-
queries can be stored inside a Datalib, according to its DB. Several values of the first row can be retrieved.
We recommend to use the Datalib since it allow SQL to be dynamically reused from one test case to another.
5.6. Test Case Variables
You can use variables in many area of Cerberus. Those variable are used in order to perform some actions of controls in a dynamic way. 3 types of variables can be created :
-
Variables defined from properties inside Test Cases.
-
Variables defined from application object.
-
System Variables
Properties and Application Object are defined by the users while system variable are provided by Cerberus.
The global syntax of a variable is : %[property|object|system].nameOfTheVariable%
This is the list of fields in Cerberus where you can use those variables.
-
All Test Cases, Steps, Actions and Control descriptions.
-
Condition Value1 and Value2 at Test Case level.
-
Condition Value1 and Value2 at Step Test Case level.
-
Condition Value1 and Value2 at Action Test Case level.
-
Condition Value1 and Value2 at Control Test Case level.
-
Test Case Action Value 1, Value 2 and Value 3.
-
Test Case Control Value 1, Value 2 and Value 3.
-
Test Case Properties Value 1, Value 2 and Value 3.
-
Path, Envelope and Method at Test Data Library (SOAP) level.
-
SQL Script at Test Data Library (SQL) level
-
Column, Parsing Answer and Column Position at Test Data Library Subdata definition level
-
Path, Request, Operation and Attachment URL at Service level.
-
Request detail (all keys and values) and Header (all keys and values) at Service level.
When a variable is detected in one of those field, Cerberus will replace it by the value during the execution.
-
If the variable is an object, the value (that never change) is just replaced.
-
If the variable is a system variable, the value is calculated and replaced at the same time (for ex : time defined by %system.TODAY-D% will be the day and time of the replacement).
-
If the variable is a property, it gets automatically calculated at the time of the replacement. If it was already calculated before, the same value (already calculated) is replaced. NOTE: In order to force the calculation of a property at a certain timing, calculateProperty Action can be inserted just before the action is used in a field.
Variables can be defined in a recursive way. That means that the following syntax :
%property.%system.COUNTRY%% will be first replaced by
%property.FR% and then by FR property value (if it exist).
Please note also that, if at the end of the decode operation, there are still references to %property.???% or %system.???% or %object.%%% in the field, the corresponding test case will report an error and generate an FA status.
5.6.1. Property Variables
Property variable allow to have multi row content. As a consequence the full syntax will look like this :
%property.NameOfTheVariable.rowNb.SubData%
|
Note
|
If rowNb is not defined, the 1st row will be used. As a consequence, the syntax %property.nameOfTheVariable% is the same as %property.1.nameOfTheVariable%
If SubData is not defined, the 'key' subdata will be used (ie, correspond to the empty subdata).
|
|
Note
|
You can also get the nb of rows your variable has by using the nbrows reserved word of the property :
%property.NameOfTheVariable.nbrows%
|
5.6.2. Object Variables
-
%object.myobject.value%: Get the application object value of myobject -
%object.myobject.picturepath%: Get the application object picture path of the file of myobject (that will be replaced by local path of the file) -
%object.myobject.pictureurl%: Get the application object picture URL of the file of myobject (that will be replaced by a URL that provide the file content) -
%object.myobject.base64%: Get the application object base64 value of the file of myobject
5.6.3. System Variables
Value |
Description |
%system.SYSTEM% |
System value |
%system.APPLI% |
Application name |
%system.BROWSER% |
Browser name of the current execution. |
%system.ROBOT% |
Robot name of the current execution. |
%system.ROBOTDECLI% |
Robot declination name of the current execution. |
%system.ROBOTHOST% |
current robot host. |
%system.SCREENSIZE% |
Robot screensize of the current execution. |
%system.APP_DOMAIN% |
Domain of the Application (defined at application level) |
%system.APP_HOST% |
Host of the tested Application |
%system.APP_CONTEXTROOT% |
Context Root of the tested Application |
%system.EXEURL% |
Full Url of the tested Application |
%system.APP_VAR1% |
VAR1 of the application on the environment. |
%system.APP_VAR2% |
VAR2 of the application on the environment. |
%system.APP_VAR3% |
VAR3 of the application on the environment. |
%system.APP_VAR4% |
VAR4 of the application on the environment. |
%system.APP_SECRET1% |
Secret 1 of the application on the environment (Secrets will be protected by not displaying anywhere in the Cerberus GUI and API). |
%system.APP_SECRET2% |
Secret 2 of the application on the environment (Secrets will be protected by not displaying anywhere in the Cerberus GUI and API). |
%system.ENV% |
Environment value |
%system.ENVGP% |
Environment group code |
%system.COUNTRY% |
Country code |
%system.COUNTRYGP1% |
Country group1 value |
%system.COUNTRYGP2% |
Country group2 value |
%system.COUNTRYGP3% |
Country group3 value |
%system.COUNTRYGP4% |
Country group4 value |
%system.COUNTRYGP5% |
Country group5 value |
%system.COUNTRYGP6% |
Country group6 value |
%system.COUNTRYGP7% |
Country group7 value |
%system.COUNTRYGP8% |
Country group8 value |
%system.COUNTRYGP9% |
Country group9 value |
%system.TEST% |
Test Folder. |
%system.TESTCASE% |
TestCase ID |
%system.TESTCASEDESCRIPTION% |
TestCase Description |
%system.SSIP% |
Selenium Robot server IP |
%system.SSPORT% |
Selenium Robot server port |
%system.TAG% |
Execution tag or Campaign execution ID. |
%system.EXECUTIONID% |
Execution ID |
%system.EXESTART% |
Start date and time of the execution with format : 2016-12-31 21:24:53.008. |
%system.EXESTORAGEURL% |
Path where media are stored (based from the exeid). |
%system.EXEELAPSEDMS% |
Elapsed time in ms since the beginning of the execution (can be used to perform timing controls). |
%system.CURRENTSTEP_INDEX% |
Index number of the current step execution. Can be used when looping over a step. |
%system.CURRENTSTEP_SORT% |
Sort number of the current step execution. Can be used when looping over a step. |
%system.CURRENTSTEP_STARTISO% |
ISO Timestamp of the beginning of the step execution. |
%system.CURRENTSTEP_ELAPSEDMS% |
Elapsed time in ms since the beginning of the current step execution (can be used to perform timing controls). |
%system.STEP.n.n.RETURNCODE% |
Return Code of the step n. n being the execution sequence of the step (sort). |
%system.LASTSERVICE_HTTPCODE% |
Http return code of the last service called. |
%system.LASTSERVICE_RESPONSETIME% |
Http response time in ms of the last service called. |
%system.LASTSERVICE_CALL% |
Last JSON Service call. |
%system.LASTSERVICE_RESPONSE% |
Last JSON Service answer. |
5.6.4. Date System Variables
%system.XXXX-YYYY%
Date System Variables |
|
XXXX |
Any of those key word: TODAY, YESTERDAY, TOMORROW, YEAR-n, YEAR+n, MONTH-n, MONTH+n, WEEK-n, WEEK+n, DAY-n, DAY+n, HOUR-n, HOUR+n, MINUTE-n, MINUTE+n |
YYYY |
Any of the JAVA Date Patern such as: W (Week in year), W (Week in month), y (Year), M (Month in year), d (Day in month), E (Day name in week), H (Hour in day (0-23)), m (Minute in hour), s (Second in minute),…. |
Examples
%system.DAY-13-EEEE% |
dimanche (day of week, 13 days ago) |
%system.MINUTE-3-m% |
40 (minute of hour, 3 minutes ago) |
%system.TODAY-dd% |
11 (day of month, today) |
5.6.5. Tricks
You will find below some tricks which help you to implement specific test cases.
|
Note
|
It is possible to create a random property with a number of char defined. You have to feed the property fields like the screenshot below. This property will be different for each execution. Example: 8e4!9EsT5-GfZvJ3oZ7v
Charset can be limited to any values by using Value field.

|
5.7. Test Case Elements Indentifiers
Syntax in order to identify a field or element inside a page has the form :
identifier=html_reference
identifier can take the various values :
-
id=
id of the field will be used.
<ul class="list-group step-list side-item nav nav-pills" id="steps" style="max-height: 600px;overflow-y: auto">
id=steps
-
name=
<a name="menu" id="menuLabel" href="Label.jsp">Label</a>
name=menu
-
class= .class= html example
<label class="checkbox"></label>
class=checkbox
-
css=
-
xpath=
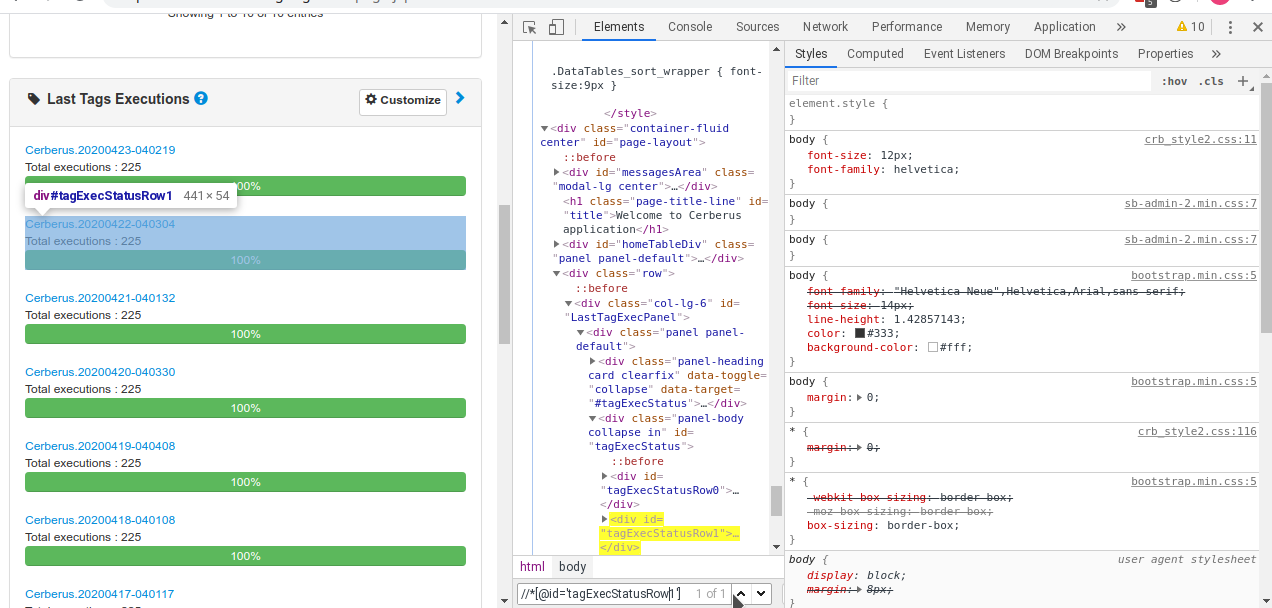
You can specify an xpath value. Additional documentation on xpath syntax can be found here. Xpath can be tested live on Web pages from Chrome Developer extention (accessible via F12).
Via Element tab, you just have to hit CTRL+F in order to find inside the DOM.
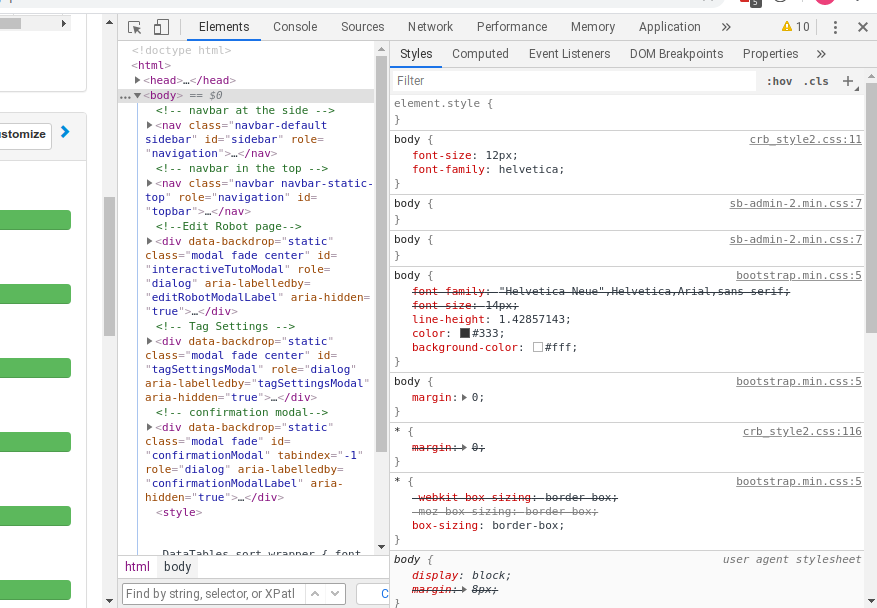
In the search field, typing the xpath will point you to the element.
XPath can also be tested from the console tab.

Just type
$x("//div");
And it will report the Element found. [] is returned in case no element are found.

xpath=//*[@id='html_reference']
-
link=
-
data-cerberus=
<label data-cerberus="label-OK"></label>
data-cerberus=label-OK
-
coord=
-
picture=
This identifier will use the image recognition engine to find the element pixel by pixel. That will only work for FAT Applications (Sikuli) or GUI in hybrid mode (using Sikuli extention)
picture=%object.buttonOK.pictureurl%
In order to perform any action/control (e.g. 'click', 'verifyElementPresent'), Application Object must be used to reference picture.
Keep in mind that for click action, it will be performed in the center of the picture:

-
text=
This identifier will use the OCR engine of the image recognition capability to find the element pixel by pixel. That will only work for FAT Applications (Sikuli) or GUI in hybrid mode (using Sikuli extention)
text=save my preferences
-
erratum=
Use the Erratum feature in order to get the element. That works in GUI applications. That algorithm guess the correct xpath from pages that could change over time. Please see more details on erratum project page. Erratum syntax is :
erratum=<full xpath>,<html page full content>
erratum=/html/body/button, <!DOCTYPE html> <html> <head> <meta http-equiv="Content-Type" content="text/html; charset=UTF-8"> <title>JSP Page</title> <script type="text/javascript" src="../dependencies/jQuery-2.2.3/jquery-2.2.3.min.js"></script> </head> <body> <button id="erratumButton">Errratum</button> </body> </html>
In order to collect the erratum syntax, you need to use Cerberus Google Chrome extention.
-
querySelector=
This identifier is used on websites that use shadowDOM pages (eg : Salesforce).
querySelector=iron-component-page>>iron-doc-viewer>>a
-
OTHER
|
Note
|
If no indentifier is defined, Cerberus will either consider that it is an id or an xpath if it starts by // (most xpath does start by //). That behaviour allows to copy/paste from Cerberus to any other tools without being forced to add or remove xpath=. |
5.8. Network Traffic JSON format
Standard JSON format can by found in w3c repo.
In addition to standard HAR structure, Cerberus will add a stat json entry in top level containing some agregated data in order to make controls easier. That stat section will be feed by checking every hit performed by the tested application. Every hit will enrish the total section (excepted ingnored entries that will feed ignore section). They will also feed one of the following section : either internal, either thirdparty (each will then be spread per thirdparty ThirdPartyN) or unknown if the hit cannot match one of the application domain or one of the Third Party domain.
"stat": {
    "total":{
        "hosts": [
            "www.laredoute.fr",
            "fonts.googleapis.com",
            "laredoutemobile.commander1.com",
            "privacy.trustcommander.net"
        ],
        "size":{
            "sum": 2286467,
            "max": 125109,
            "urlMax": "https://www.laredoute.com/mar/toto.jpg"
        },
        "requests":{
            "nb": 117,
            "nb100": 0,
            "nb101": 0,
            "nb1xx": 0,
            "nb200": 111,
            "nb201": 0,
            "nb2xx": 111,
            "nb300": 0,
            "nb301": 2,
            "nb302": 2,
            "nb307": 0,
            "nb3xx": 4,
            "nb400": 0,
            "nb403": 0,
            "nb404": 1,
            "nb4xx": 1,
            "nb500": 0,
            "nb5xx": 0,
            "nbError": 1,
            "urlError": [ "https://www.lrd.co/mar/to.jpg"]
        },
        "time":{
            "totalDuration": 18062,
            "max": 4512,
            "urlMax": "https://latem.commander1.com/dc3/?chn=D",
            "avg": 455,
            "sum": 53249,
            "firstURL": "http://www.laredoute.fr/",
            "firstStart": "2020-02-25T20:15:16.048Z",
            "firstStartR": 0,
            "firstEnd": "2020-02-25T20:15:16.95Z",
            "firstEndR": 47,
            "firstDuration": 47,
            "lastURL": "https://p.trust.net/p-c/?id=1&site=12",
            "lastStart": "2020-02-25T20:15:29.655Z",
            "lastStartR": 13607,
            "lastEnd": "2020-02-25T20:15:34.110Z",
            "lastEndR": 18062,
            "lastDuration": 4455
        },
        "type":{
            "css":{
                "requests": 2,
                "sizeSum": 125109,
                "sizeMax": 2286467,
                "urlMax": "https://www.laredoute.com/mar/12.css"
            },
            "img":{...},
            "other":{...},
            "js":{...},
            "html":{...},
            "content":{...},
            "media":{...},
            "font":{...}
        }
    },
    "internal":{...},
    "nbThirdParty":2,
    "thirdparty":{
        "ThirdParty1":{...},
        "ThirdParty2":{...}
    },
    "ignore":{...},
    "unknown":{...},
    "requests": [
        {
            "size": 79565,
            "provider": "internal",
            "indexName": "n/a",
            "domain": "www.domain.com",
            "httpStatus": 200,
            "start": 0,
            "index": 0,
            "time": 325,
            "queryString": {
                "txn_id": "o2hke",
                "tw_sale_amount": "0",
                "p_user_id": "0",
                "tw_order_quantity": "0"
            },
            "contentType": "html",
            "url": "https://www.domain.com/"
        },
        {...}
    ]
}
Detail explanation on time section :
|
duration in ms between the start of the first request and the end of the last request. |
|
|
sum of duration in ms spent in all requests. |
|
|
duration in ms of the longuest request (that correspond to |
|
|
average duration in ms of all requests. |
|
|
first request definition |
|
|
last request definition |
Cerberus will determine if a hit must be ignored (and appear in ignore section) by feeding parameter cerberus_webperf_ignoredomainlist with coma separated domains to ignore.
Cerberus will get and guess the ThirdPartyN from thirdparty section from a json file that can be retrieve from the following repo.
The file should be available from Cerberus from the location provided by the parameter cerberus_webperf_thirdpartyfilepath.
If parameter is empty or file not found by Cerberus, no third party will be guess.
You can also add extra third party from the Cerberus GUI by adding a public invariant WEBPERFTHIRDPARTY with first attribute with the list of domain with coma separated format.
internal section is populated from the URL domain list defined on the corresponding application / environment. all hosts should be defined on the domain field with coma separated format. In case the domain field is empty, Cerberus will guess it from the application URL.
Any host URL that does not match either the cerberus_webperf_ignoredomainlist parameter, the ThirdParty definition file from parameter cerberus_webperf_thirdpartyfilepath, the WEBPERFTHIRDPARTY public invariant or list of application domain will appear in the unknown section.
At the end of the execution, Cerberus will automatically execute 'waitNetworkTrafficIdle' action in order to secure that requests are no longer performed. This is used in order to secure that the collected stats are complete and does not miss some important hits.
6. Import / Export
6.1. Import/Export
In this section, you will find information on how to Import and Export testcases inside or outside Cerberus. Cerberus store the testcase in a relational model database. You may still want to export a list of test cases from a specific database in order to import it on a different database or any other system. In order to do so, Cerberus allow you to export any testcase into a json format. All import/export features are available from test case list page (menu : Test / Testcase List)
6.2. Export
In order to export a single testcase, just click on the export button of the testcase you want to export. The testcase will then be downloaded in a json Cerberus format from your browser to your local drive.

If you want to export a list of testcases, you need to select them first with the help of the checkbox and then choose the Export button from the Import/Export menu.
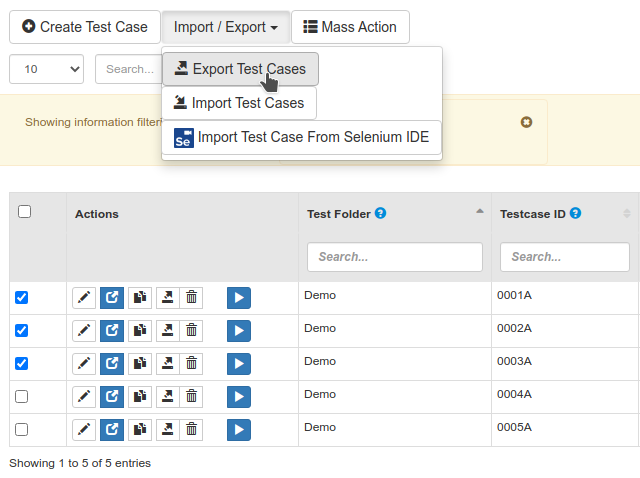
6.3. Import
In order to import any testcase, from a json Cerberus file, you can open the Import/Export menu and choose Import Button. Then select the json file you want to import and Cerberus will load it into the database.

NOTE : In order for the test to work correctly, you may need to create all the corresponding application, systems, datalib or library it may require.
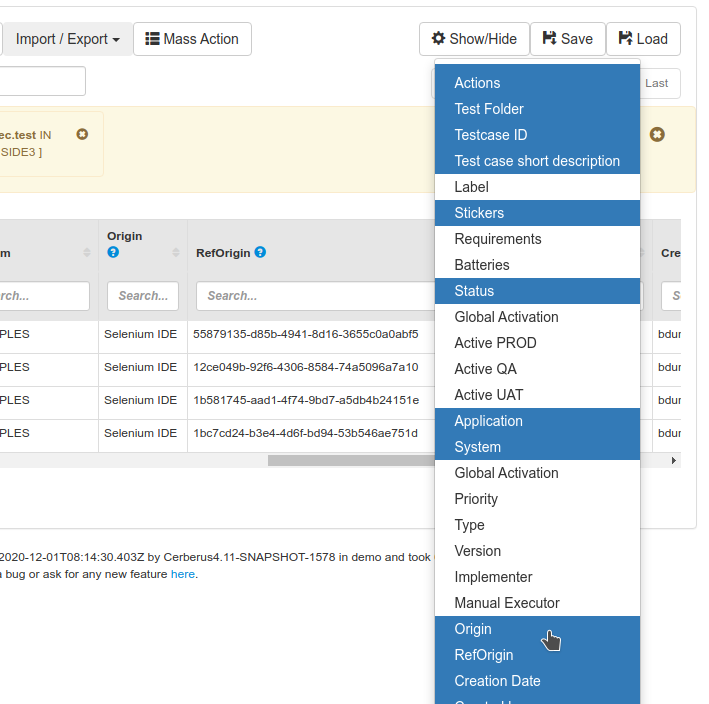
6.4. Import from Selenium IDE and Test Recorder
You may want to record your web test using Selenium IDE plugin. Selenium IDE allow you to record live your test and save it into a specific json format. No need to export your test from Selenium IDE, just save them into the native Selenium file format (files ends with .side). Cerberus will allow you to import the native Selenium IDE format directly. The advantage of that 'recorder' method is that it can save you a lot of time building the xpath or id that point to the various element of your scenario. The disadvantage is that the resulting scenario will need to be described and structured manually into steps in order to be maintained easily over time.
In order to import from Selenium IDE files, just click on the 'Import Test Case From Selenium IDE' button on the 'Import / Export' menu.
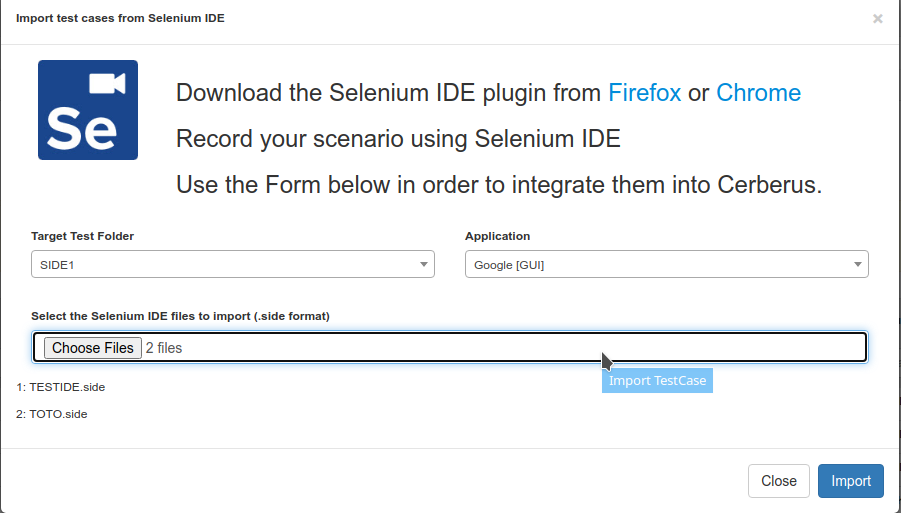
The screen allow you to:
-
Choose an existing folder or define one on the fly. All imported testcases will be created inside that folder.
-
Select a 'GUI' application. Testcases will be attached to that application.
-
Select 1 or more SIDE files to be imported.
Once imported, the column 'Origin' will take the value 'Selenium IDE' and 'Ref Origin' will have the Selenium IDE id of the testcase.
7. Label
7.1. Label
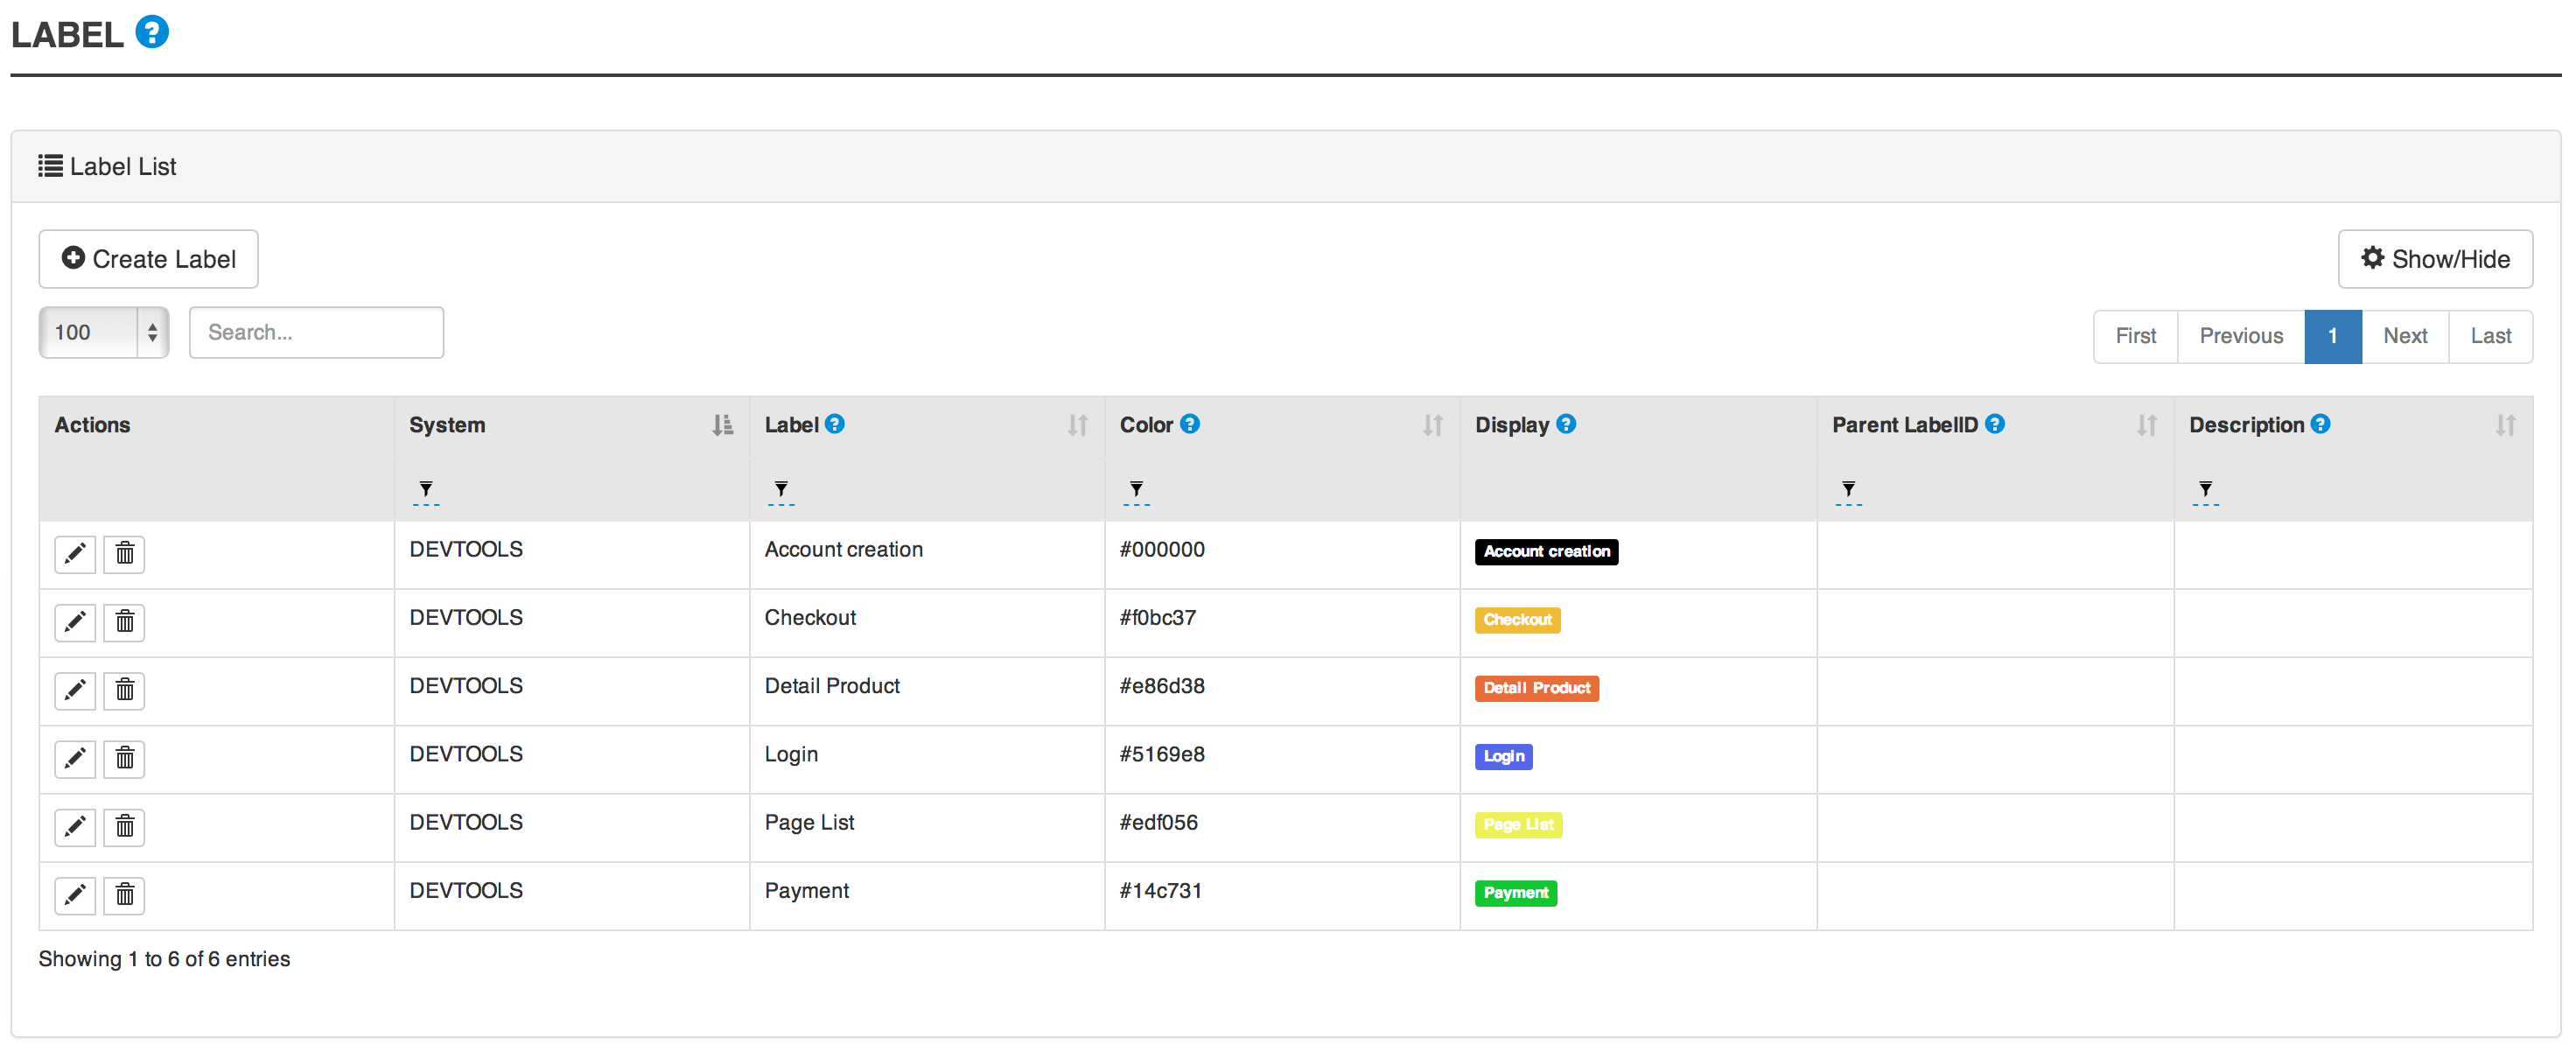
In this section, you will find the bla bla
7.2. Label attributes
Field |
Description |
System |
System on which the label will be available. |
Label |
Name of the label. |
Color |
Color in #hex format. |
Parent Label ID |
Allow to link the label to another one in order to group them and build a label hierarchy. |
Description |
This is a short description of the label. |
8. TestCase execution
8.1. Introduction
The run options are accessible using the menu Run > Run Test Case
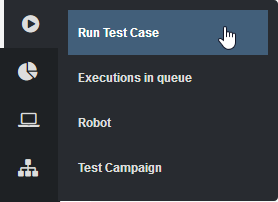
The different sections let the user select the test case(s) to launch and choose its execution parameters.
-
Selection type
-
Environment & Country
-
Robot settings
-
Execution settings
8.2. Selection Type

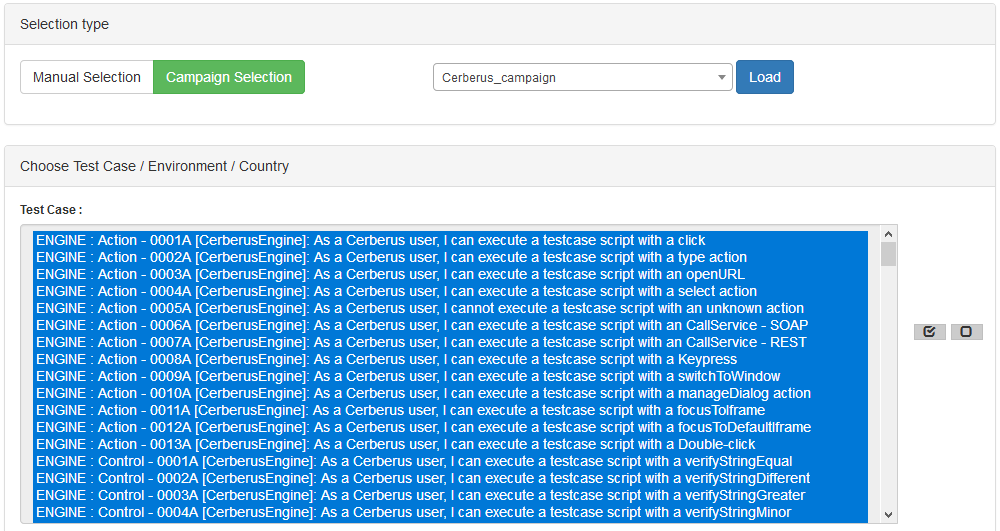
Manual selection let the user select one or several test cases using the filters.

Campaign selection let the user select a campaign from a dropdown menu. Clicking 'load' button display the selected test cases in the section below.
8.3. Environment & Country
By default, in automatic mode, you can select the preconfigured environment.
Warning: The environment and countries must be configured for the related applications. Besides, the testcase attributes override the configuration (e.g. Active in PROD)

You can also define yourself the url of the application to test. In that case, the environment still needs to be defined in order to determine which data for the property calculation to use. url can have different format :
-
simple string : http://host
-
Composed string for multiple applications using : and ; separators : APP1:qa.cerberus-testing.org;APP2:toto.cerberus-testing.org
-
Composed string for multiple applications using JSON format : {"APP1":"https://qa.cerberus-testing.org:443","APP2":"http://toto.cerberus-testing.org"}
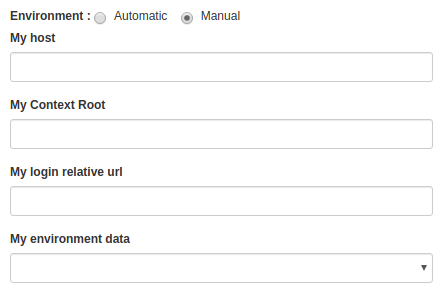
Last you need to select one or more countries.

8.4. Robots settings
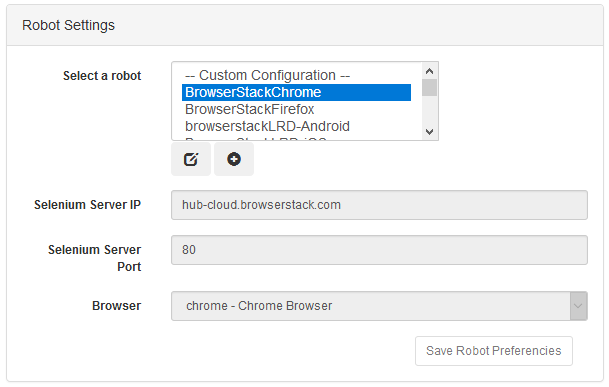
The robots settings can be linked to a campaign. If so, the robot(s) will be automatically selected when the corresponding campaign is loaded.
However, if the user changes this value, it will be overriden by his selection.
'Save Robot Preferencies' button save these settings in the browser cache of the device.
The selected robot can be edited using the left button. A new robot can be created using the right one.
8.5. Robot Capabilities
When creating or updating a robot, you can specify capabilities in the 'Capabilities' tab of the robot modal window. Appium 2 and Selenium 4 use the W3C protocol to apply the capabilities to the robot. Therefore, it’s essential to follow the correct syntax to ensure compliance with the W3C protocol.
8.5.1. Basic WebDriver Capabilities
The syntax remains mostly the same, with the exceptions of 'version' and 'platform', which have been replaced by 'browserVersion' and 'platformName' respectively. You can find the list of W3C WebDriver standard capabilities here: https://www.w3.org/TR/webdriver1/#capabilities.
8.5.2. Appium Capabilities
With Appium 2, each Appium capability name must be prefixed with the appium prefix.
When defining Appium capabilities in the Capabilities tab, you must prefix the capability name like this: <prefix>:<capability>.
For example:
-
appium:app(instead of justapp) -
appium:appActivity(instead ofappActivity) -
…
You can find the official documentation provided by Appium:
-
General capabilities: https://appium.io/docs/en/2.0/guides/caps/
-
UIAutomator2 driver capabilities: https://github.com/appium/appium-uiautomator2-driver
-
XCUITest driver capabilities: https://appium.github.io/appium-xcuitest-driver/latest/reference/capabilities/
8.5.3. Cloud Provider Capabilities
Cerberus supports the following 3 cloud testing providers:
-
BrowserStack
-
LambdaTest
-
Kobiton
To define specific cloud capabilities, in addition to those generated by Cerberus when launching the test, you must prefix the capability name as follows: <prefix>:<capability>.
Prefixes are specific to each testing cloud provider:
-
bstackfor BrowserStack (e.g.,bstack:buildName;bstack:sessionName; …) -
ltfor LambdaTest (e.g.,lt:build;lt:name; …) -
kobitonfor Kobiton (e.g.,kobiton:sessionName;kobiton:sessionDescription; …)
Each of these testing cloud providers provides documentation on capabilities:
-
BrowserStack:
-
Web Automate capabilities: https://www.browserstack.com/docs/automate/capabilities
-
App Automate capabilities: https://www.browserstack.com/docs/app-automate/capabilities
-
-
LambdaTest:
-
Capabilities Generator: https://www.lambdatest.com/capabilities-generator/
-
-
Kobiton:
-
Launching an Appium 2 session on Kobiton: https://docs.kobiton.com/automation-testing/basic-appium-server/launch-a-basic-appium-2-session
-
Available Kobiton capabilities: https://docs.kobiton.com/automation-testing/capabilities/available-capabilities#_kobiton_capabilities
-
8.5.4. Capabilities File
You can view the capabilities used in your tests by navigating to the Robot tab in the Execution Report. Two files are available:
-
Robot caps: The list of capabilities provided by you and Cerberus to the robot.
-
Robot server caps: The capabilities generated by the server (Selenium or Appium). This file combines Robot caps and additional server-specific capabilities.
8.6. Execution settings
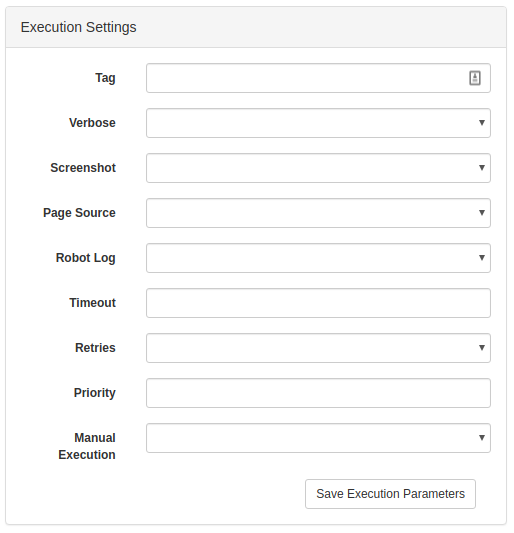
-
Tag : regroup all the execution in the same tag. It help identify this execution for reporting sake. If no value, the tag will be a timestamp. you can use %USER% and %TIMESTAMP% variable in this field.
-
Verbose : Verbose define how much trace information will be output on the execution. The higher the level is from 0 to 2 the more information will be and the slower the testcase will be executed.
Trace \ Verbose Level |
0 |
1 |
2 |
Chrome & Firefox display |
no (headless) |
yes |
yes |
JSON INFO on Cerberus Application Server logs |
no |
yes |
yes |
Save Selenium log |
no |
only when result <> OK |
yes |
Full HAR file (when using Cerberus proxy executor) (1) |
no |
no |
yes |
HAR summarized stat file (when using Cerberus proxy executor) (1) |
no |
yes |
yes |
Browserstack log activation |
no |
no |
yes |
Browserstack Save HAR and Selenium log |
no |
no |
yes |
(1) HAR and stat data is only collected if cerberus_networkstatsave_active is active.
-
Screenshot : define if screenshots and video have to be taken and the frequency.
-
Page Source : define if Page source have to be taken and the frequency.
-
Robot Log : define if robot (Selenium or Appium) log will be taken.
-
Timeout : define the maximum time (in ms) to spent in an action or control. Correspond to the time Cerberus will wait until it consider that a field or object is not available.
-
Retries : Defined the number of retries for each test cases. A retry is a re submission of a testcase (in the queue) if its status is different from OK.
-
Priority : define the priority for all the test cases (reminder: the lowest (=0) the most important). Default value is 1000. Tips: Use 0 priority only when relaunching manually a test case.
-
Manual Execution : define the test case execution type: Y : manual, N : Automatic, A : Automaticly determined from test case. default value is 'N'
Execution parameter \ Test Case Group |
AUTOMATED |
MANUAL |
PRIVATE |
N |
Automated execution |
Automated execution |
Automated execution |
Y |
Manual execution |
Manual execution |
Manual execution |
A |
Automated execution |
Manual Execution |
Automated execution |
8.7. Execution result status
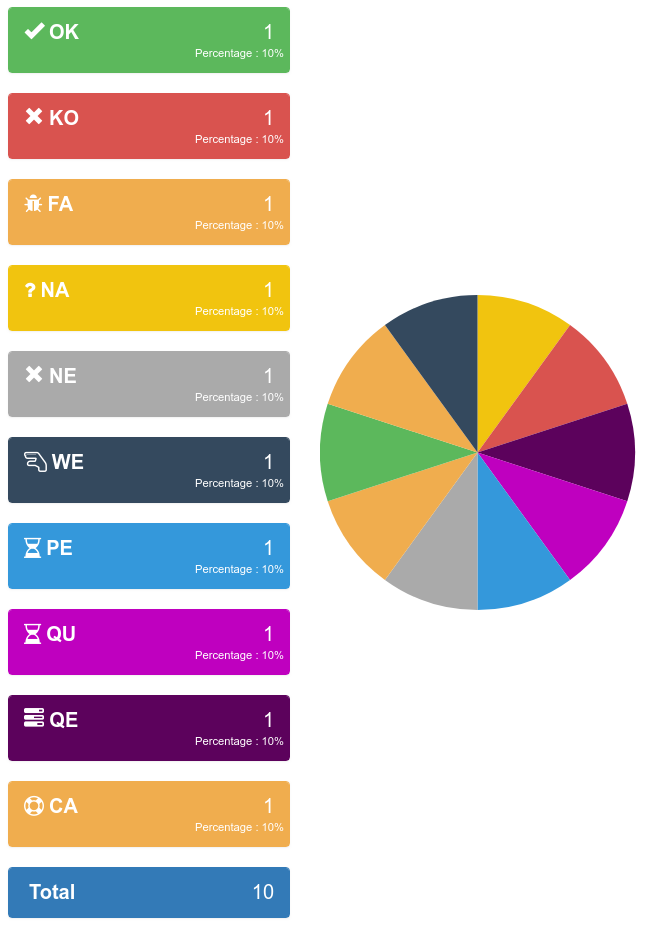
Here is a summary of all execution status with their corresponding meanings.
-
OK : The execution was performed correctly and all controls were OK.
-
KO : The execution was performed correcly and at least one control failed resulting a global KO. That means that a bug needs to be reported to development teams.
-
FA : The execution did not performed correctly and needs a correction from the team that is in charge of managing the testcases. It couls be a failed SQL or action during the test.
-
NA : Test could not be executed as a data could not be retreived. That probably means that the test is not possible in the current environment/status.
-
NE : Test Case was not executed (following a condition execution).
-
WE : Test Case was not yet executed (waiting a manual execution).
-
PE : Test Case is currently running.
-
QU : Test Case is still waiting in the queue for ressources or constrains to be released.
-
QE : Test Case failed in the queue and will not be triggered.
-
CA : Test Case has been cancelled by user.
9. Execution Queuing system
9.1. Workflow
The queuing system allow you to submit many execution and have them executed automatically ASAP depending on constrain configuration.
-
Every execution that are submitted inside the queue follow a specific workflow.
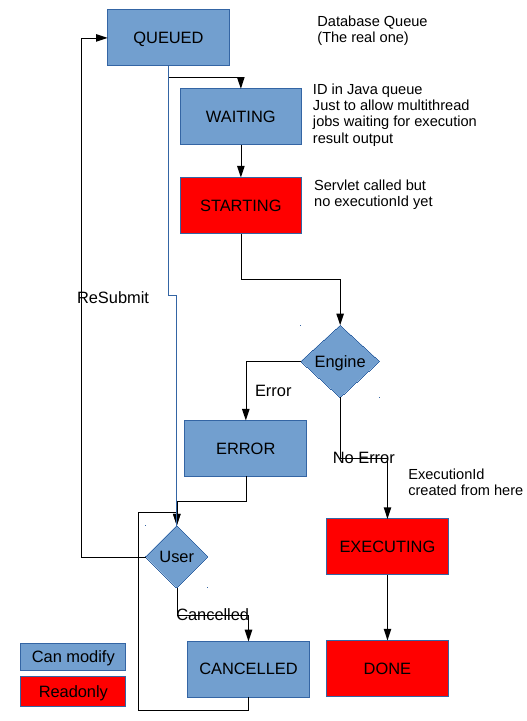
-
In order to monitor and administer the workflow every execution gets a State with an associated message. Each time the State is modified the Last State date is updated accordingly.
-
Each execution enter the queue in a QUEUED State.
-
The queue Job will analyse all the executions that are in QUEUED State in order to decide (or not) to start the execution. If none of the constrains are applied, the execution moves to a WAITING State. That state corresponding to the execution being in the final (JAVA) queue before execution.
-
It then moves to STARTING as soon as the call to the RunTestCase Servlet is done.
-
Then depending on if execution could be started, it moves in ERROR State with the associated error message or EXECUTING.
-
An execution in EXECUTING State have the execution ID defined and the followup of that execution can be monitored directly on that execution.
-
Once the execution is finished (no matter what could be the end result in terms of status - OK, KO, FA, NA, …), the execution move to the final state DONE.
-
Execution that are in state ERROR can either be submitted again in QUEUED or cancelled in state CANCELLED
-
Executions that are in state CANCELLED can also be submitted again in QUEUED state.
-
All executions that are in State QUEUED, WAITING, ERROR and CANCELLED can be modified.
-
All executions that are in State STARTING, EXECUTING and DONE cannot be modified.
9.2. Administration
The 'Executions in Queue' tab from the Executions in queue screen allow to see and count the number of exe in various state.
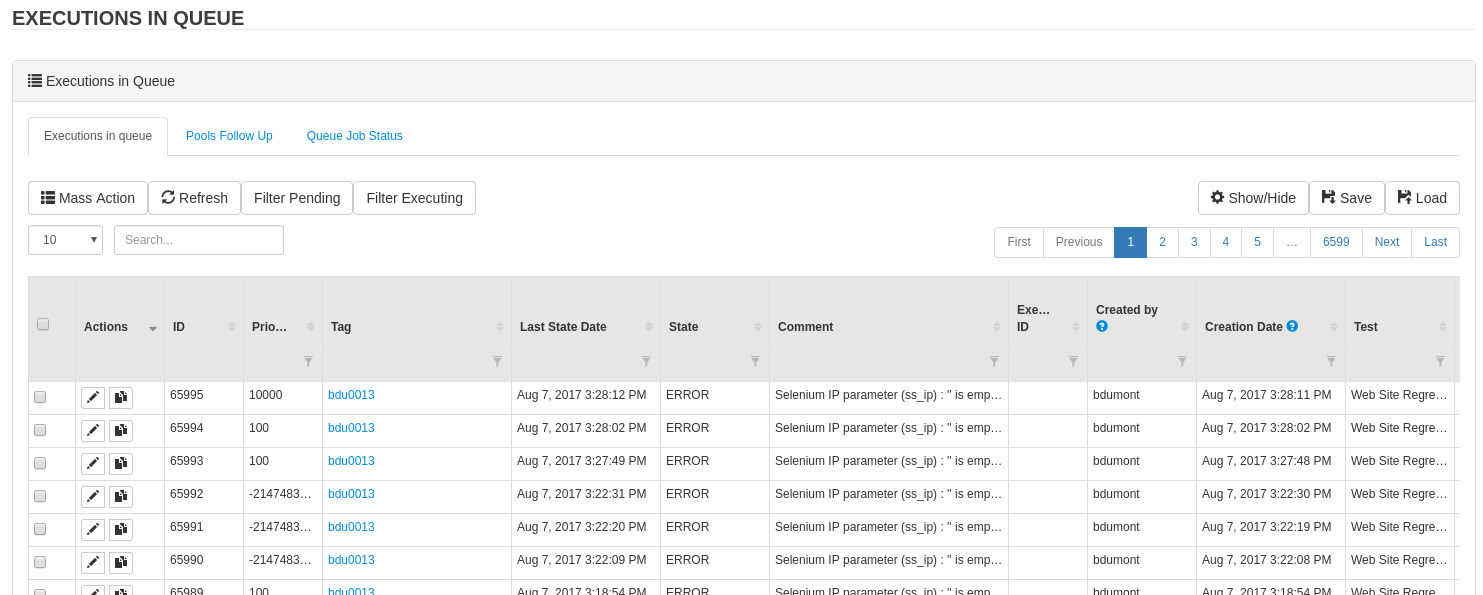
-
Button 'Filter Pending' allow to directly filter to QUEUED State.
-
Button 'Filter Executing' allow to filter state : WAITING, STARTING and EXECUTING
-
Refresh button allow to refresh the list without fully loading the page.
On each execution, you can modify its content by clicking on the edit button.
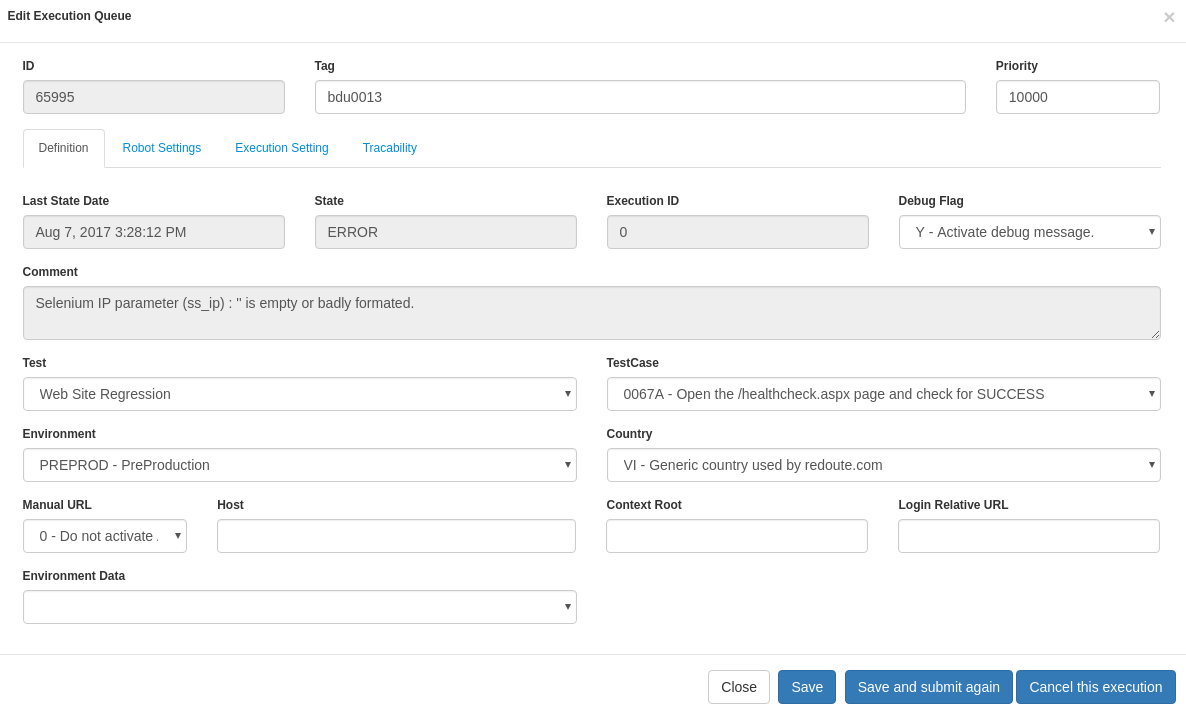
-
Button 'Save' allow to modify the parameters of the execution.
-
Button 'Save and submit again' is to save the new parameters and change the status again to QUEUED
-
Button 'Cancel this execution' is to cancel the execution by moving it state to CANCELLED
You can also duplicate it to a new execution that will be inserted in QUEUED state by clicking on the duplicate button.
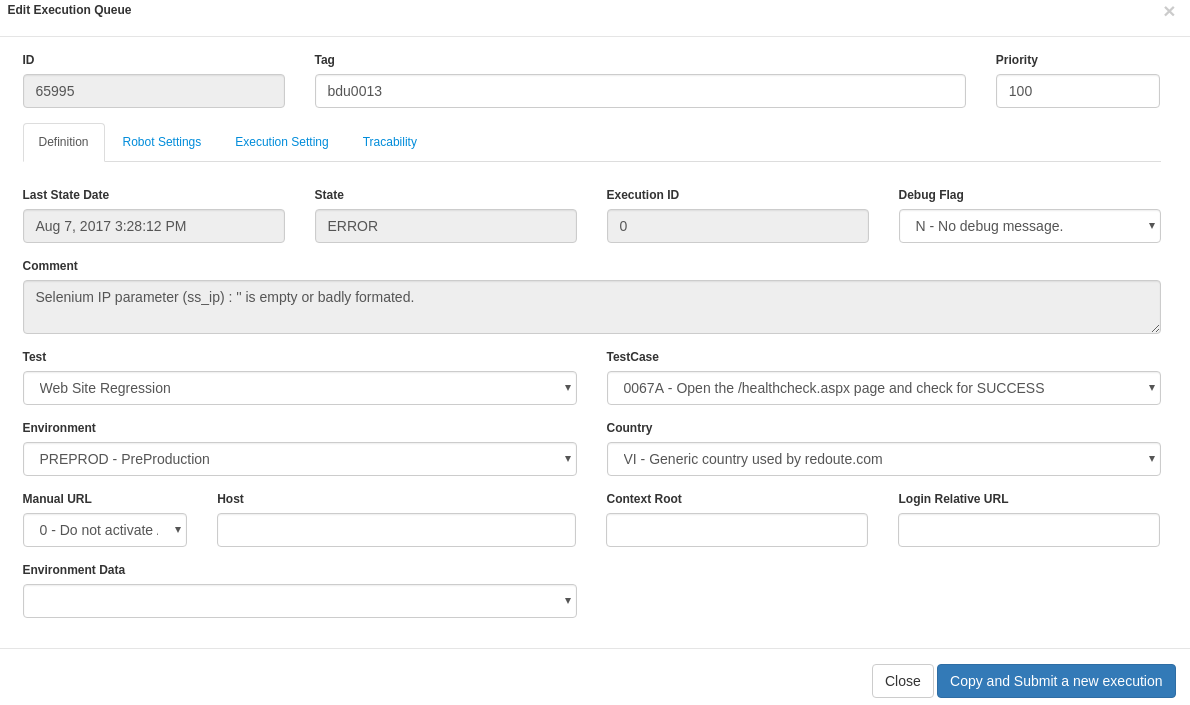
-
Button 'Copy and submit a new execution' allow to copy the execution to a new one that will be inserted in QUEUED state.
Mass Action allow to perform similar operation in a massive way. Select a list of exe and click on Mass Action button in order to open the following screen:
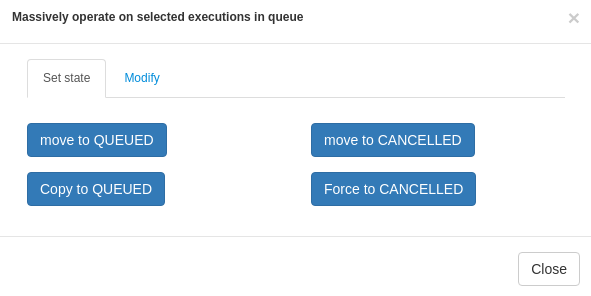
-
'move to QUEUED' allow to move an execution that is in state ERROR or CANCELLED back to QUEUED state
-
'copy to QUEUED' allow to copy the list of execution to new executions that will all be in QUEUED state.
-
'move to CANCELLED' allow to cancel the list of execution that are in state ERROR or QUEUED
-
'force to CANCELLED' should be used only in very rare occasion when some executions are stuck in WAITING, STARTING or EXECUTING state. That could happen for example if Cerberus has been stopped when executions were still processing.
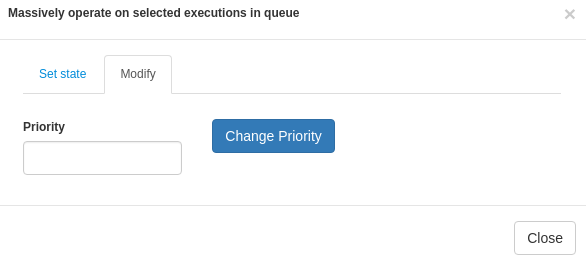
On that screen you can massively modify the priority of the execution list. Just put the new priority value and cick on 'Change Priority'
9.3. Priorities management
-
By default, execution are treated in FIFO mode.
-
Each time the queue job analyse the list of QUEUED execution, it will analyse them sorted by priority ascending + by queueID ascending.
-
Default Priority value is 1000.
-
If you want to increase the priority of the given execution, you can change it to any value bellow 1000. The lower priority value takes, the higher the priority will be.
-
If you want some execution to be treated last, change it to any value above 1000.
9.4. Constrain management
When submitting too many execution in a too short period of time, the result could be uncertain due to overloading the application being tested or robot infrastructure used. In order to prevent that issue, 3 levels of constrains can be defined.
-
constrain 'constrain1_global' : Global level of constrain in order to secure that Cerberus itself is not saturated by number of simultaneous execution. Parameter cerberus_queueexecution_global_threadpoolsize allow to configure the number of simultaneous execution will handle in total.
-
constrain 'constrain2_applienvironment' : Application/Environment level constrain. An application on a given environment could have some limitation that can be controlled by that constrain. The number of simultaneous execution can be defined in 'Pool Size' field from application screen or Environment screen.
-
constrain 'constrain3_application' : Global Application level constrain. An application could have some limitation (whether environment) that can be controlled by that constrain. The number of simultaneous execution can be defined in 'Pool Size' field from application screen.
-
constrain 'constrain4_robot' : Robot level constrain. Some robot cannot handle too many execution at the same time. The configuration of simultaneous execution is done at robot host level. Please use public invariant ROBOTHOST in order to define that number of simultaneous execution using gp1 field.
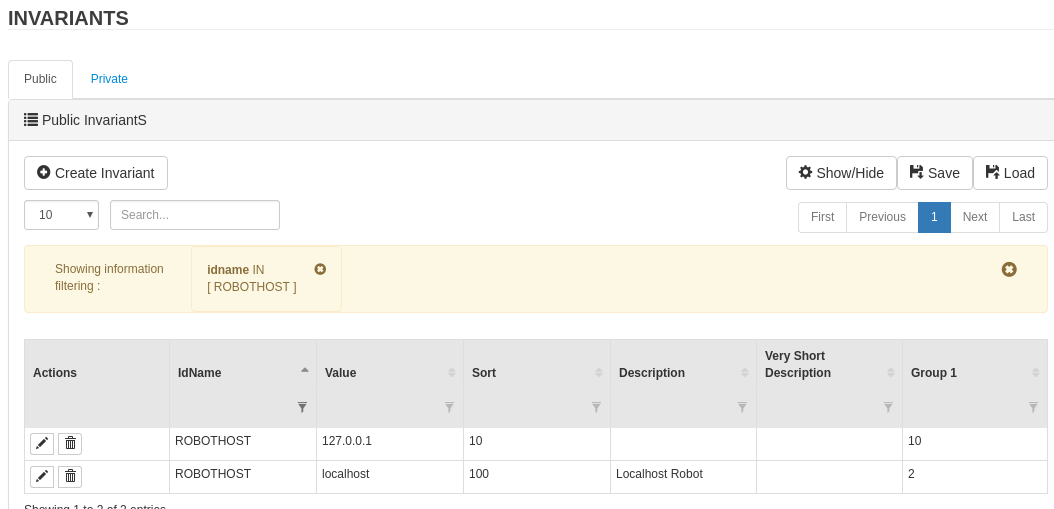
A default value can be configured with parameter cerberus_queueexecution_defaultrobothost_threadpoolsize. That parameter will be used in case the invariant entry does not exist or cannot be converted to numeric value.
|
Note
|
Only the applications that require a robot will enter to that constrain (GUI, IPA, APK, FAT). |
The 'Pools Follow Up' tab allow to control and follow up all those constrain value
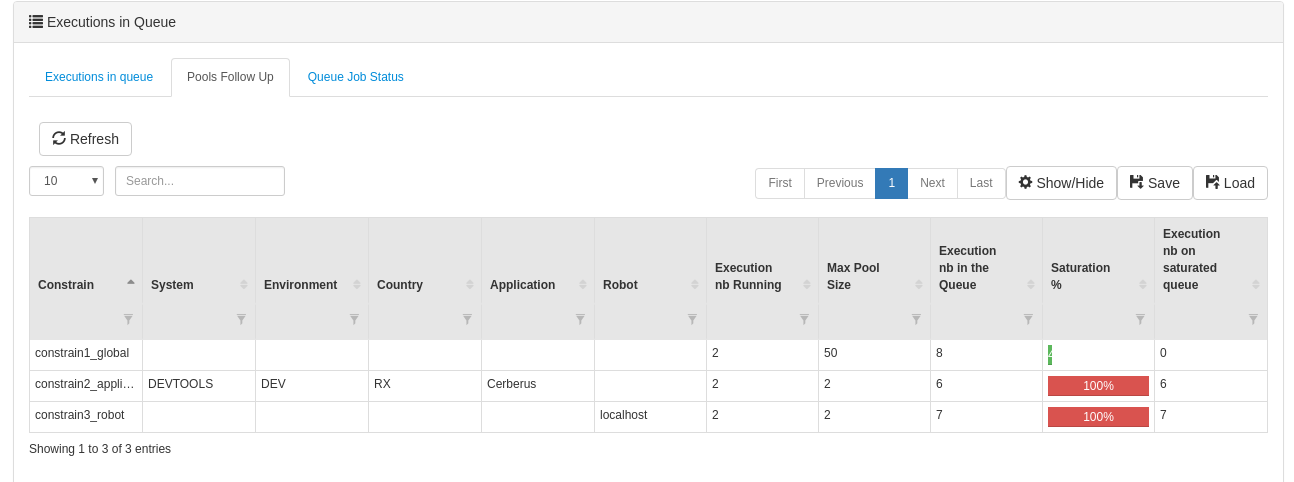
In that example, there is currently 2 executions for a global maximum of 50 executions. A total of 8 executions are still in the queue (that will be treated once the 2 pending will be finished). Saturation level is at 4% and considering that global queue is not saturated, there are no execution pending on saturated queue.
There is currently 2 executions running against Cerberus application in DEV for RX country. On that application / environment, a total of 6 executions are still in queue. That queue is saturated at 100% and 6 executions are in the queue on that saturated queue.
There is currently 2 executions running against localhost robot. On that robot host, a total of 7 executions are still in queue. That queue is also saturated at 100% and 7 executions are in the queue on that saturated queue.
Sorting the last column will give the constrain/queue that require the most attention in order to speedup the global execution of the campaign.
TIP : In case you have an execution that you don’t understand why it is not released, you can modify for that execution the debug Flag to Y. Next time the queue job execute, the state message will detail the constrain that prevent the execution to be released.
The 'Queue Job Status' tab allow to monitor the 'queue execution job'.
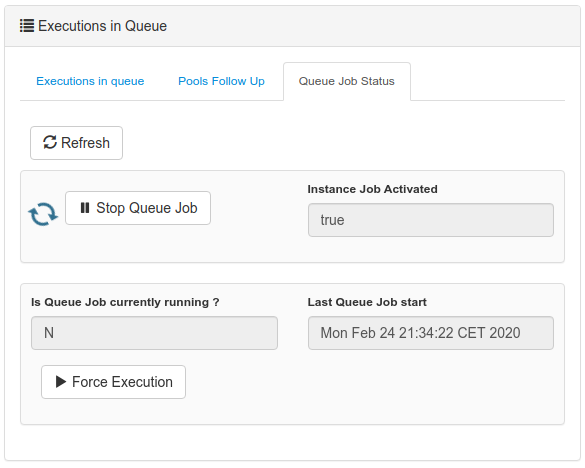
-
'Instance Job Activated' is at Y when the job on that instance (Tomcat JVM instance) is allowed to run. Job can be temporary disabled during maintenance period using the manage API.
-
'Is Queue Job currently running ?' is at Y when the job that analyze the queue is currently running (that should almost never happen).
-
'Last Queue Job start' correspond to the time when the last job was triggered. That job automatically trigger when a new execution is inserted inside the queue or an execution finish (releasing some space for a new execution to start).
Button 'Stop Queue Job' allow to stop the queue job to be triggered. That will stop submitting new execution keeping all of them into the queue until the job is started again.
Button 'Force Execution' will force the execution in case the job is not automatically triggered.
10. Campaign management
10.1. Test campaign
A campaign is composed of - a list of testcases (that can be specified either by test battery of labels) - a list of country(ies) - a list of environment(s) - a list of browser.
Campaign is used when you want to trigger a perimeter of testcase on a given country and environment. Campaign name can be specified when calling public API AddToExecutionQueue.
When a Campaign execution is triggered, notifications can be sent to a distribution list at the beginning or the end of the campaign execution. Flags can be used in order to activate the sending of the email. Distribution list can be configured. Email from, subject and body can be configured by changing parameters that start by cerberus_notification_tagexecutionend and cerberus_notification_tagexecutionstart
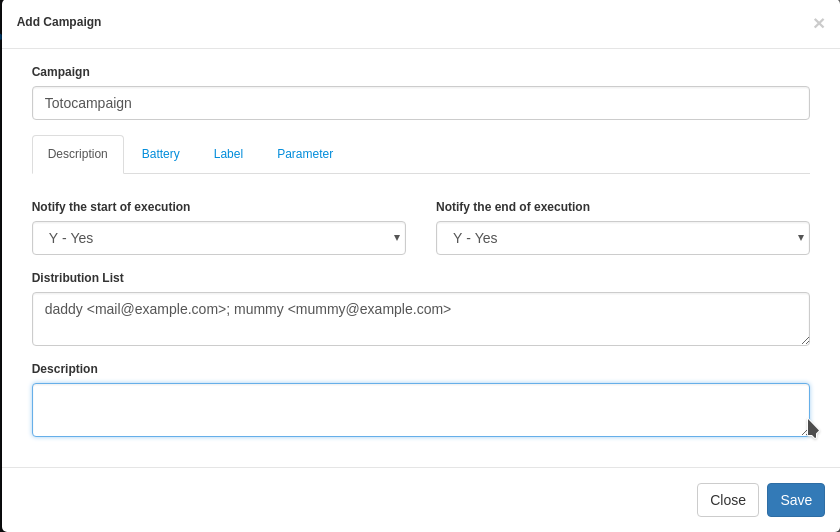
10.2. Schedule campaign
The campaigns can be scheduled through the modal. Open the scheduler tab and pass the Quartz-CRON expressions that will plan the execution.
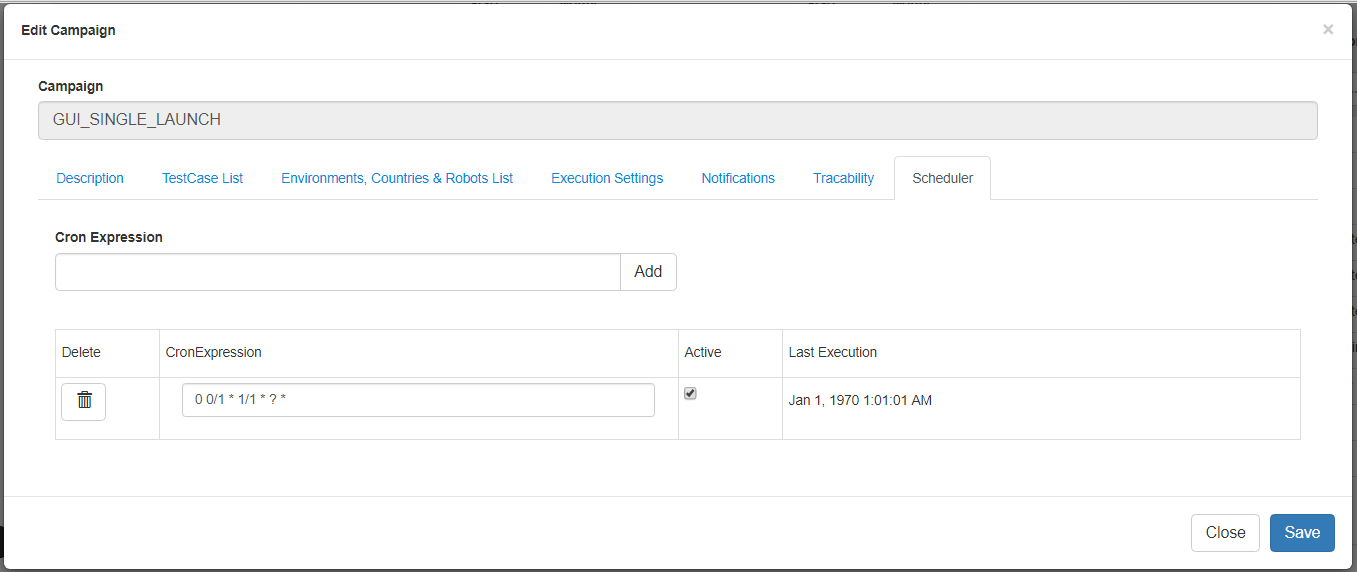
Cron is an expression format that will allow you to define a frequency of execution. To generate one easily use the following site: http://www.cronmaker.com/
you can add as many CRON entries as you want
Test Data Management
11. Data library
11.1. Create data
A Test Data Library is used to store or define the way to retrieve the data that will be necessary to perform the tests. Different way of getting the data can be used (INTERNAL, SQL, SERVICE or CSV) but that definition is independent from the test case definition so that you can easily change from one to another without impacting all the corresponding test cases.
The first sub-data does not require a name, it correspond to the key of the datalib and should be unique to that entry. Inside a testcase, if property PROP1 is defined as getFromTestDataLib on that data, that sub data is retreived as %PROP1%. The other sub data values are retreived as %PROP1.SUBDATA1%.
If you do not select an environment, a system and a country, your data will be available for all environments, systems and countries.
Cerberus allows the definition of 4 types : INTERNAL, SQL, CSV and SERVICE
TYPE |
Description |
INTERNAL |
Static test data - in each execution the values used by the test cases are statically definied directly in Cerberus. |
SQL |
Test data obtained from a SQL execution – values depend on what the SQL return on the corresponding environment. |
CSV |
Test data obtained from a CSV file structure privided by a URL. Values depend on the result of the service call to CSV file. |
SERVICE |
Test data obtained from a SERVICE call – values depend on the result of the service call. Service needs to be configured on Service screen inside application menu. |
11.2. Data configurations
11.2.1. INTERNAL configuration
This is used to store the test data directly inside Cerberus. This is considered as being static as it will require to define manually each data inside Cerberus. No specific configuration needed, just feed static sub data values in subdata tab.
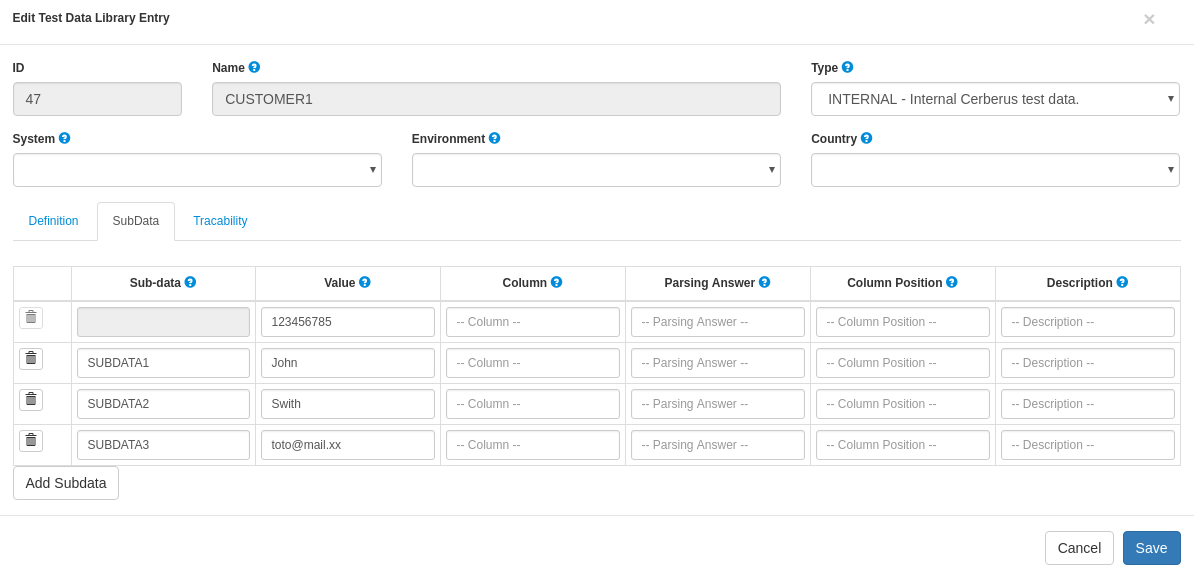
NOTE : You can define as many INTERNAL data lib entry as you want be giving them the same name. That way, Cerberus will be able to pick one of them from that list (just like it would for the dynamic type such as SQL, SRVICE or CSV).
11.2.2. SQL configuration
This is used to retrieve the test data in a dynamic way from any database that has JDCB driver available (it still require Glassfish configuration to create the corresponding connection pool). The SQL will be performed during the test execution to get the data in the right environment at the right timing..
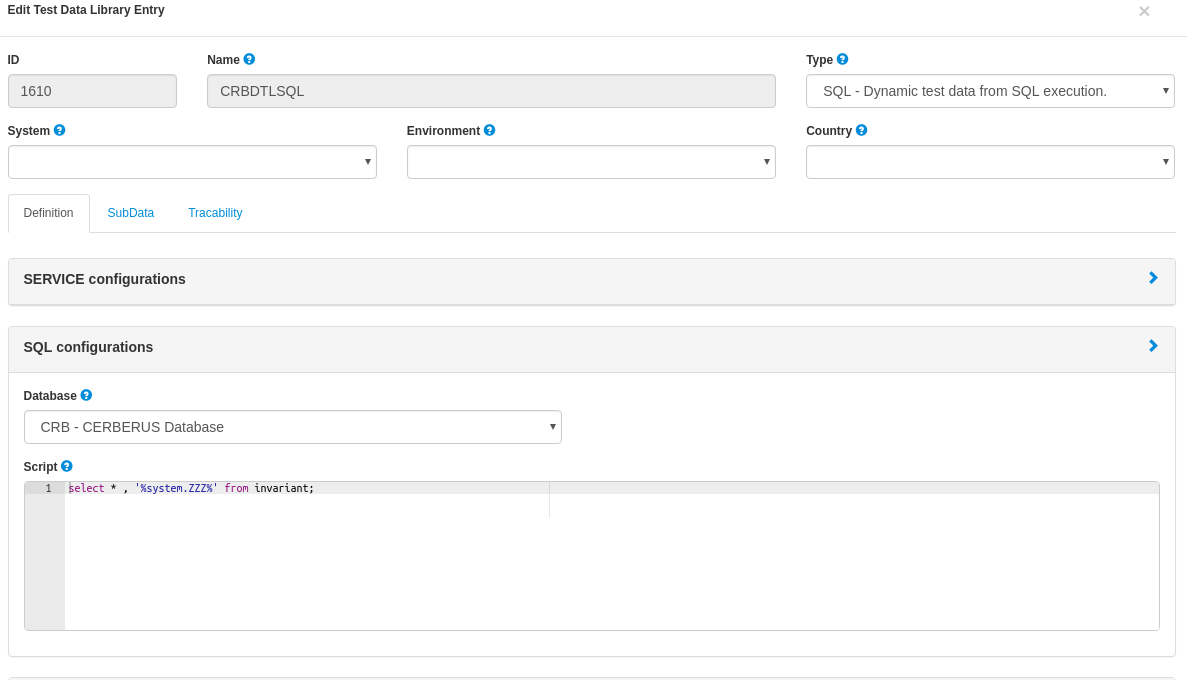
Field |
Description |
Database |
Database where the script attribute should be executed. |
Script |
SQL Script you want to execute. |
All Subdata now need to be defined in Column with the name of the column where the subdata is defined.
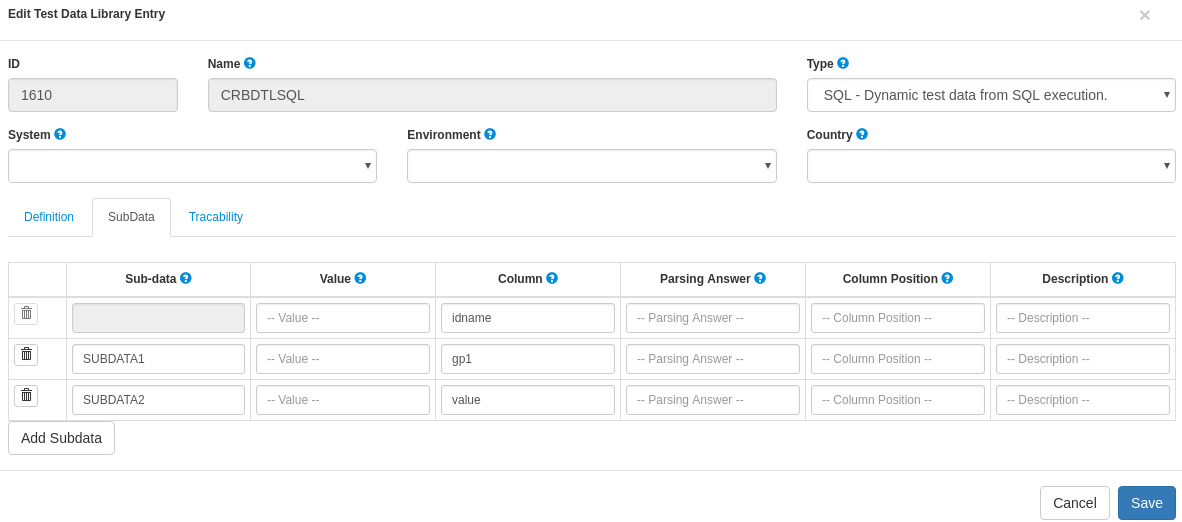
11.2.3. SERVICE configuration
Just like SQL, it will get the data in a dynamic way but from a service call in stead of an SQL. The best option is to define a corresponding service (Service) and point to it (it can then be REST (both GET or POST) or SOAP).
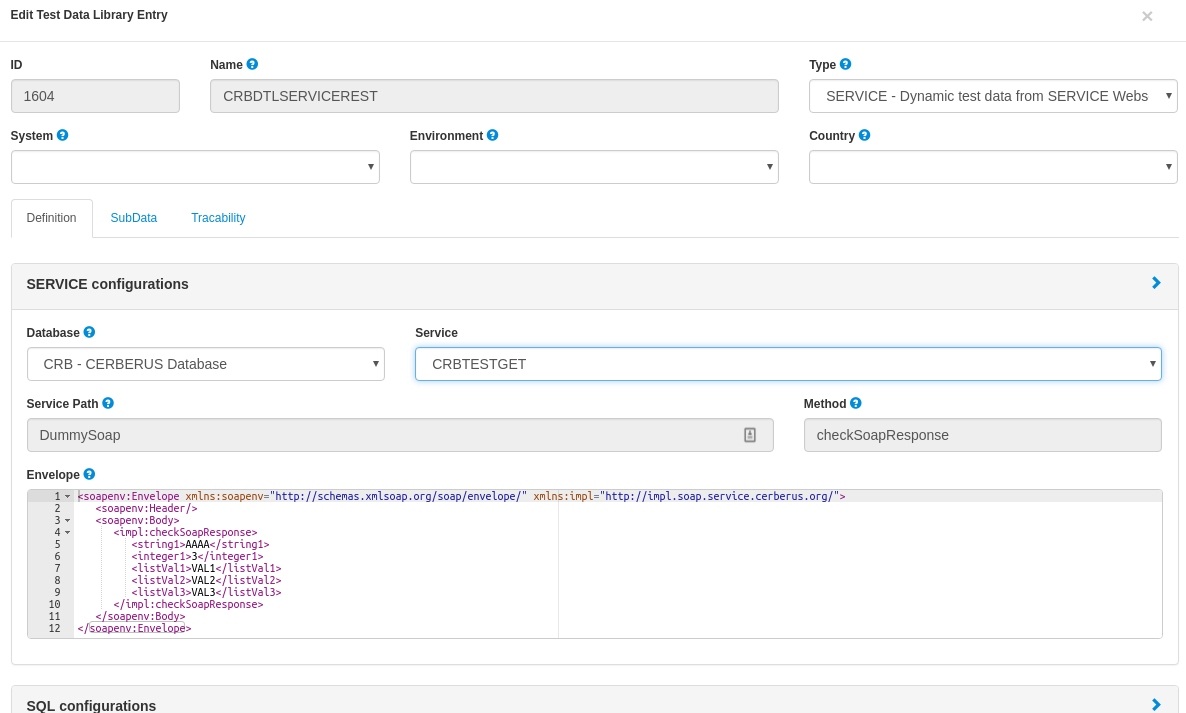
But you can also directly define a Service call request (Service Path, Method and Envelope) if it is in a SOAP format.
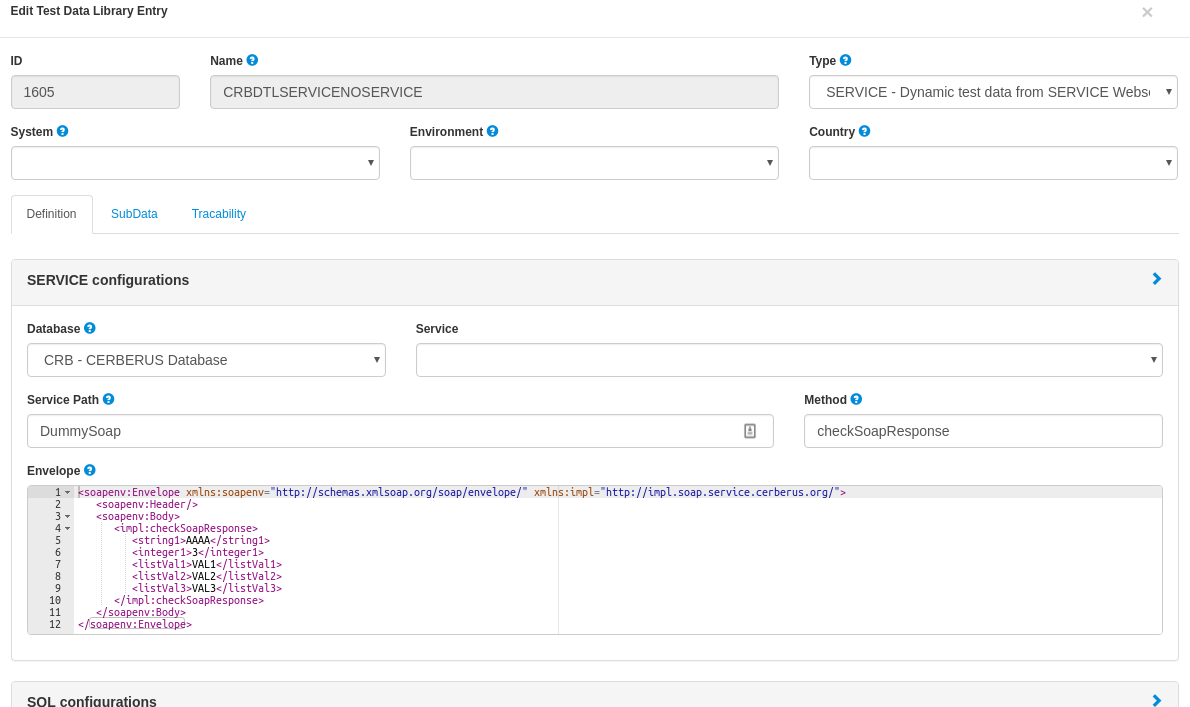
Field |
Description |
Database |
Database where the Service Path will be requested. (optional) |
Service |
Name of the service that define the request. |
Service Path |
Location of the service. Example: http://mydomain/mywebservicelocationmywebservicelocation |
Method |
Method that is invoked by the SOAP request/call. |
Envelope |
Envelope that is sent in the SOAP request. |
All Subdata now need to be defined in Parsing Answer with the xpath or jsonpath where the subdata is defined.
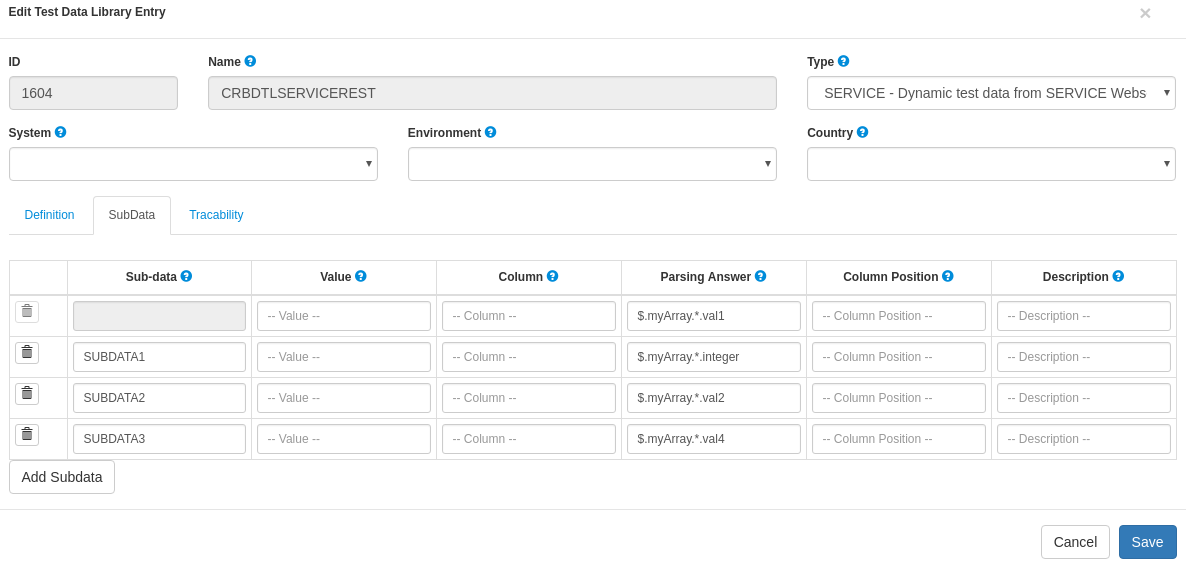
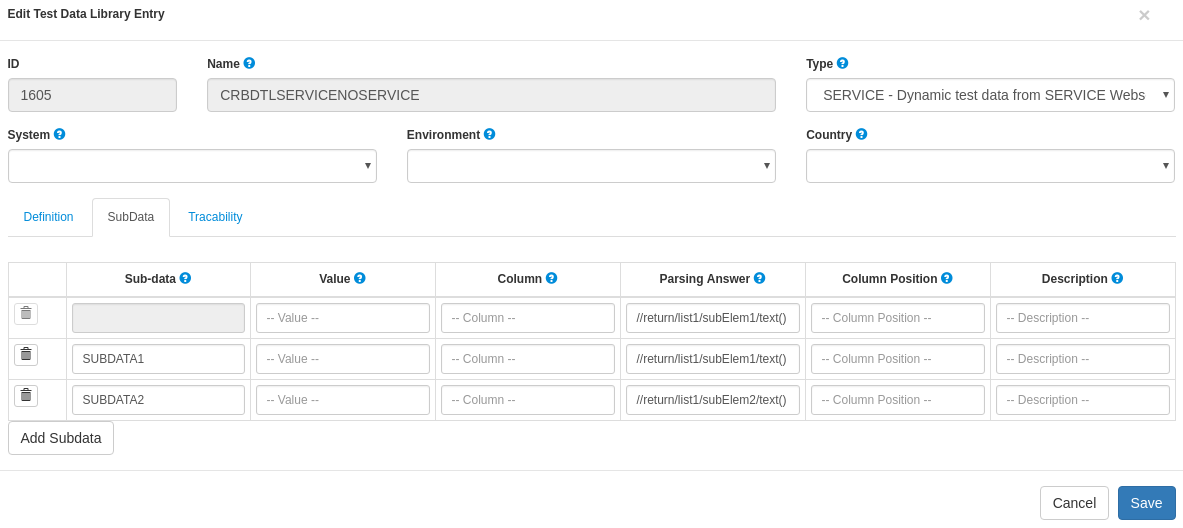
11.2.4. CSV configuration
Just like SQL and SERVICE, it will get the data in a dynamic way but from a csv flat file (that can be static or dynamic). Just define the path to the csv file and separator used.
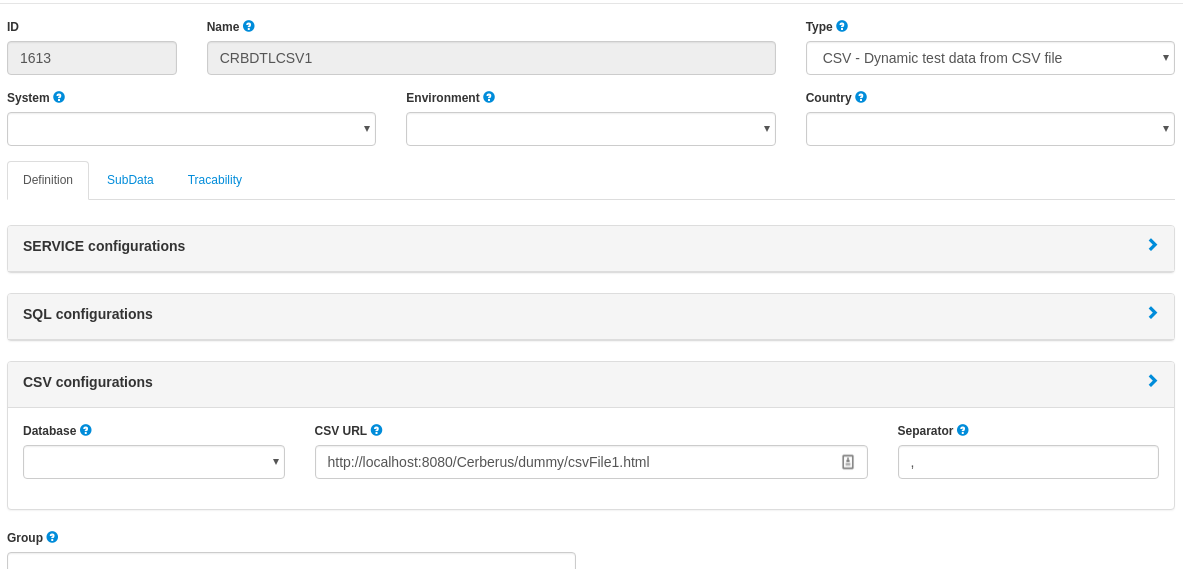
Field |
Description |
Database |
Name of the database the define the root path where to get the CSV file. (optional) |
CSV URL |
CSV URL specifies the URL where the CSV can be reached. Can be a full URL but also a relative URL in case the Database information is provided and configured at environment level. |
Separator |
Separator used parsing a CSV. |
All Subdata now need to be defined in Column Position with an integer that define the number of the column where the subdata is defined.
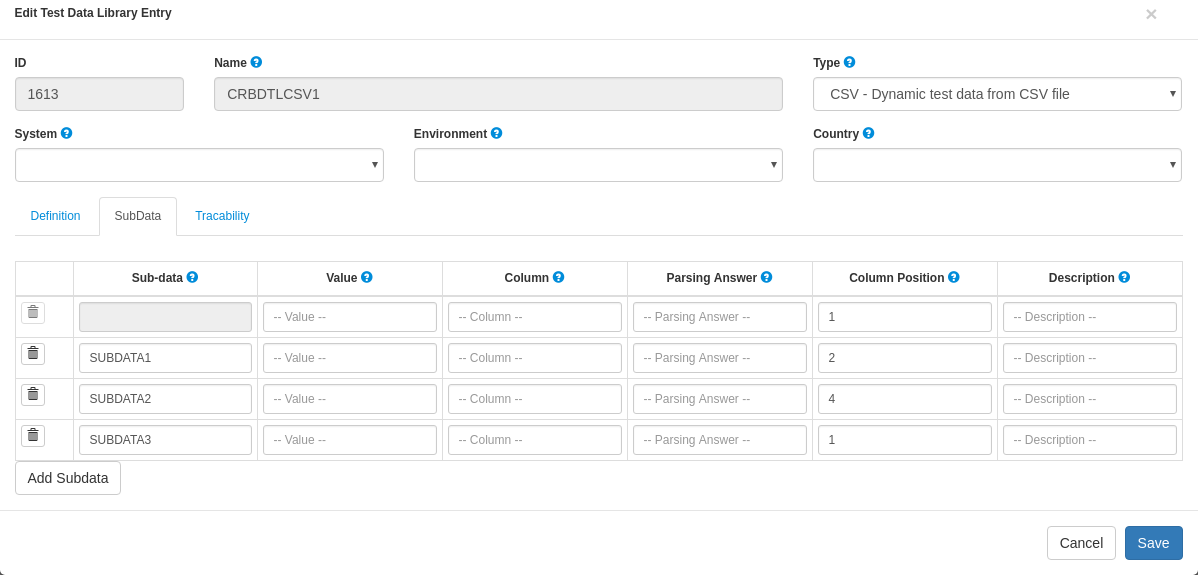
11.2.5. Database field configuration
Database can be configured for data library of types : SQL, SERVICE and CSV. It is used in order to make the access to the data linked to the environment so that, a testcase executed in PROD environment will not call the same URL (or access the same JDBC ressource) as in UAT.
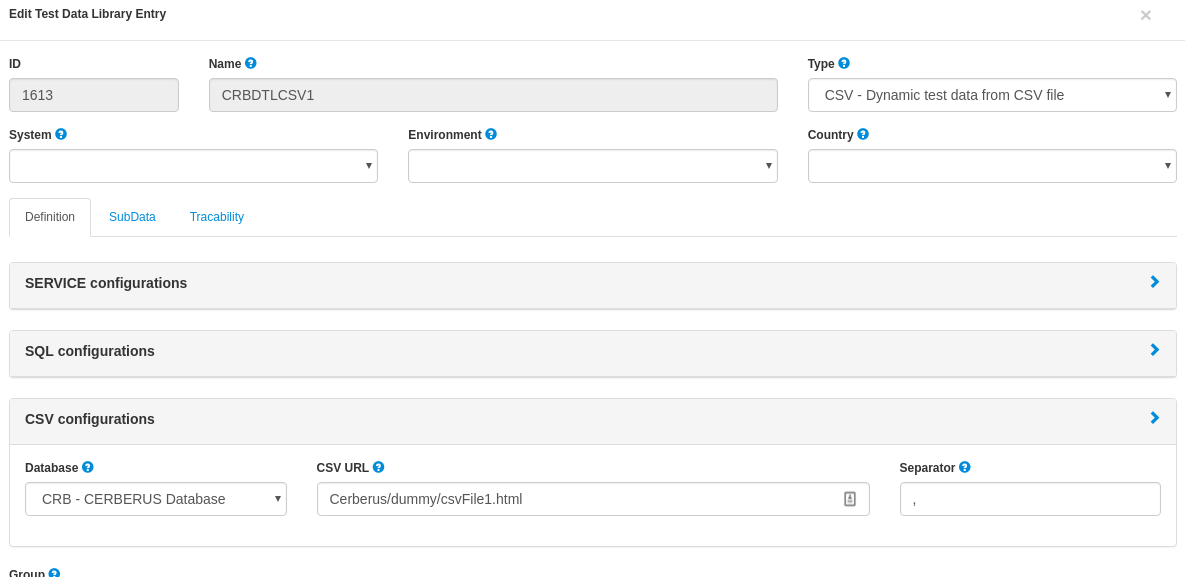
In that example, CRB database has been defined and as a consequence, CSV URL has been modified to be relative.
Databases can be created inside invariant screen. Use PROPERTYDATABASE idname.
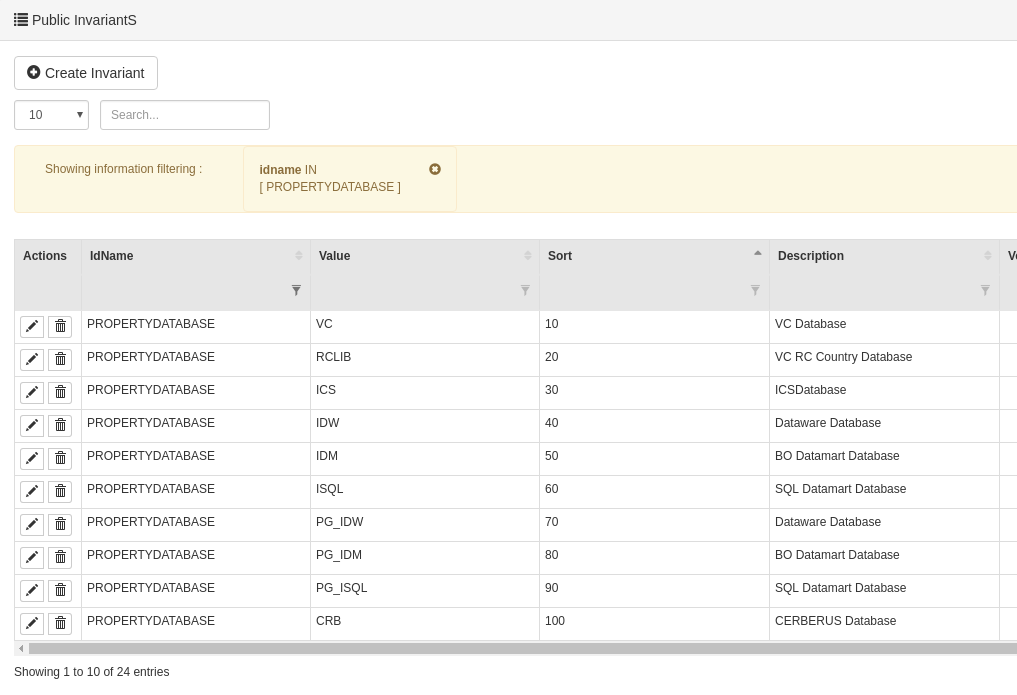
Once the database is created in invariant table and used inside the test data library, you can define the context of the data access calls for each environment (System + Country + Environment) inside the Environment screen for the 3 types of datasource :
-
For SQL Test Data Library -→ JDBC Ressource : Connection pool name to be configured inside Glassfish application server.
-
For SERVICE Test Data Library -→ SOAP Service URL : Left part of the URL that will be used to call the Service URL
-
For CSV Test Data Library -→ CSV Service URL : Left part of the URL that will be used to get the CSV file.
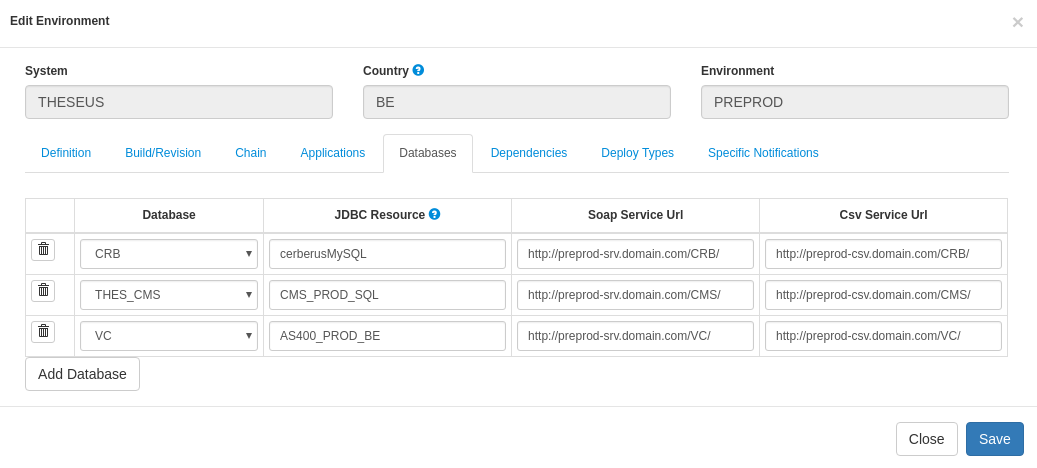
Application and Environment Management
12. Environment
12.1. Environment
In this section, you will find information on how to manage environment in Cerberus.
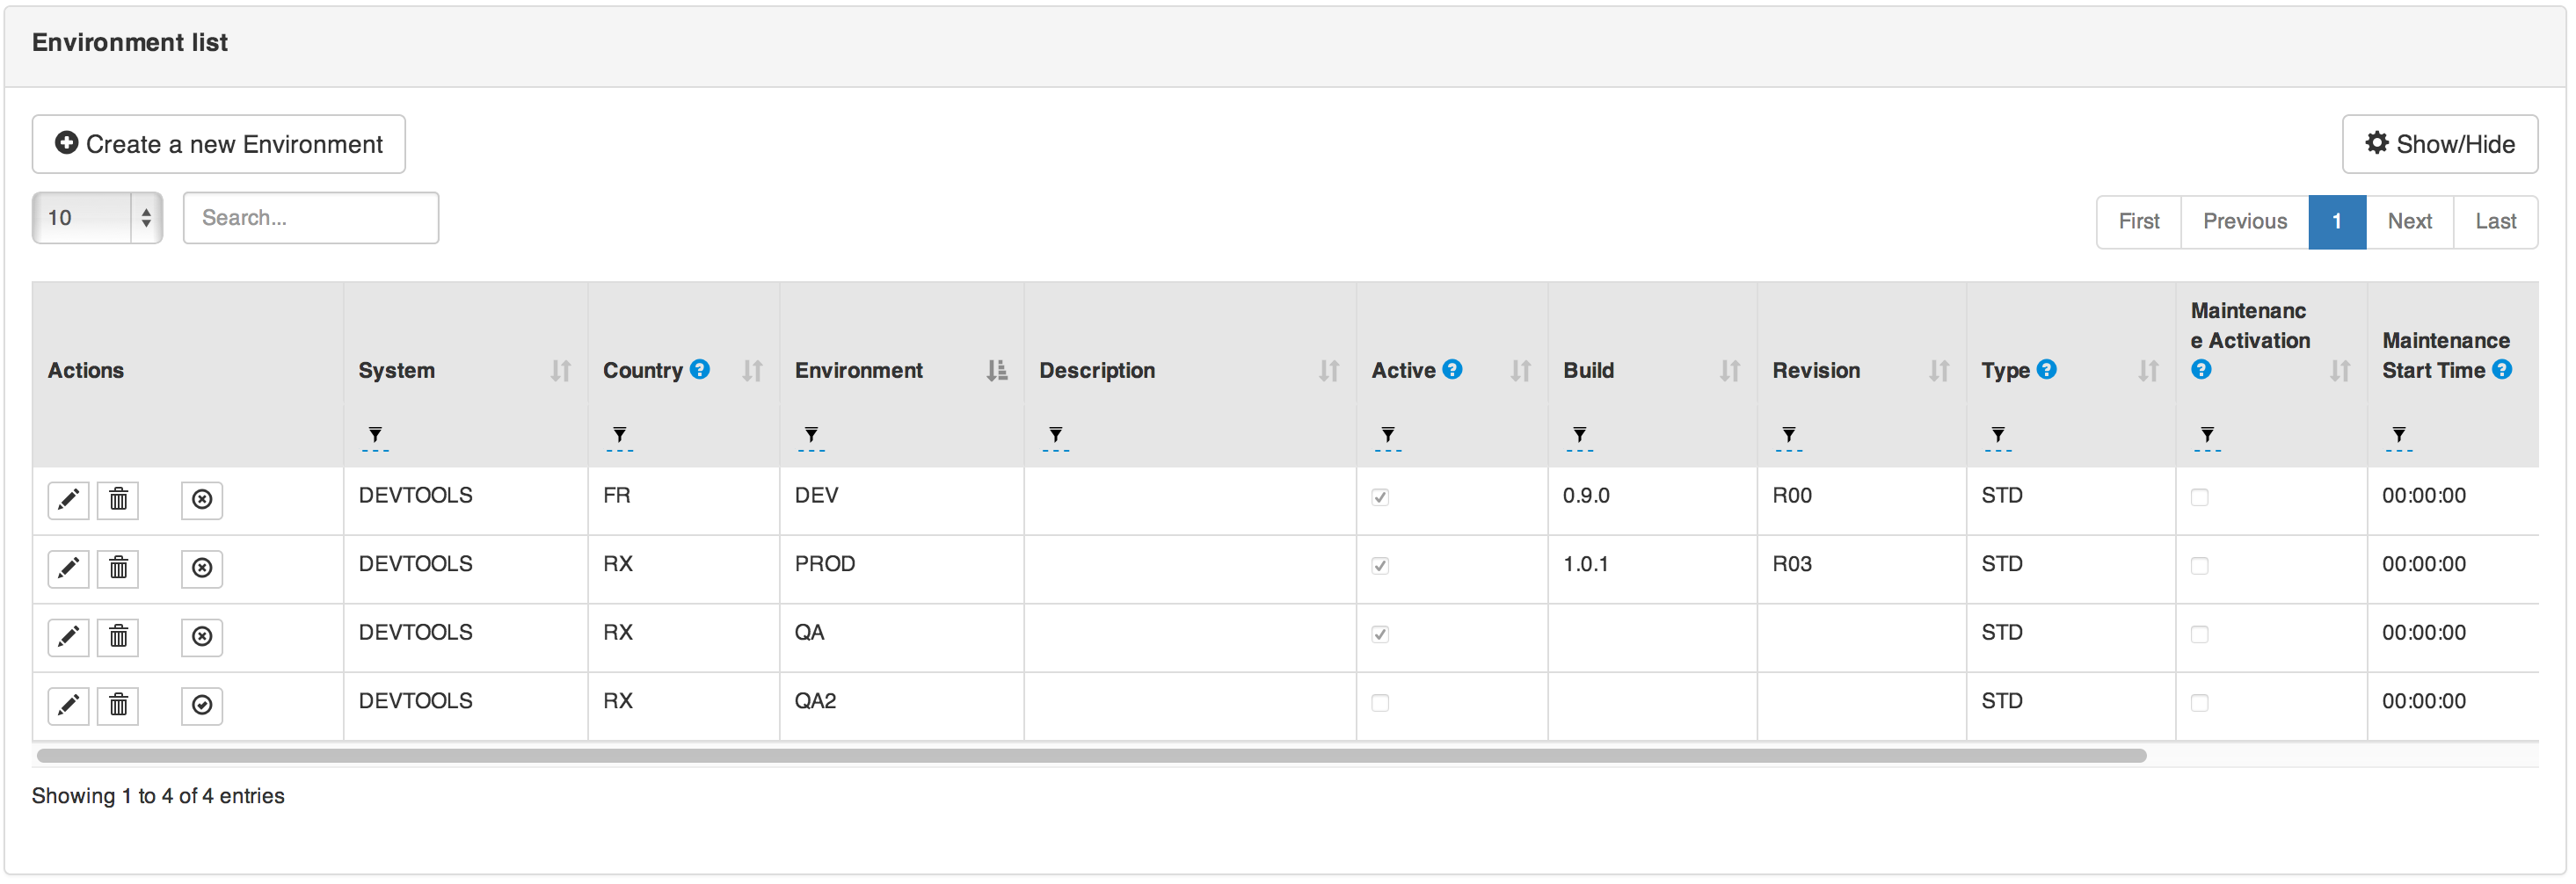
12.2. Environment Attributes
Field |
Description |
System |
System. |
Country |
Country. |
Environment |
Environment. |
Description |
Description of the test. |
Active |
Define if the test is active. When Inactive, all associated test cases will be desactivated and will be allowed to be executed. |
13. Application configuration
13.1. Application
In this section, you will find information on application configuration in Cerberus.

13.2. Application attributes
Field |
Description |
Application |
Cell in column 2, row 3 |
Description |
Cell in column 2, row 3 |
Sort |
Cell in column 2, row 3 |
Type |
The Type of the application define whether the application is a GUI, a service or a batch treatment. More detail in the Application type section. |
Bug URL |
This correspond to the URL that points to the bug on the Bug system of the application. Variable %BUGID% can be used on the URL. |
New Bug URL |
This correspond to the URL that points to the page where a new bug can be created on the Bug system of the application. More detail in the New Bug URL section. |
13.2.1. Application type
- Application type recognizable by Cerberus
-
-
GUI (Web application using Selenium backend)
-
APK (Android application using Appium backend)
-
IPA (IOS application using Appium backend)
-
FAT (Fat application using Sikuli backend)
-
BAT (BATCH application)
-
SRV (Service)
-
NONE (Not defined)
-
13.2.2. New Bug URL
This correspond to the URL that points to the page where a new bug can be created on the Bug system of the application.
The following variables can be used inside the URL :
%TEST% |
Test |
%TESTCASE% |
Test case reference |
%TESTCASEDESC% |
Description of the test case |
%EXEID% |
Execution ID |
%EXEDATE% |
Start date and time of the execution |
%ENV% |
Environment |
%COUNTRY% |
Country |
%BUILD% |
Build |
%REV% |
Revision |
%BROWSER% |
Browser used during the test execution (ex : firefox, chrome,…) |
%BROWSERFULLVERSION% |
Browser fulle version used during the test execution (ex : firefox 47 LINUX,…) |
14. Application Object
14.1. Application object
In this section, you will find information on application object in Cerberus.

15. Service Library
15.1. Introduction
There are four service type :
-
SOAP : for SOAP endpoints
-
REST : for REST endpoints. Http with corresponding method (GET, POST,…)
-
FTP : interact with files using FTP protocol
-
KAFKA : for Apache Kafka Topics
15.2. SOAP Service
TBD
15.3. REST Service
TBD
15.4. FTP Service
TBD
15.5. KAFKA Service
In order to connect to a Kafka stream, you need to feed the following parameters:
-
Service Path : should have the list of kafka and port target. Ex : kafka-public-company-id.aivencloud.com:27453
-
Kafka Topic : the name of the topic to interact with Ex : cerberus-example
Additionally, you can define some extra key/value parameters inside Header tab.
Ex for connecting to Kafka public Aiven service in SSL mode (value depend from your own configuration) :
security.protocol |
SSL |
ssl.keystore.type |
PKCS12 |
ssl.keystore.location |
/opt/config/client.keystore.p12 |
ssl.keystore.password |
password |
ssl.truststore.location |
/opt/config/client.truststore.jks |
ssl.truststore.password |
password |
ssl.endpoint.identification.algorithm |
In Cerberus, depending on the value provided in Method field, you can :
-
produce an event to a topic → PRODUCE
-
search for an event in a topic → SEARCH
15.5.1. PRODUCE
When producing an event to Kafka, you should define :
-
'Kafka Key' that will contain the key of the event produced. Kafka will use that information in order to route it to correct partition.
-
'Service Request' that will contain the content of the event sent to the corresponding topic.
15.5.2. SEARCH
When searching an event from Kafka, at the action level you will be allowed to provide :
-
Nb Evt : That define the max number of event to wait until the action is released with the associated content.
-
Evt Wait sec : That define the number of second that Cerberus will wait until it gets the target 'Nb Evt' events to retrieve.
Cerberus will wait until either the number of event retrieved or time is reached.
When a test case contain a callService action with a KAFKA SEARCH method, at the beginning of the execution, Cerberus will automatically store the latest offset of each partition of the selected topic. When the action is reached, Cerberus will automatically search the events starting at the previously saved offset. That prevent Cerberus to search on the full list of events inside the topic securing performance of the test over time.
Additionally, you can filter the event with 2 method :
-
Fill a 'Event Filter Path' in jsonpath format and corresponding 'Event Filter Value' in order to filter from the events content and keep only the matching ones.
-
Fill a 'Message Filter Path' in jsonpath format and corresponding 'Message Filter Value' in order to filter from a json document that content both header and body of the message.
{
  "partition": 0,
  "offset": 3145,
  "header": {
    "cerberus-token": "3027",
    "testheader": "value2"
  },
  "value": {
    "surname": "DUPONT",
    "name": "Bernard41"
  },
  "key": "11"
}
Header Filter Path = $.header.testheader
Header Filter Value = value2
Event Filter Path = $.surname
Event Filter Value = DUPONT
|
Tip
|
Generate a functional unique key to Cerberus (e.g. 'cerberus%system.EXECUTIONID%') or use an existing one that will be available in the events to filter the results. |
|
Tip
|
If you want to have multiples conditions you can use the following syntax as json path :
|
|
Tip
|
Extra Json path external documentation : https://support.smartbear.com/alertsite/docs/monitors/api/endpoint/jsonpath.html |
Avro Support
Cerberus support Avro data serialization system. You can just activate the feature by checking the corresponding checkbox and feed the Avro Schema registry URL. Cerberus will automatically generate the necessary Kafka Property in order to configure it.
|
Note
|
So far only consume is supported. |
16. SQL Library
17. Deploy type
18. Batch
18.1. Batch invariant
In this section, you will find information on batch

19. Build content
19.1. Build content
In this section, you will find information on build content in Cerberus
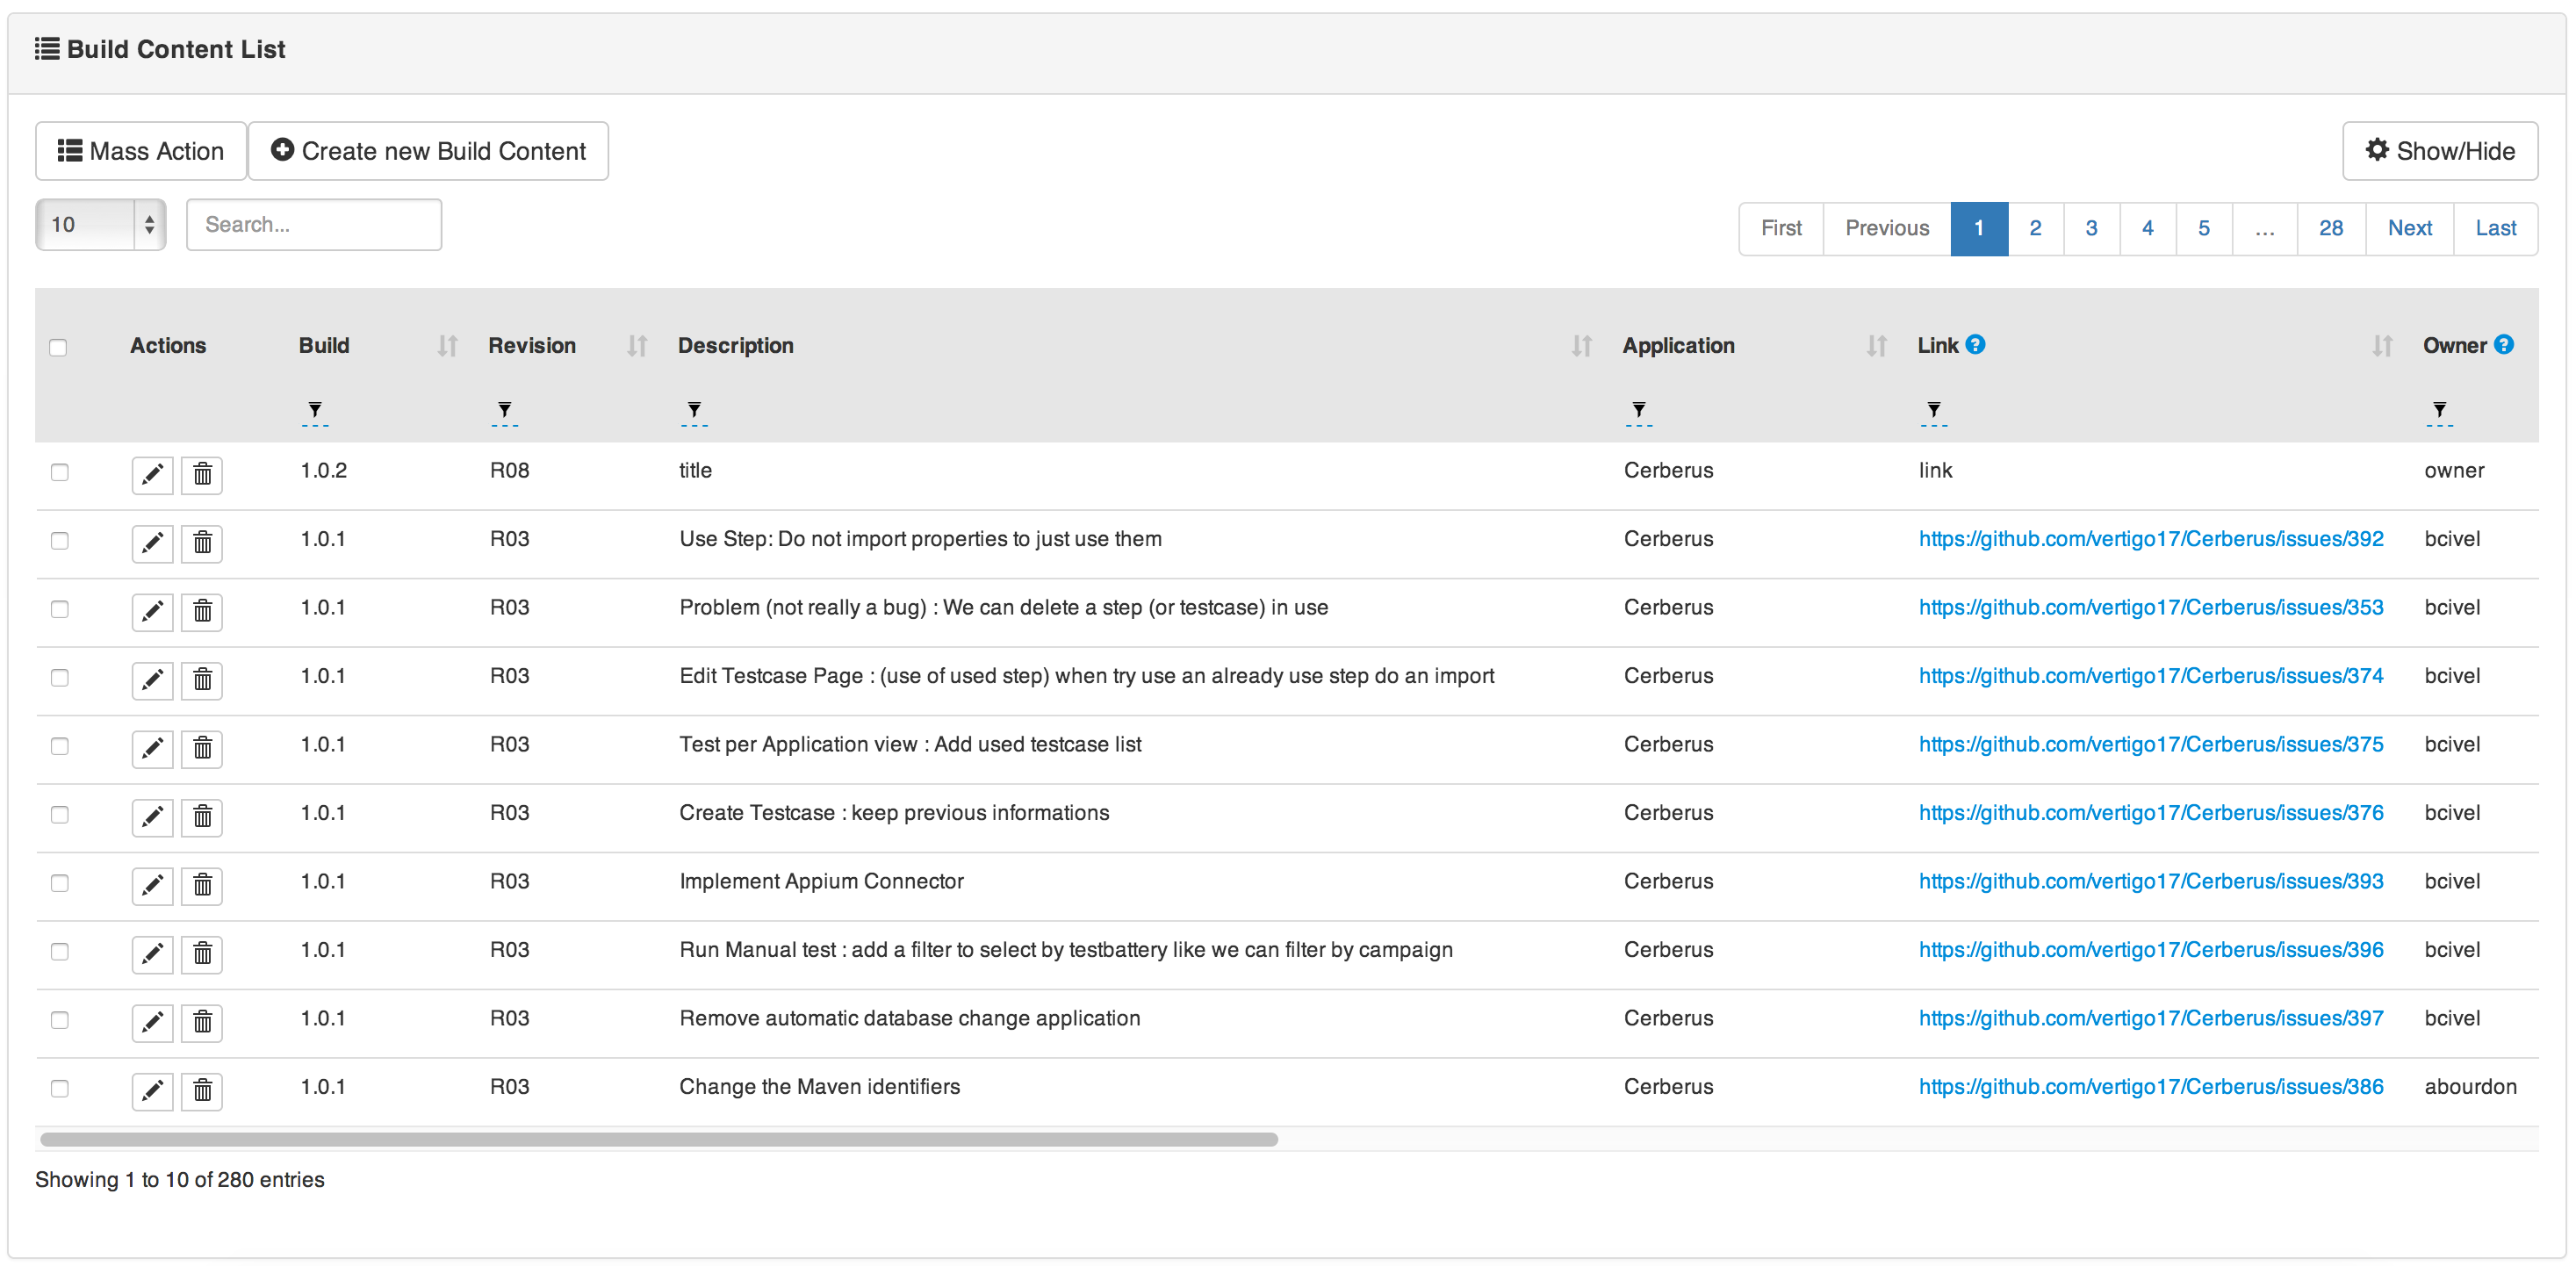
19.2. Build content attributes
Field |
Description |
To build |
To Build. |
19.3. Create build content
19.3.1. Manually
-
Go to Integration → Build Content.
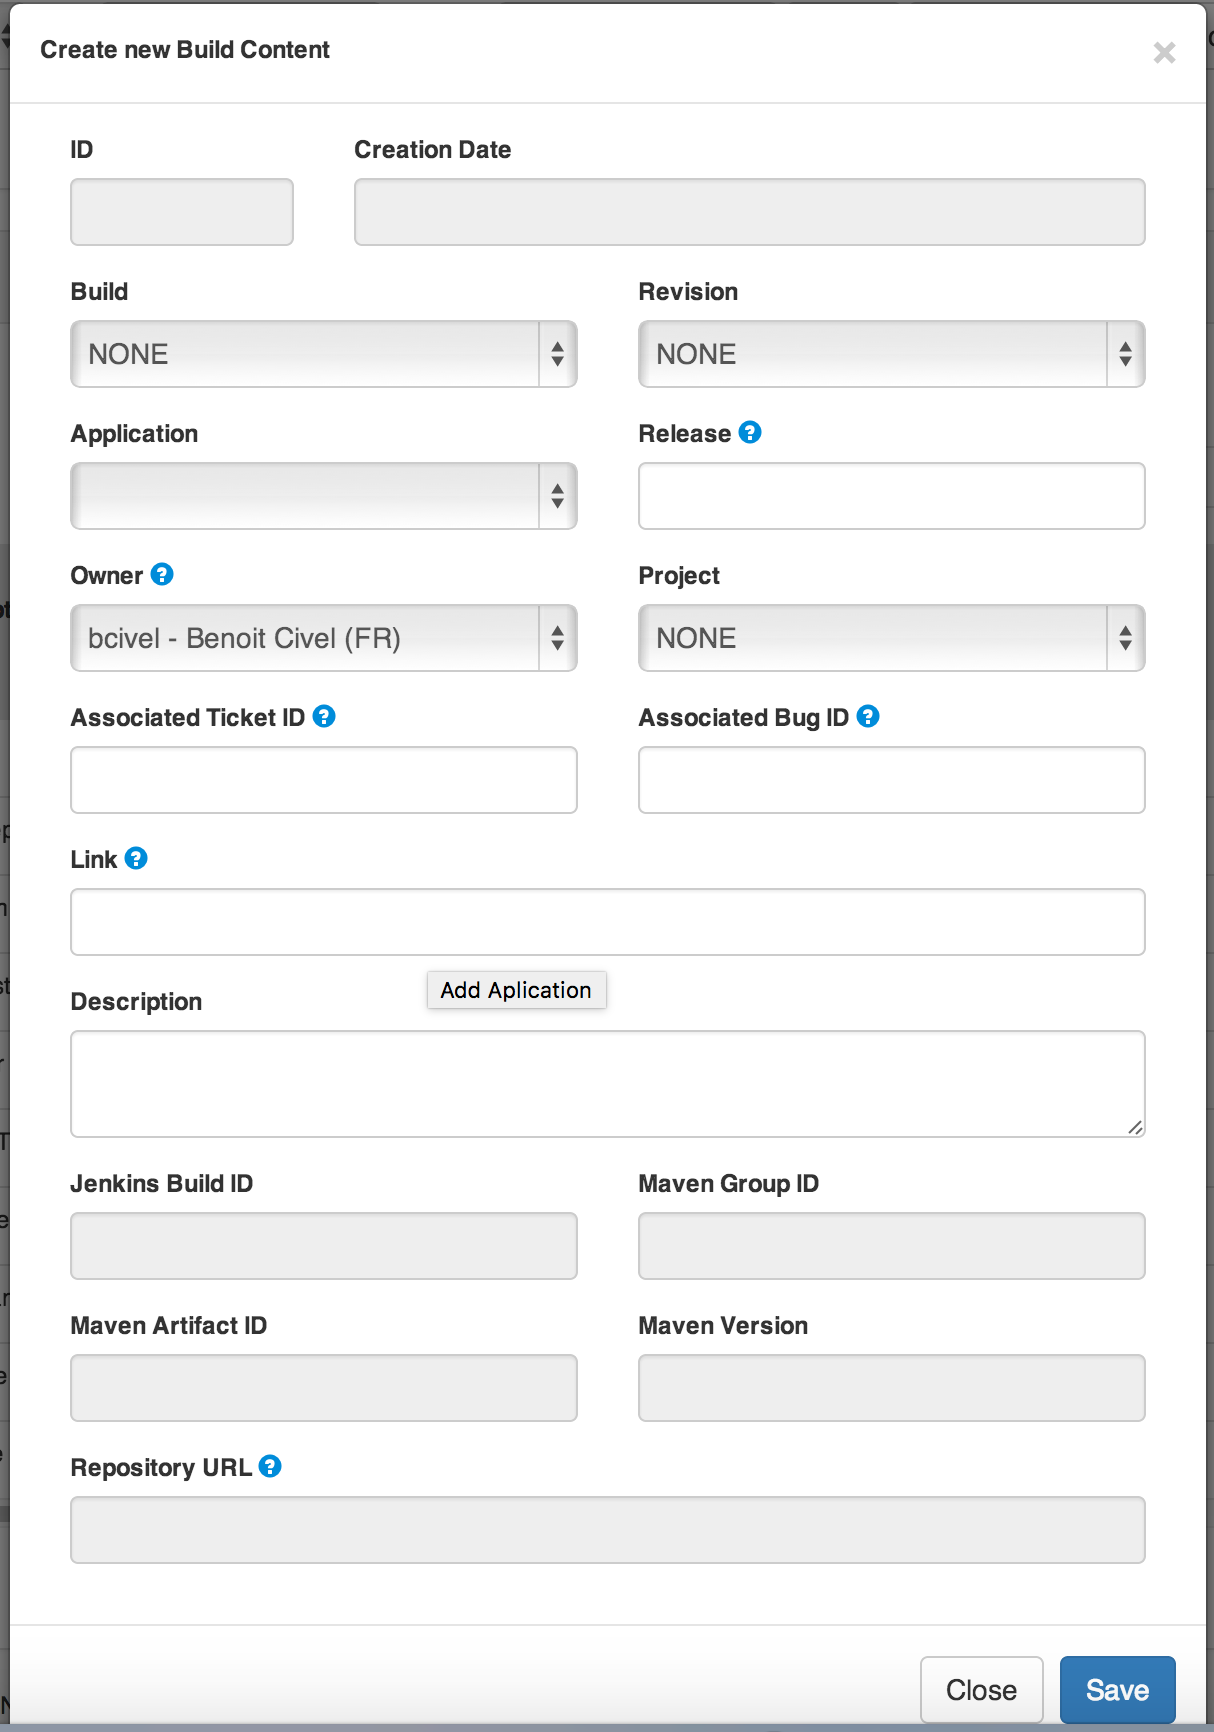
-
Click on Create new build content.
-
Select the Build.
-
Continue to describe.
-
Click on Save.
-
20. Build / Revision
20.1. Build Revision invariant
In this section, you will find information on build revision invariants
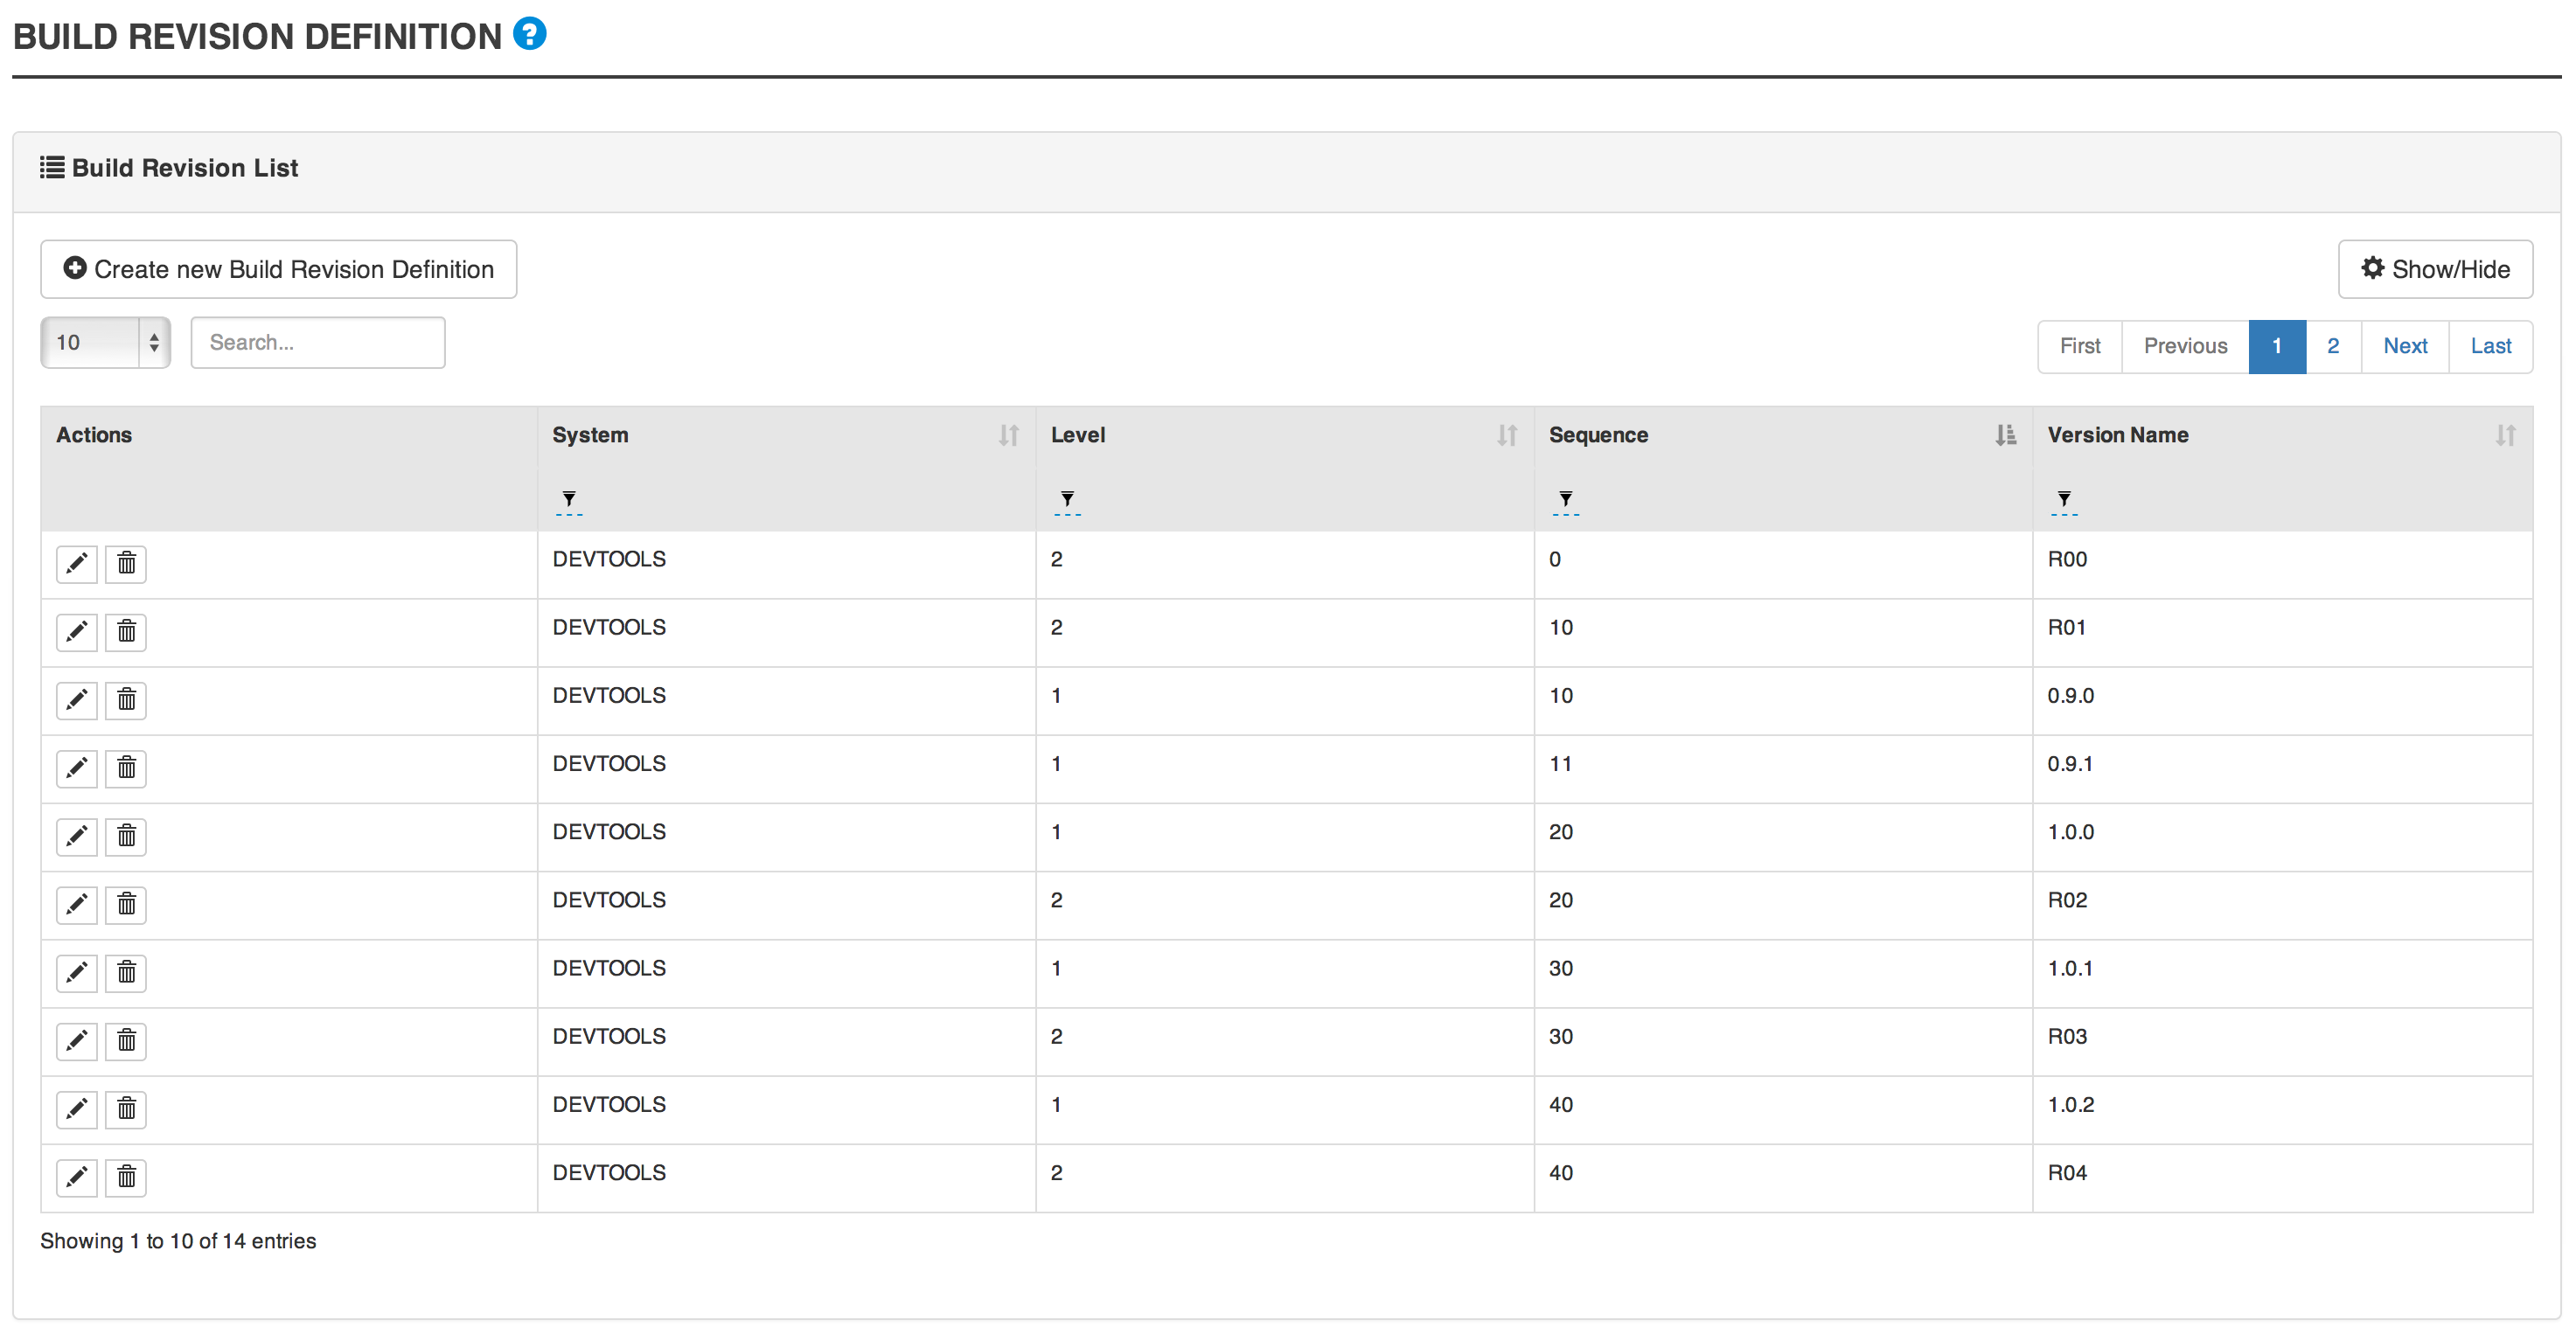
20.2. Build Revision invariant attributes
Field |
Description |
System |
The system for which the batch will be available. |
Level |
to describe. |
Sequence |
to describe. |
Version Name |
to describe. |
20.3. Create build/revision invariant
-
Go to Integration → Build Rev Definition.
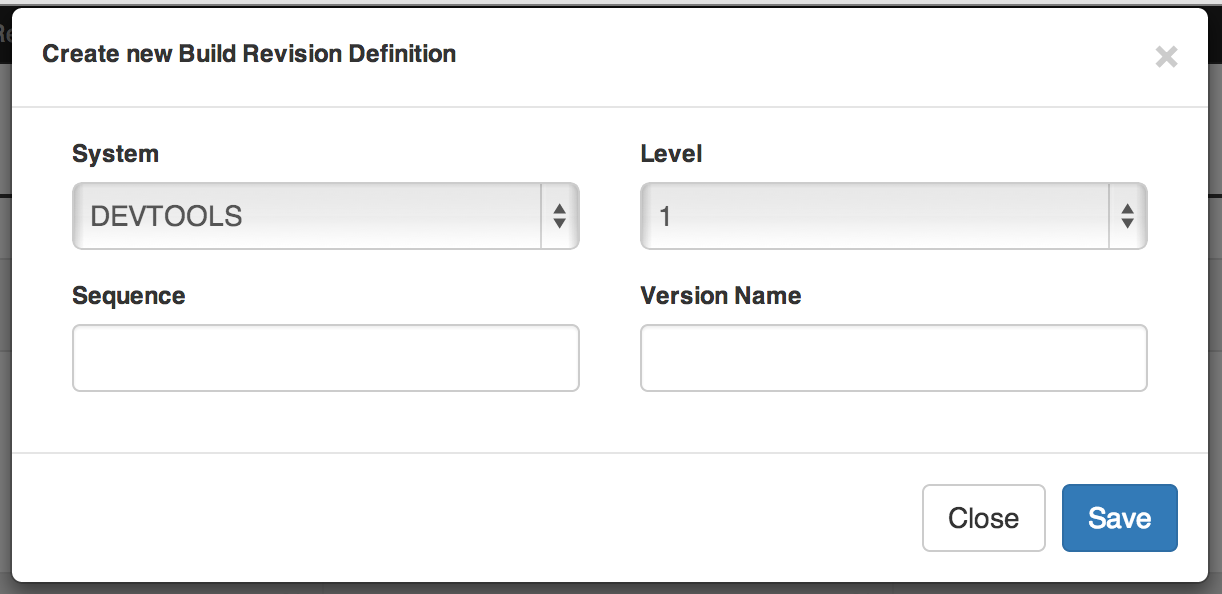
-
Click on Create new build revision definition.
-
Select the system for which the build/revision will be available.
-
Select the Level. 1 for Build and 2 for Revision.
-
Feed the Sequence field with a number to sort the build/revision.
-
Feed the Version Name field that will be displayed.
-
Click on Save.
-
Administration
21. User management
21.1. User creation
-
Go to Administration → User Management.
-
Click on Create User.
-
Feed the Login field.
-
Feed the Name field.
-
Select the Team (optional).
-
Select the Default Sytem field.
-
Set the Request to 'Y' for a new user. User will have to modify his password at the first connection.
-
Feed the Email.
-
Affect user rights in groups tab.
-
Click on Save.
-
21.2. User rights
Select the groups to affect the rights wanted.

22. Log viewer
Most of the change triggered in Cerberus are recorded in a table.
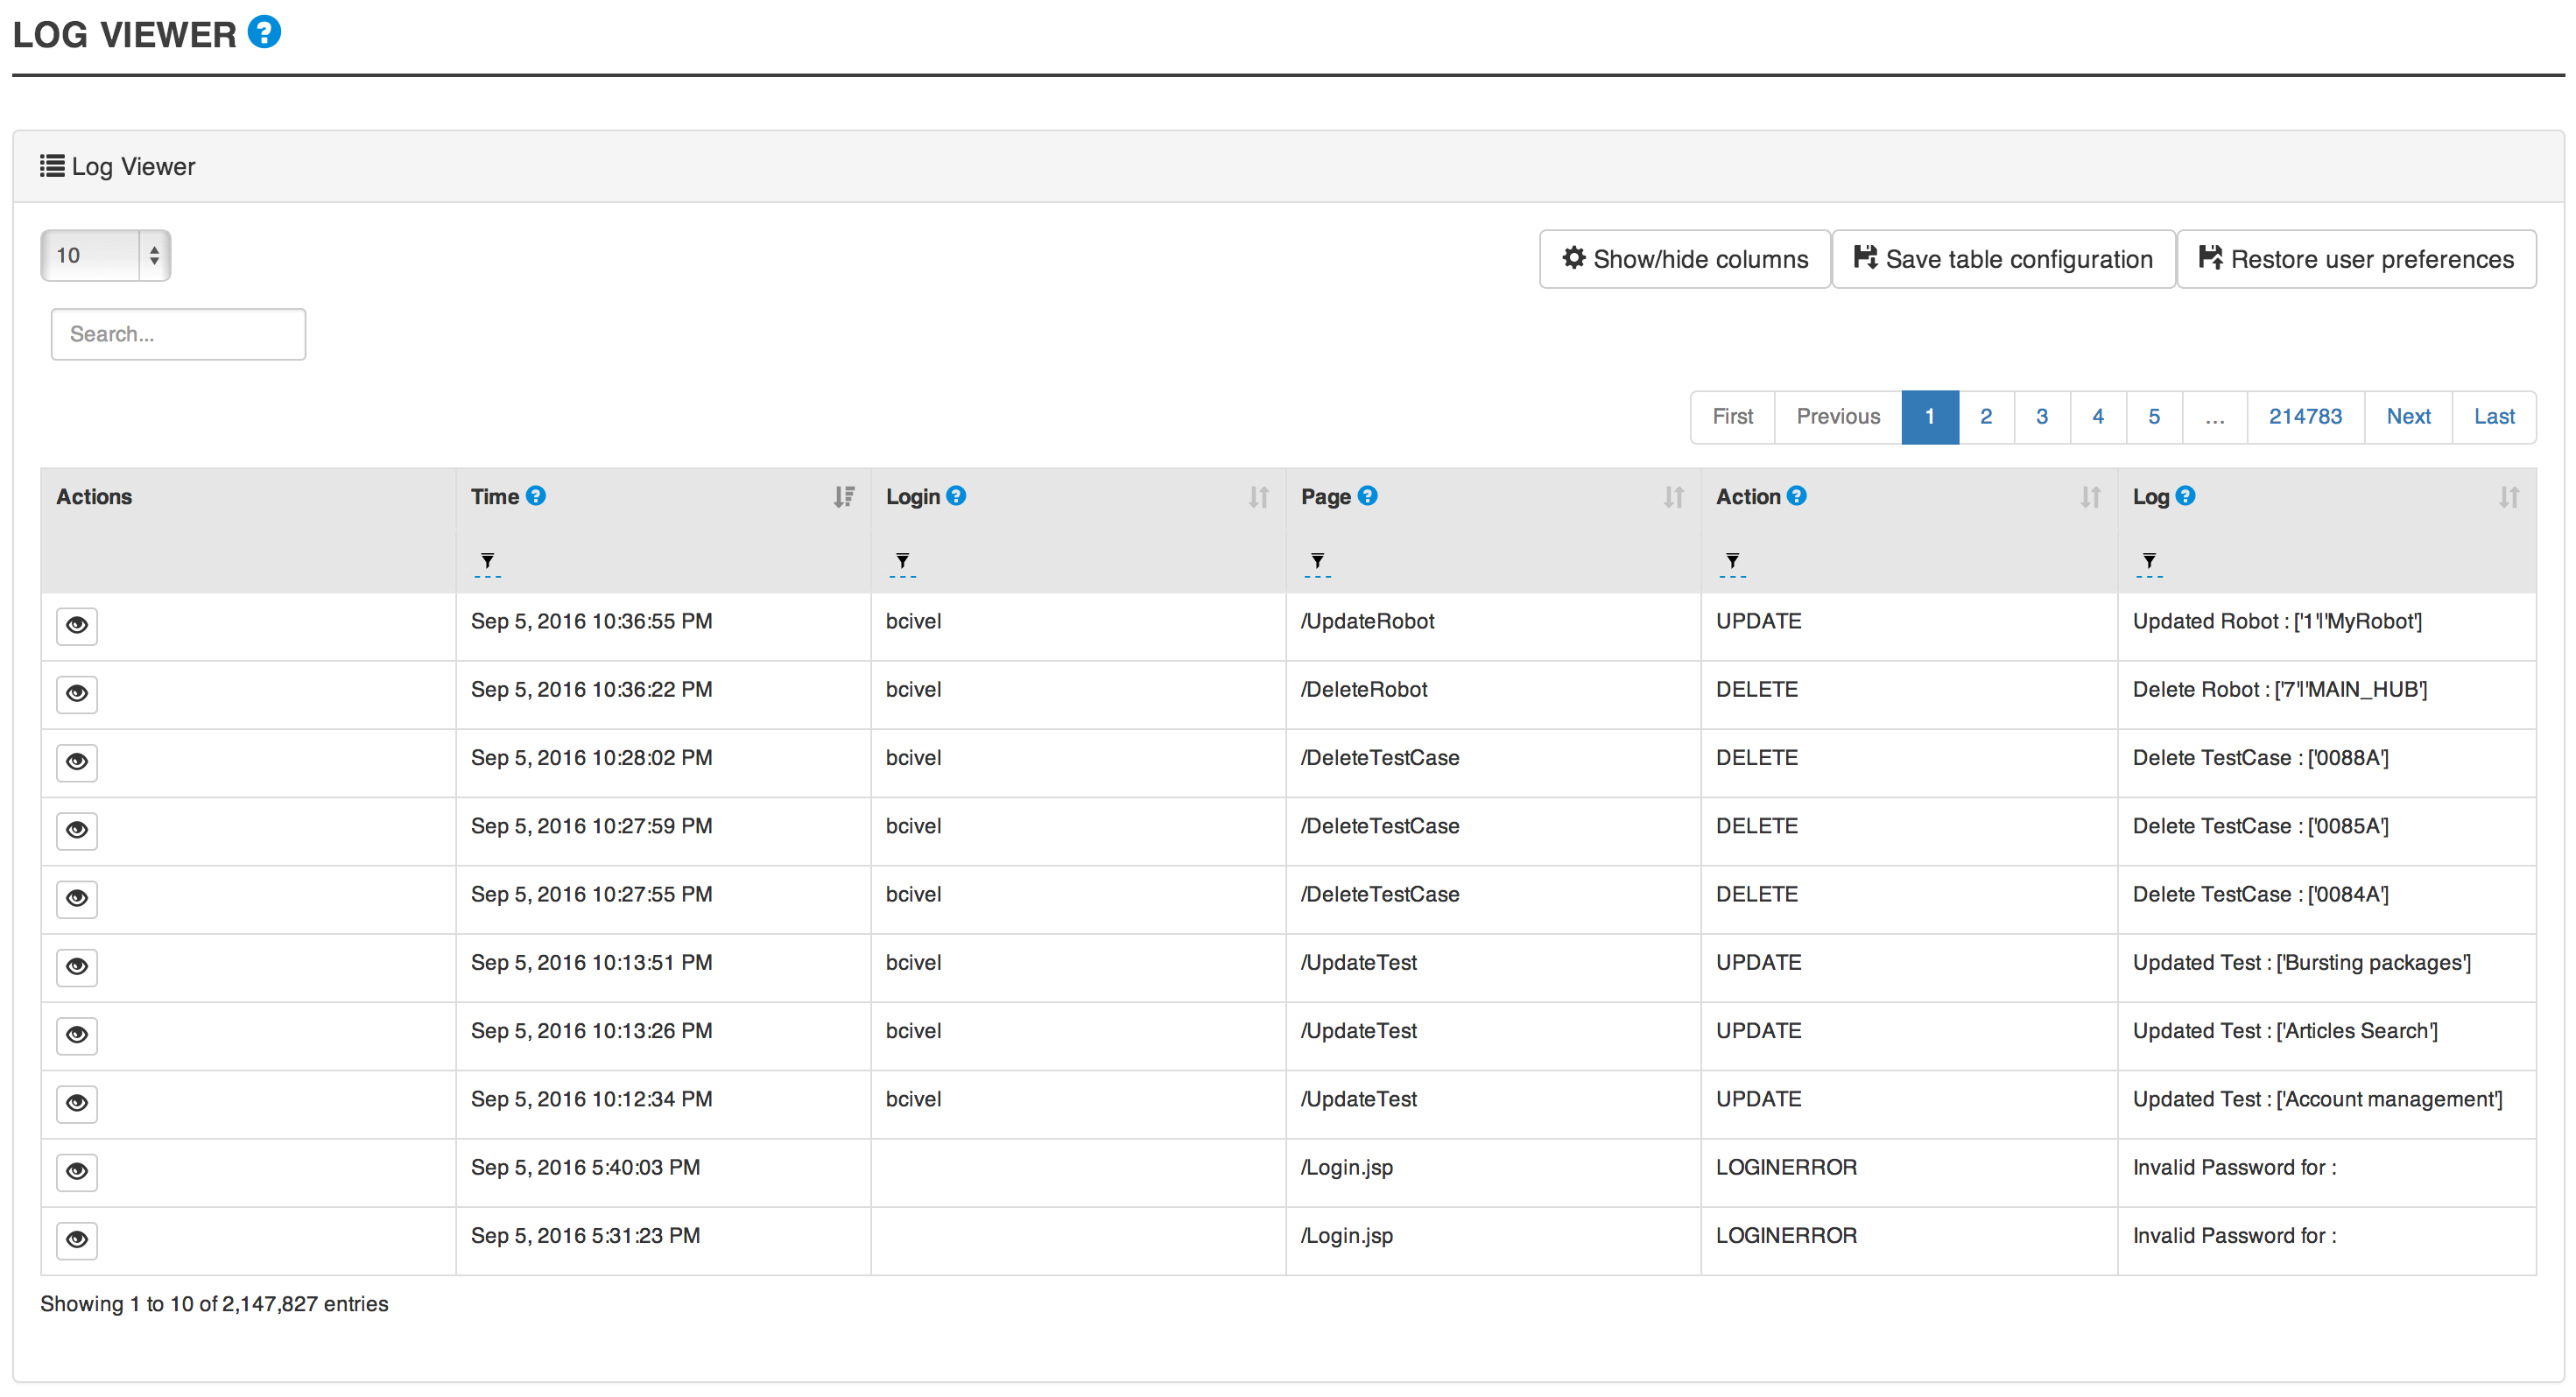
|
Warning
|
To guaranty performance of Cerbeurs over the time, please refer to [Clean Database] section to get information on database maintenance operation. |
23. Database maintenance
|
Note
|
Every new release of Cerberus come with embeded scripts to upgrade the database in order to guaranty consistency between the application and its database. |
After updating your cerberus version, as described in the [Upgrade Cerberus Version] section, you will be notified logging in Cerberus as an administrator.

Then, you are redirected to the Cerberus Database Maintenance page that allow to apply the scripts one by one.
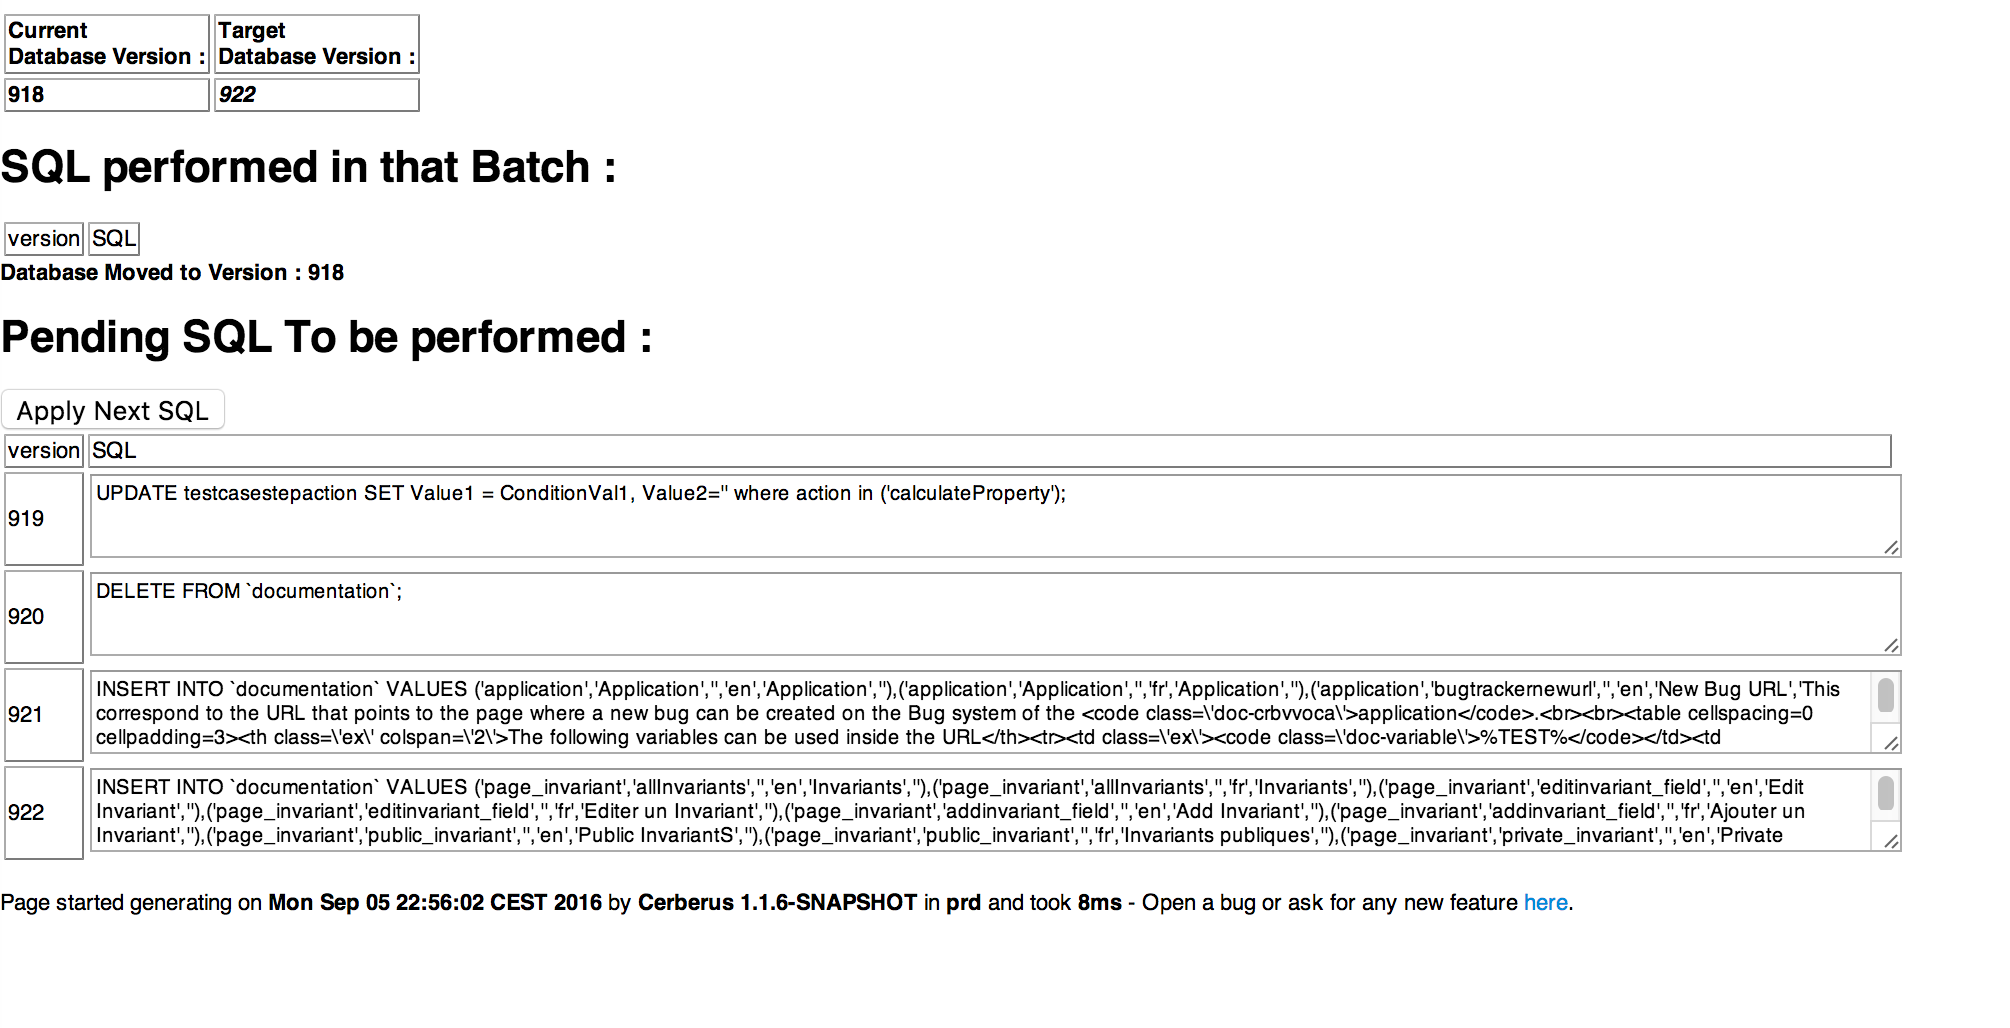
When the database is up-to-date, you will find this information.
|
Warning
|
Application and Database Must be in the same version. |
24. Parameters
24.1. Parameter
In this section, you will find information about Cerberus parameters.
|
Warning
|
The tunning of the parameters is necessary to unlock all the features, as described in the [Cerberus configuration] section. |
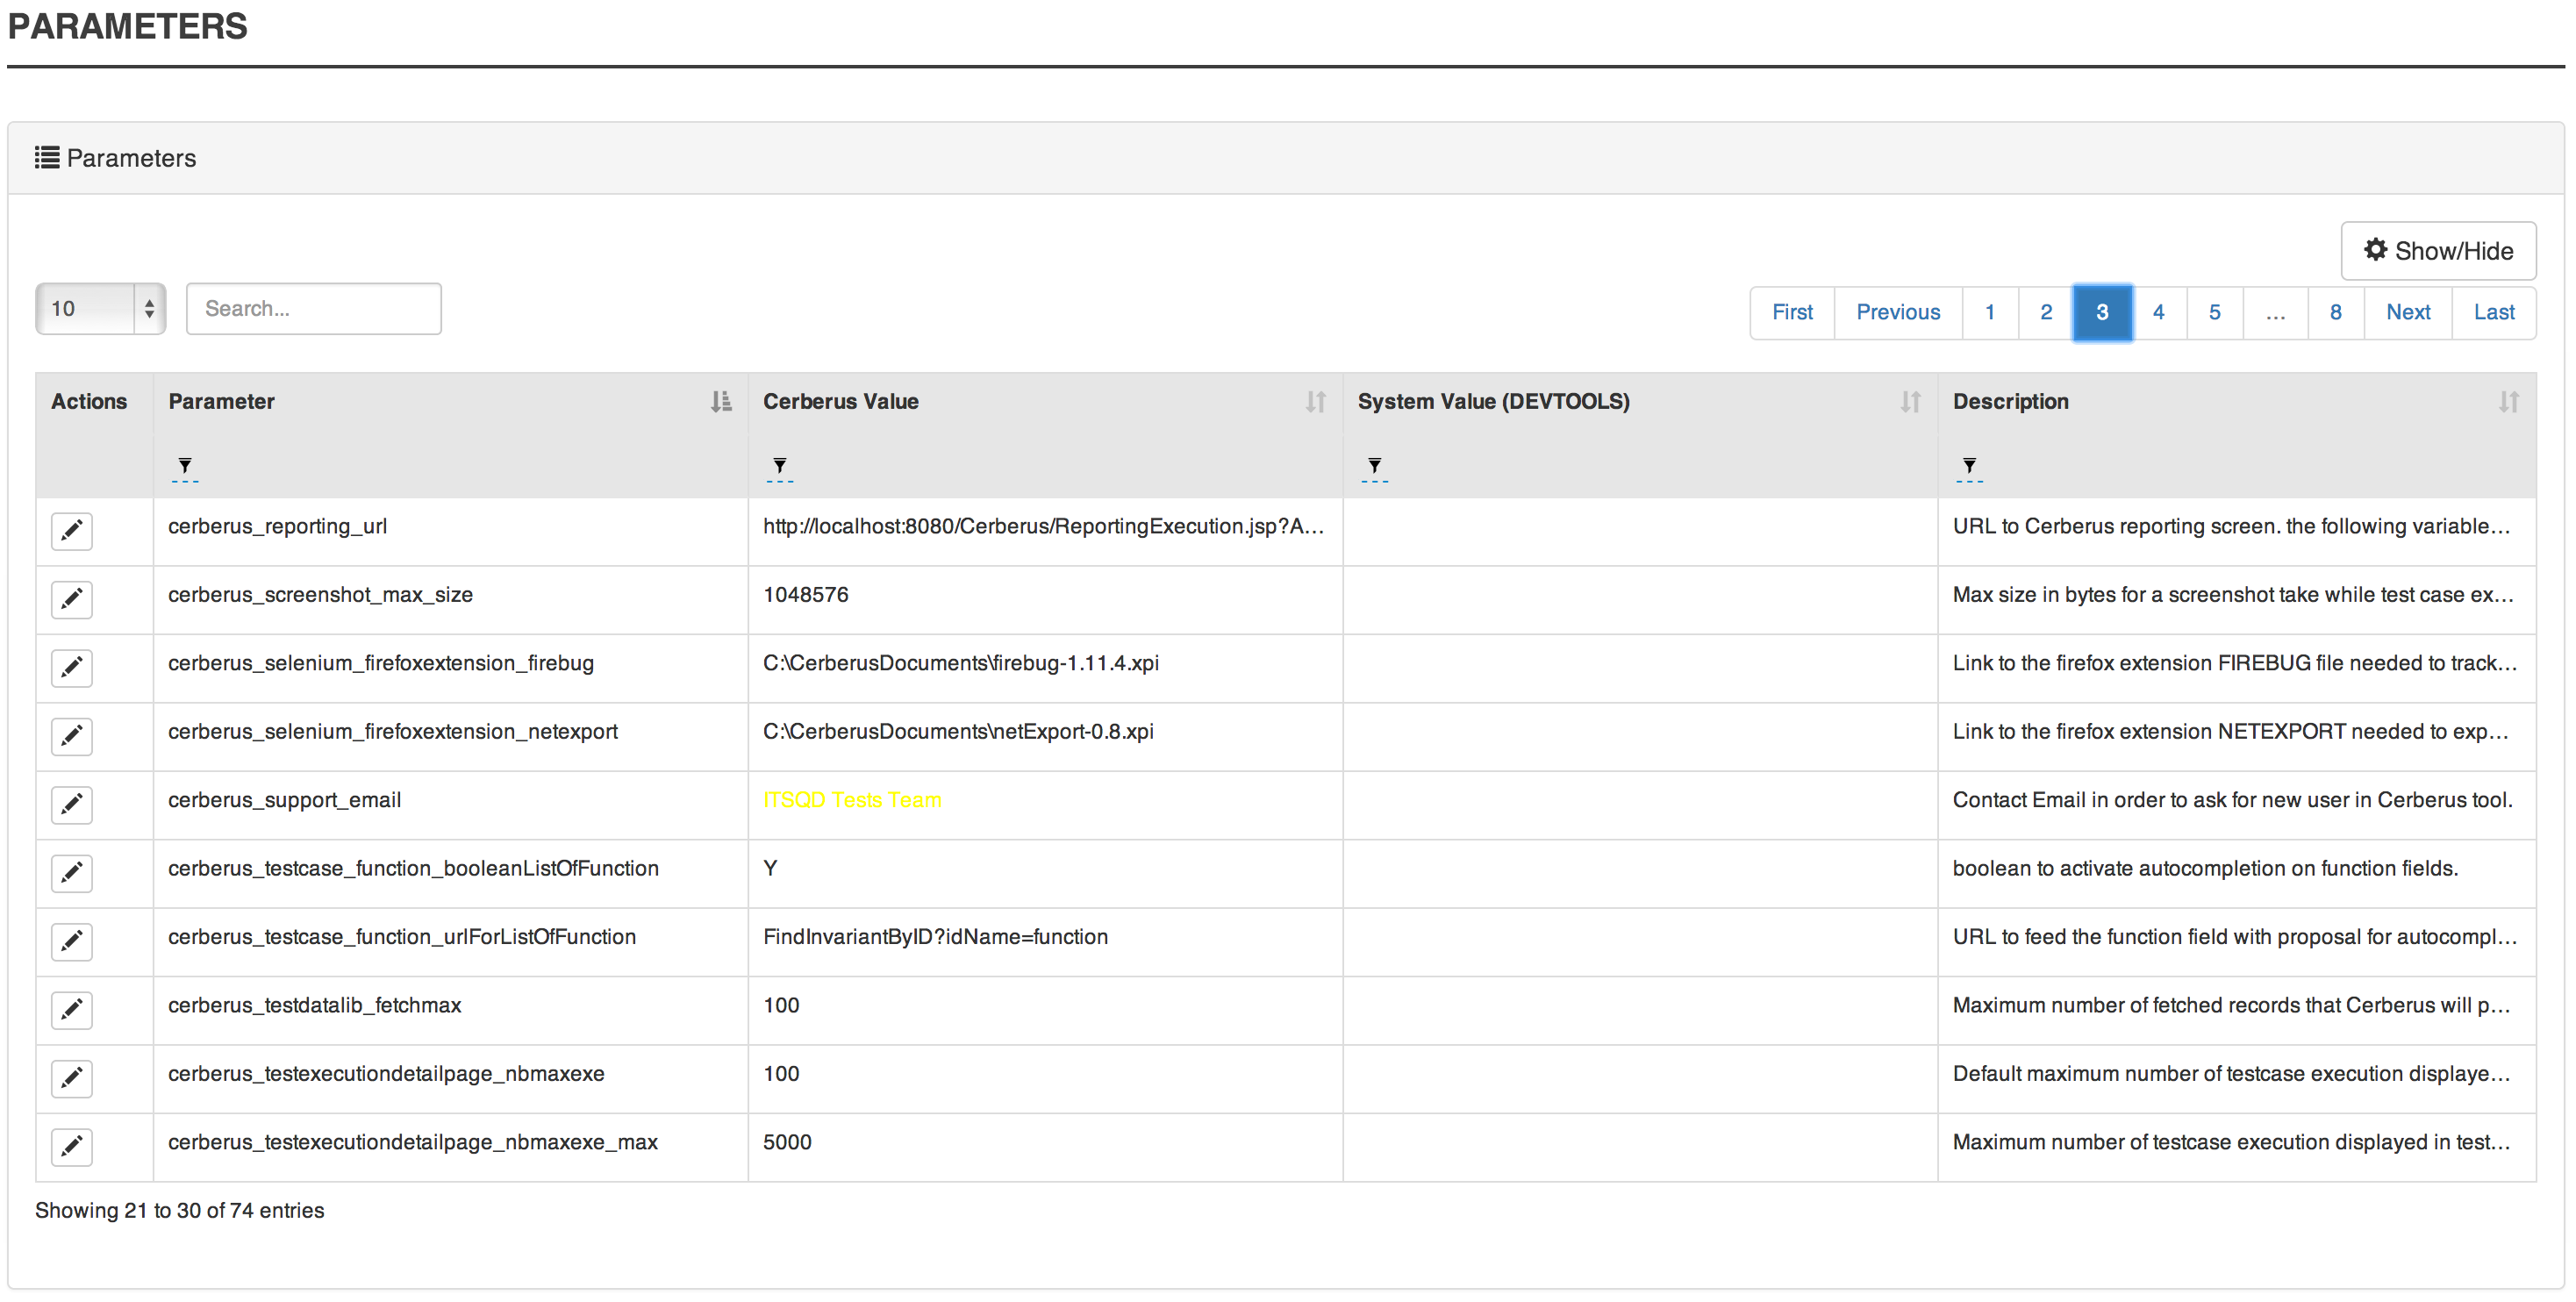
24.2. Parameter attributes
Field |
Description |
Parameter |
The parameter recognized by Cerberus. |
Value |
The default value used in case the system value is empty. |
System Value |
The specific value for the system. |
Description |
A description on the parameter. |
25. Invariants
25.1. Invariant
In this section, you will find information on invariant private and public.
|
Note
|
Private invariants are not editable because used by the Cerberus engine or the user interface. |
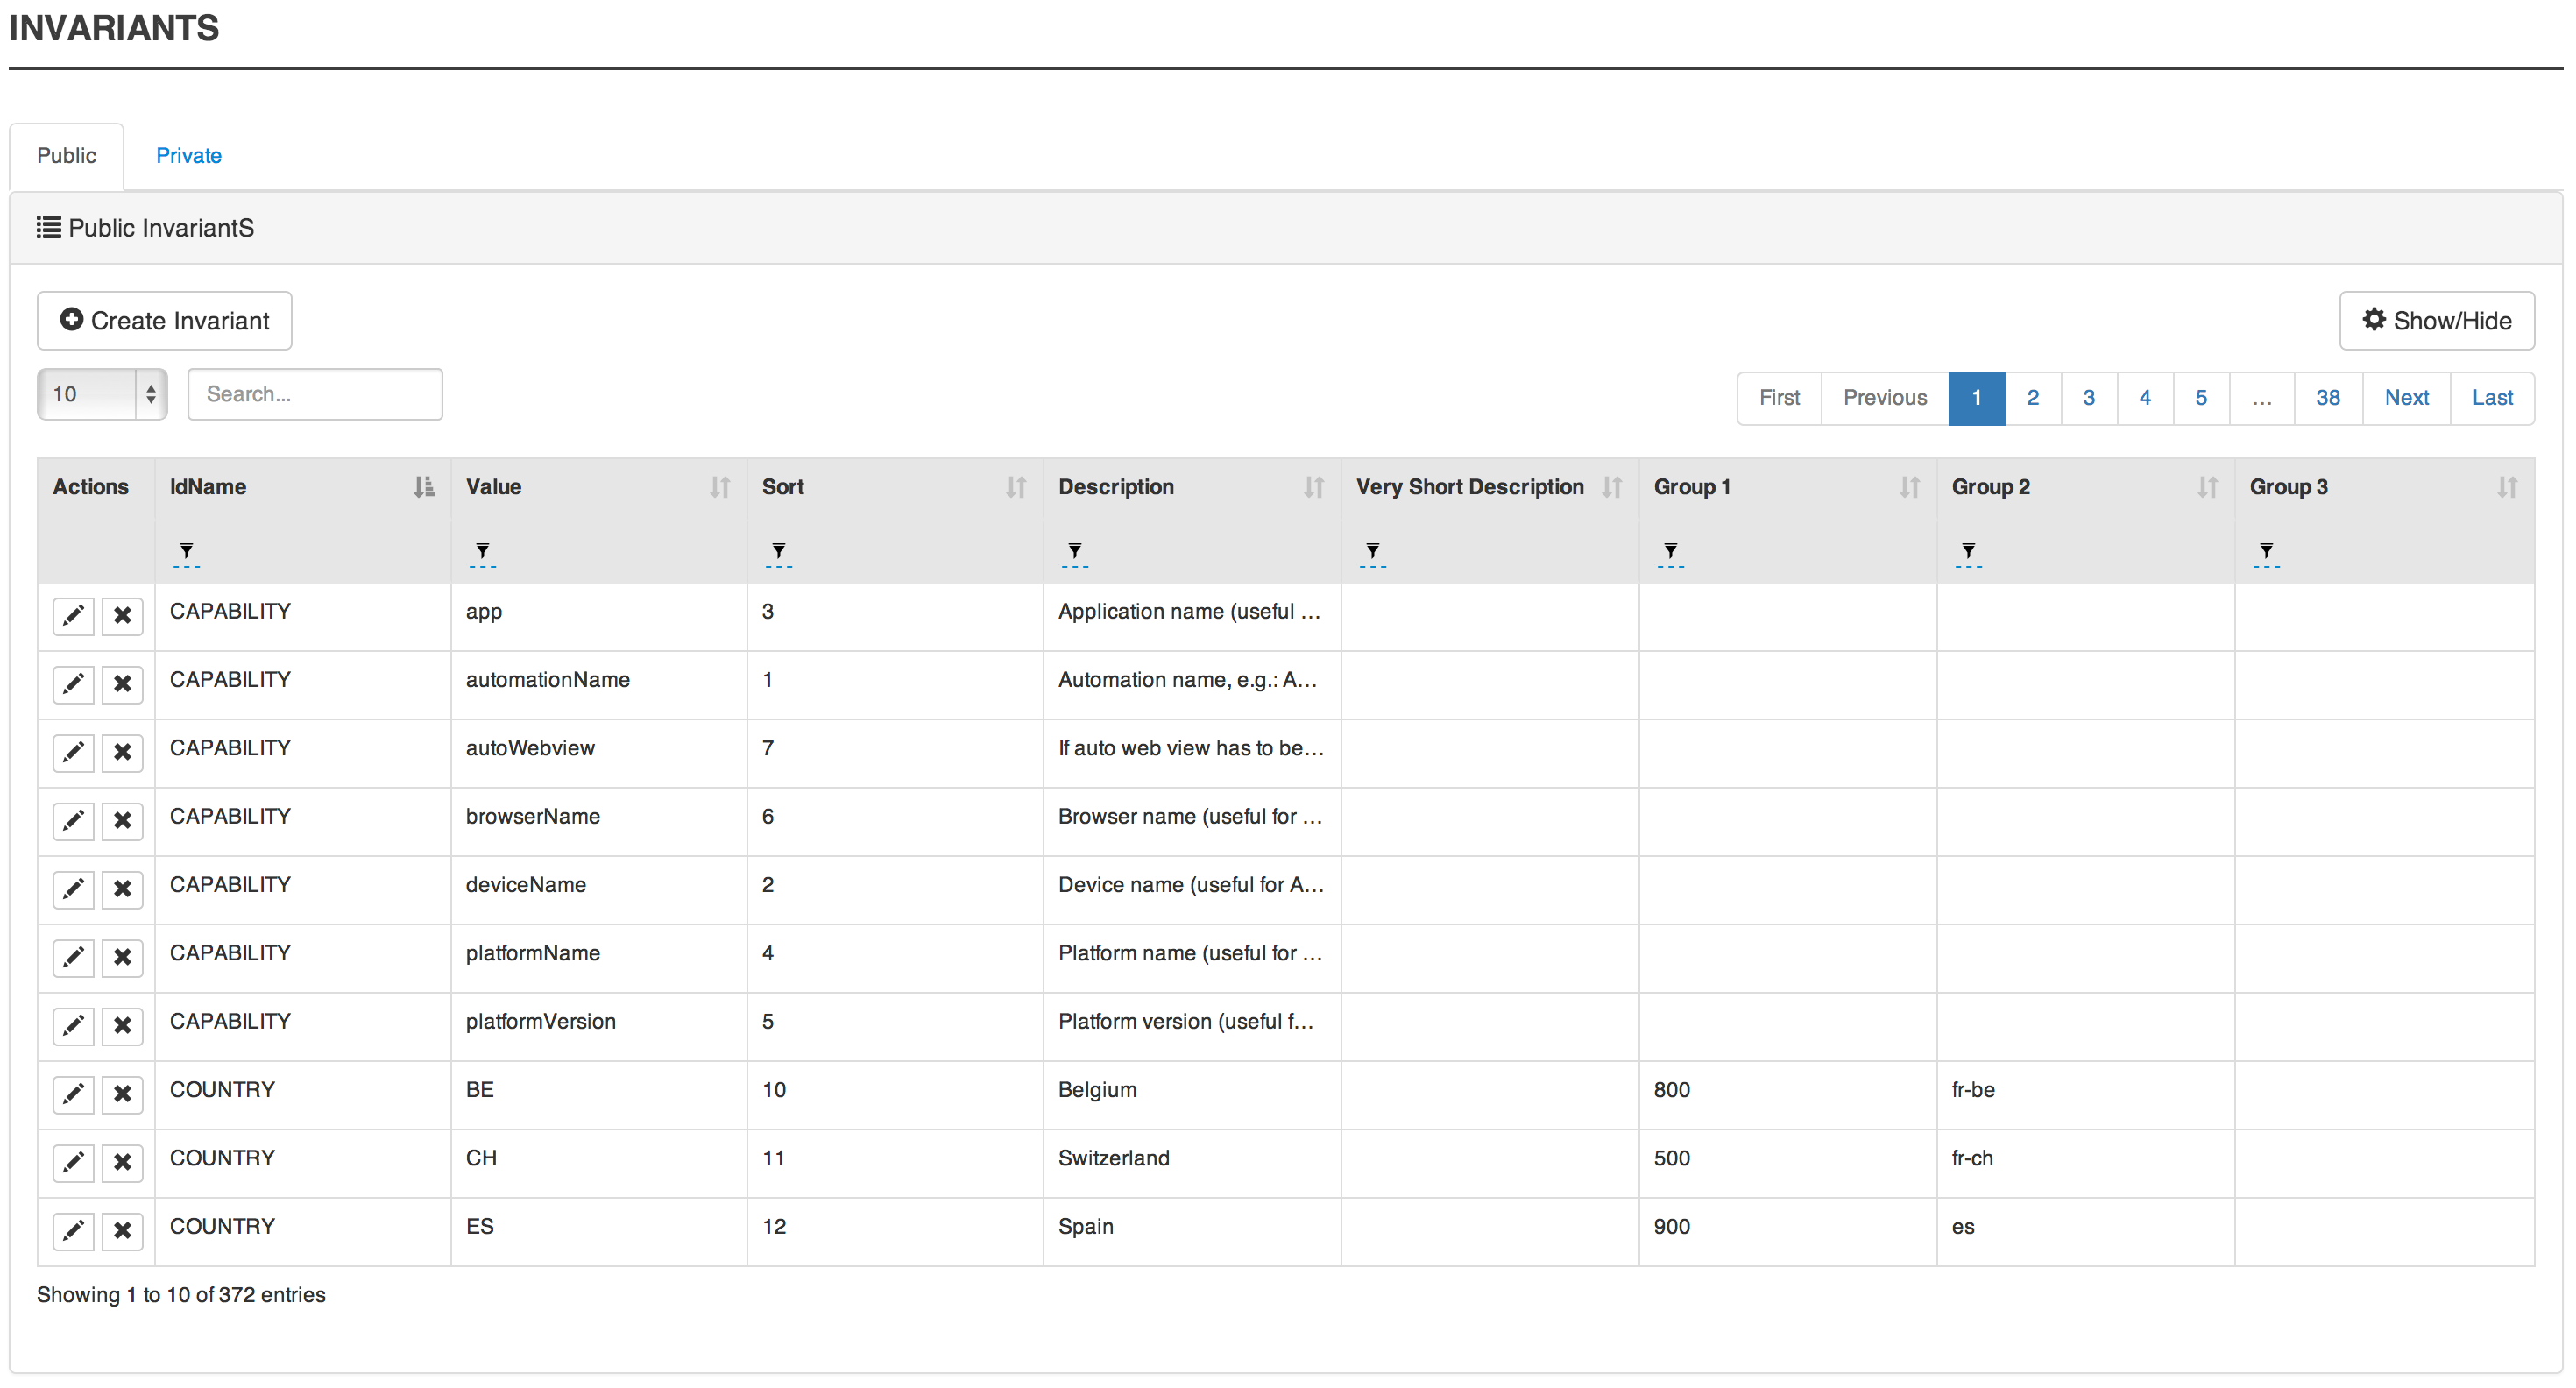
25.2. Invariant attributes
Field |
Description |
IdName |
The name of the invariant. |
Value |
The value set for the invariant. |
Sort |
An integer used to sort invariants. |
Description |
The description of the invariant. |
Very Short Desc |
A very short desc that can be displayed in the invariant. |
Group1 |
A first level of aggregation to group invariant. |
Group2 |
A second level of aggregation to group invariant. |
Group3 |
A third level of aggregation to group invariant. |
25.3. Create public invariant
-
Go to Administration → Invariant.
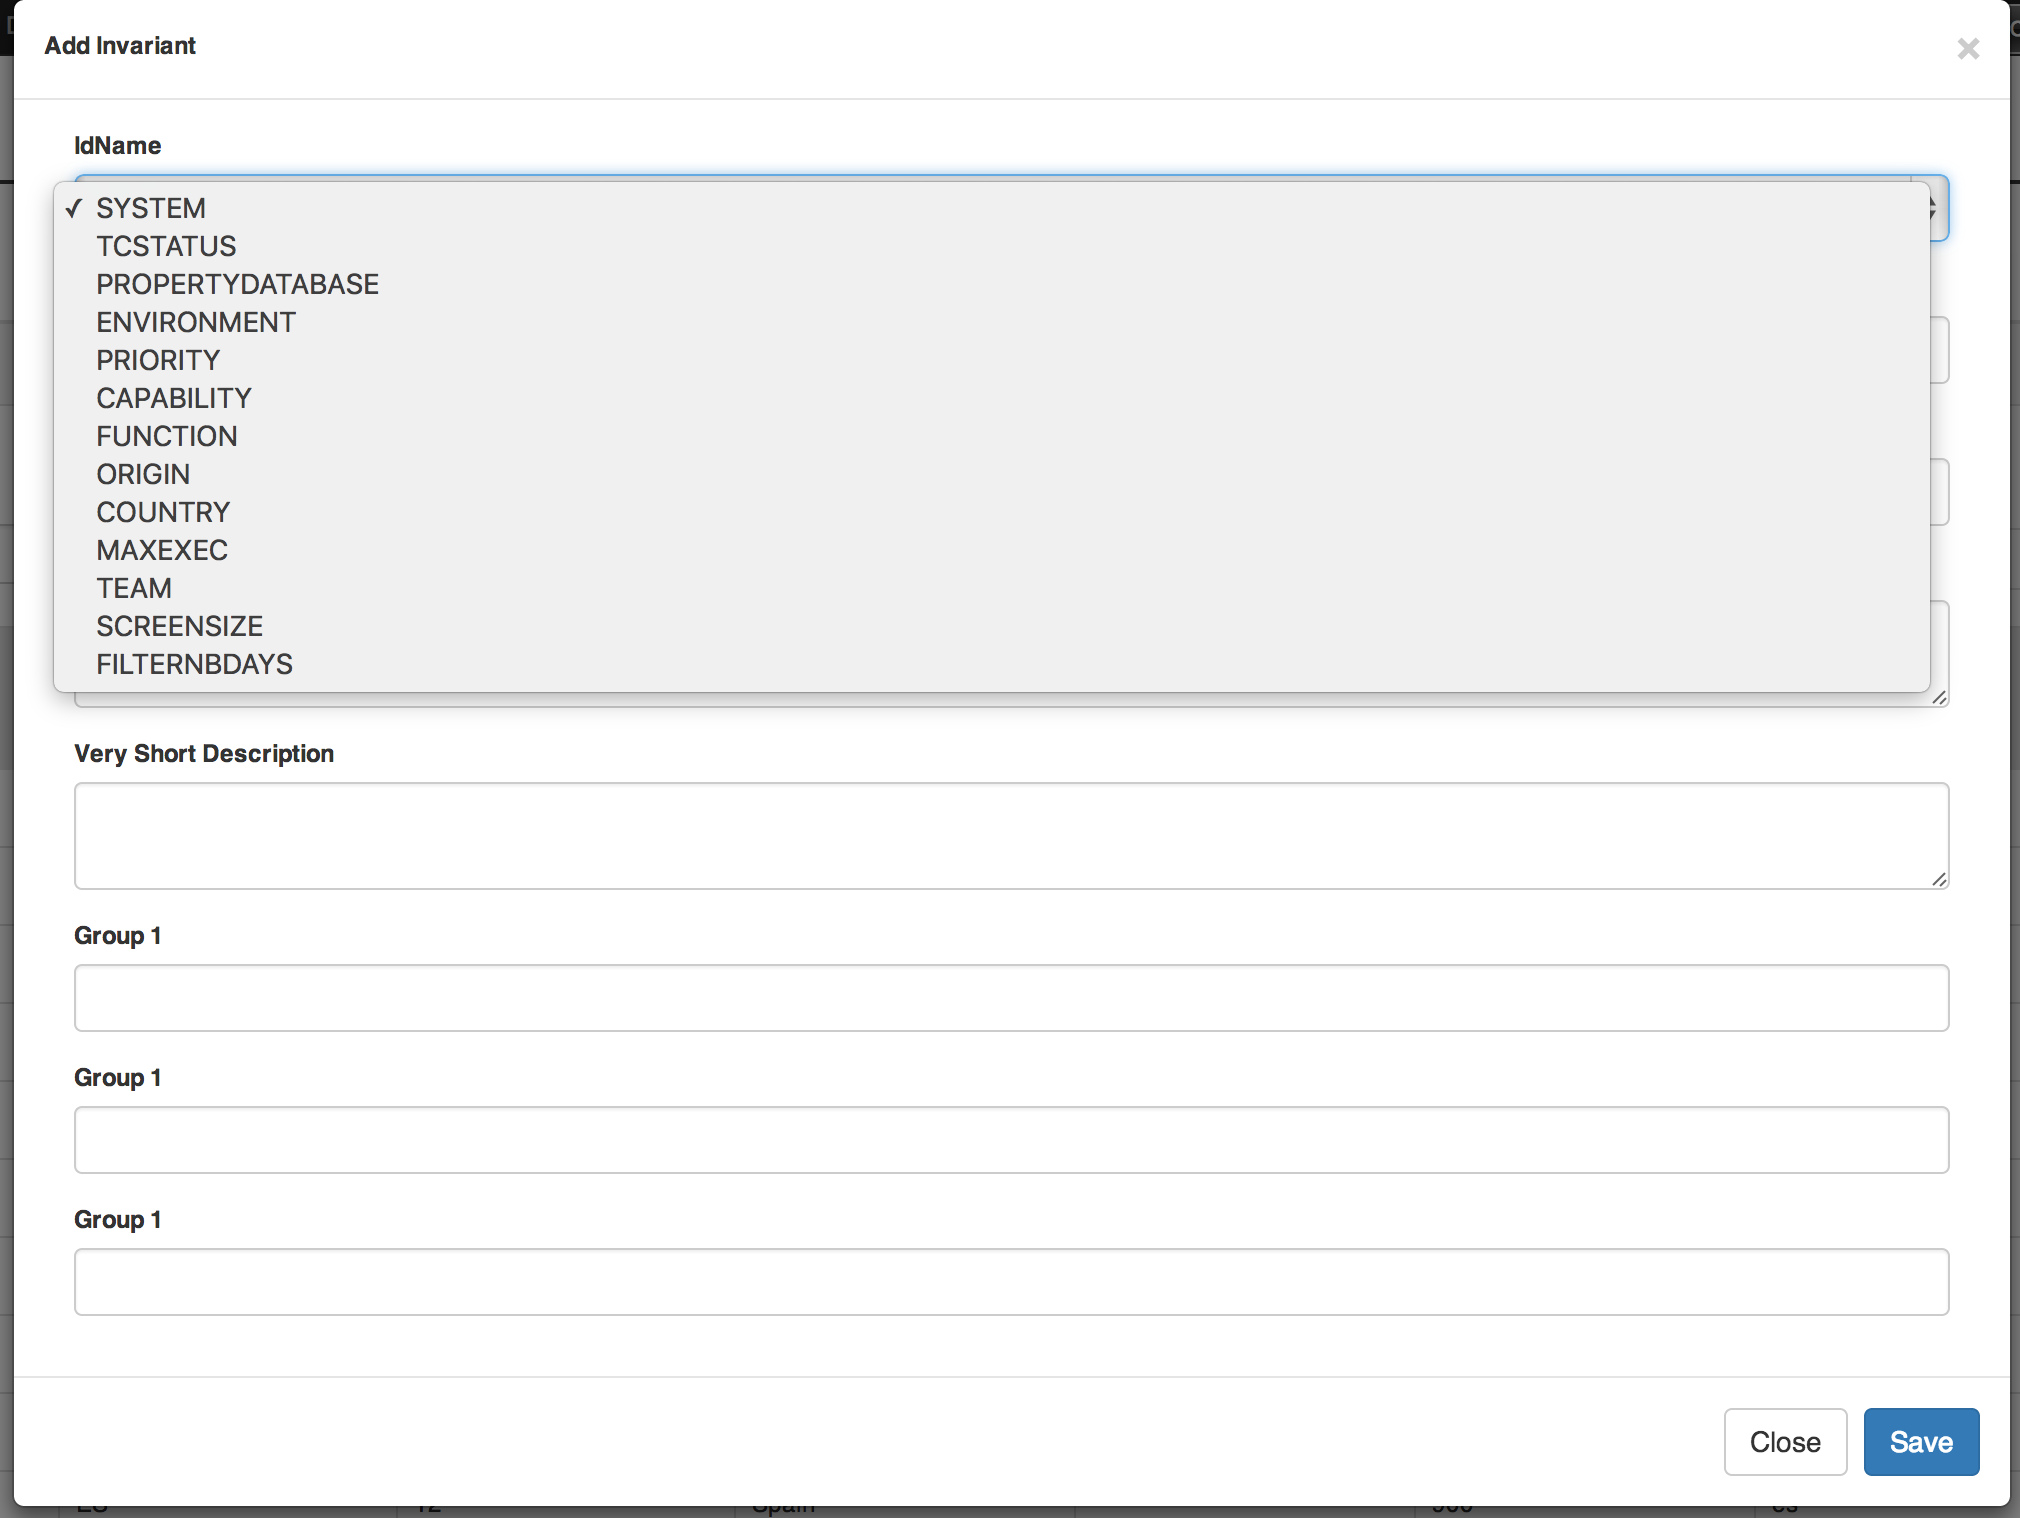
-
Click on Create Invariant.
-
Select the invariant type in IdName field.
-
Feed the Value field with the value of the invariant.
-
Feed the Sort field with an integer which will define the order the invariant will be sorted by Cerberus.
-
Feed the Description field with a description of this invariant.
-
Feed the Very Short Desc field with a short description of this invariant.
-
Feed the Group1 (Optional) field with a name to aggregate invariant.
-
Feed the Group2 (Optional) field with a name to aggregate invariant.
-
Feed the Group3 (Optional) field with a name to aggregate invariant.
-
Click on Save.
-
